What is VLESS?
VLESS is a modern, lightweight protocol used to create fast, flexible VPN-like connections over the internet. It’s an improved version of VMess with a simpler design and no built-in encryption, because it relies on TLS instead. This makes it efficient, good for use with CDNs, and useful for bypassing censorship or network limits when combined with Xray on a VPS.What is 3x-ui?
3x-ui is a web panel (a control dashboard in your browser) for managing Xray-core. It lets you create and manage VLESS VPN accounts without touching complex config files. You can add users, generate VLESS links or QR codes, and see traffic usage in a few clicks. 3x-ui also supports other popular protocols like Trojan, Shadowsocks, and more, so you can choose what works best for your needs. Overall, it turns many “terminal-only” tasks into simple buttons and forms, which is much easier for beginners.Installation 3x-ui on VPS
1
Install Ubuntu 22.04 on your EDIS Global VPS
Purchase a VPS in your preferred location through our website.
2
Connect to the VPS server using the SSH protocol:
3
Update and upgrade packages
4
Install curl package:
5
Disable IPv6 on Ubuntu 22.04:
6
Install 3x-ui panel
7
During the installation process script asked about change port
###############################################
Username: ajYbrazcyO
Password: HPty32FVU7
Port: 46522
WebBasePath: ZtvraBUmNK9NQj43ks
Access URL: http://YOUR_SERVER_IP:46522/ZtvraBUmNK9NQj43ks ###############################################
Username: ajYbrazcyO
Password: HPty32FVU7
Port: 46522
WebBasePath: ZtvraBUmNK9NQj43ks
Access URL: http://YOUR_SERVER_IP:46522/ZtvraBUmNK9NQj43ks ###############################################
Save these credentials to notes.
Connect to the 3x-ui panel
Never connect to 3x-ui over plain http – it’s not secure. Always access the panel via https or through an SSH tunnel. To secure your connection to 3x-ui, make sure at least one of the following is set up:- Generate and assign a self-signed certificate for the panel
- Use SSH port forwarding (access 3x-ui through an SSH tunnel)
- Use a Let’s Encrypt SSL certificate if you have a registered domain
- Self-sign cert
- SSH port forwarding
- Let's encrypt SSL cert
A self-signed certificate lets the 3x-ui panel use HTTPS, so all data between your browser and the panel is encrypted instead of sent in plain text. Your browser may show a warning because the cert isn’t from a public CA, but the connection is still secure—this helps prevent man-in-the-middle (MITM) attacks and is much safer than using HTTP, especially when entering your password or changing VPN settings.Generate a self-signed certificate and apply it to 3x-ui:Select option 13 to restart the panel. After that, the 3x-ui web interface will be served over HTTPS using your self-signed certificate.
- Create a directory for the certificate:
- Generate a self-signed certificate:
- Assign the certificate to the 3x-ui web panel:
- Restart the 3x-ui panel to apply changes:
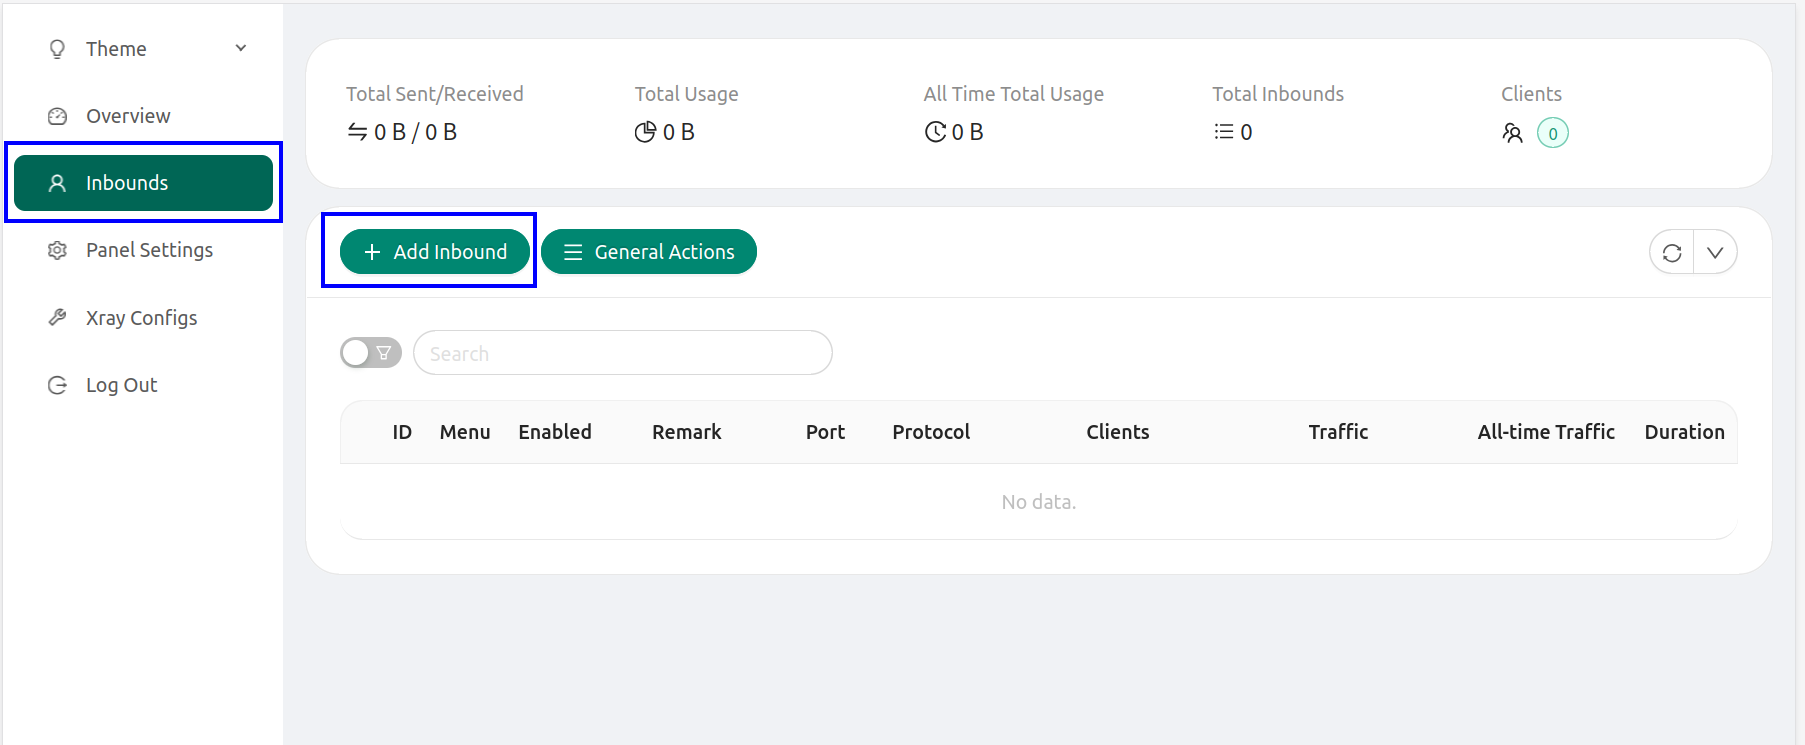
Great, you’re now securely connected and logged in to the 3x-ui panel. Next, you’ll create a new inbound and connect to your server from your client apps.
3X-UI panel
Login to the panel: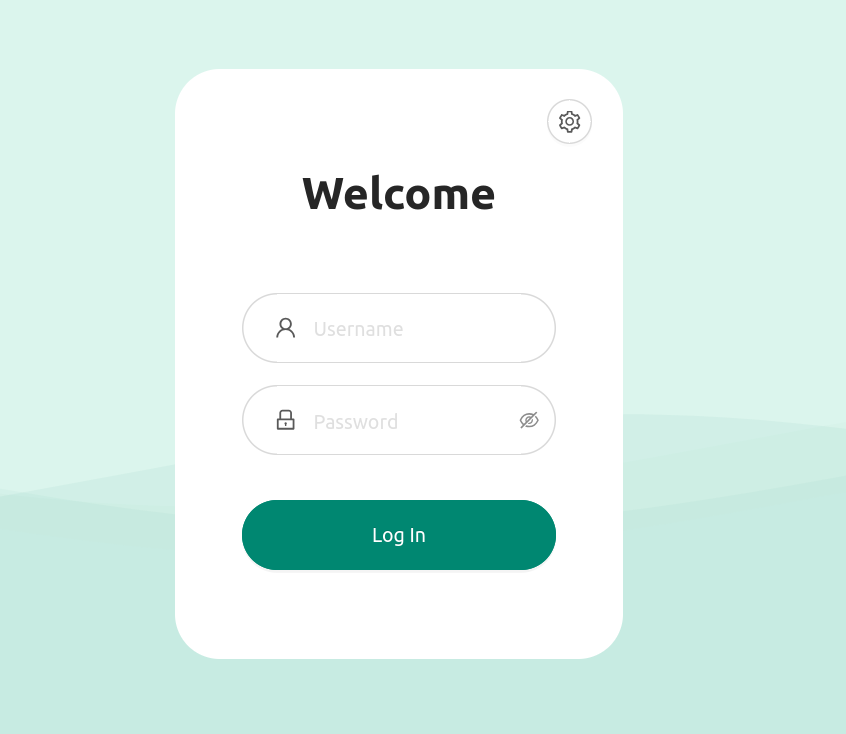
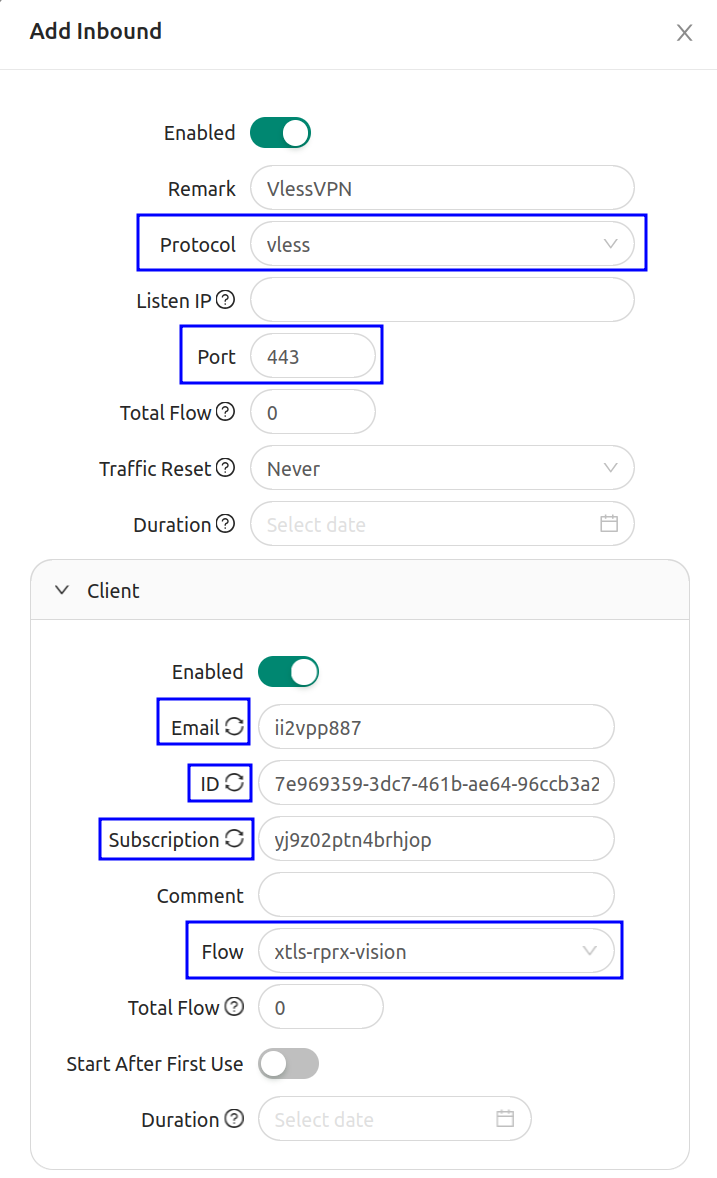
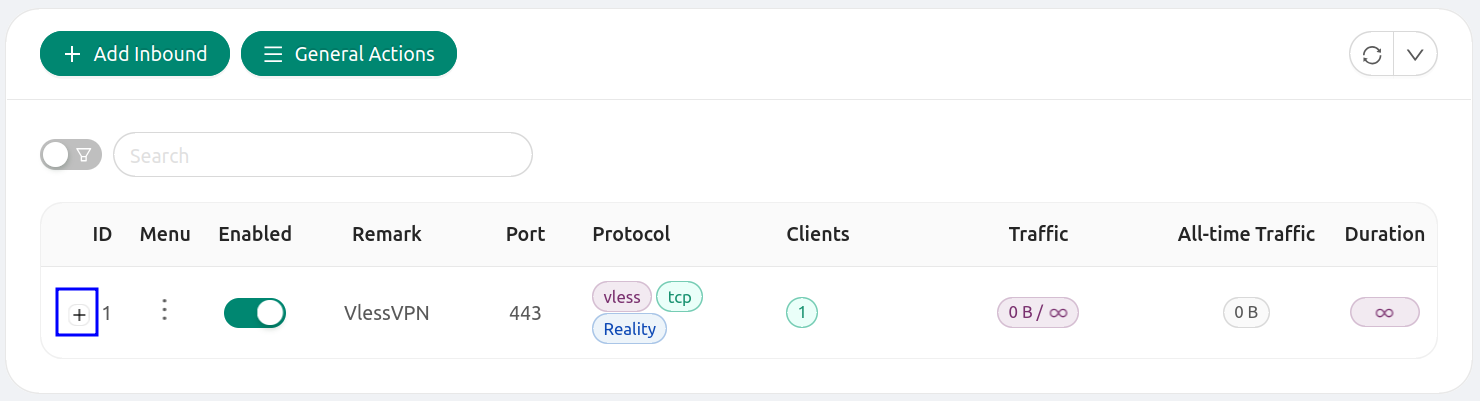
- Remark - name the connection
- Protocol - select vless
- Listen IP - leave the field blank;
- Port - specify port 443 .
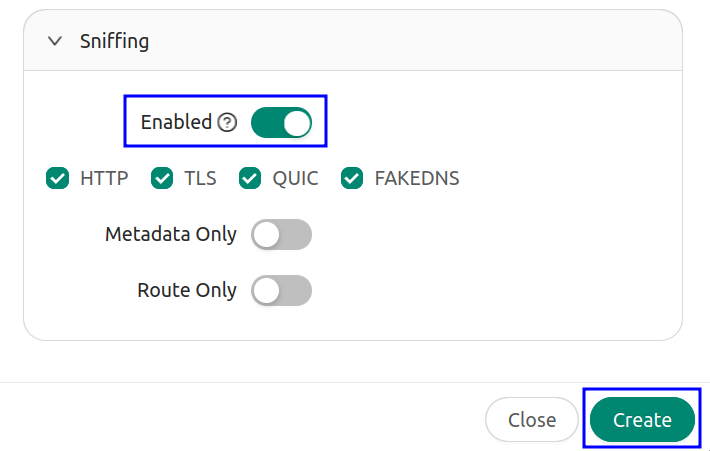
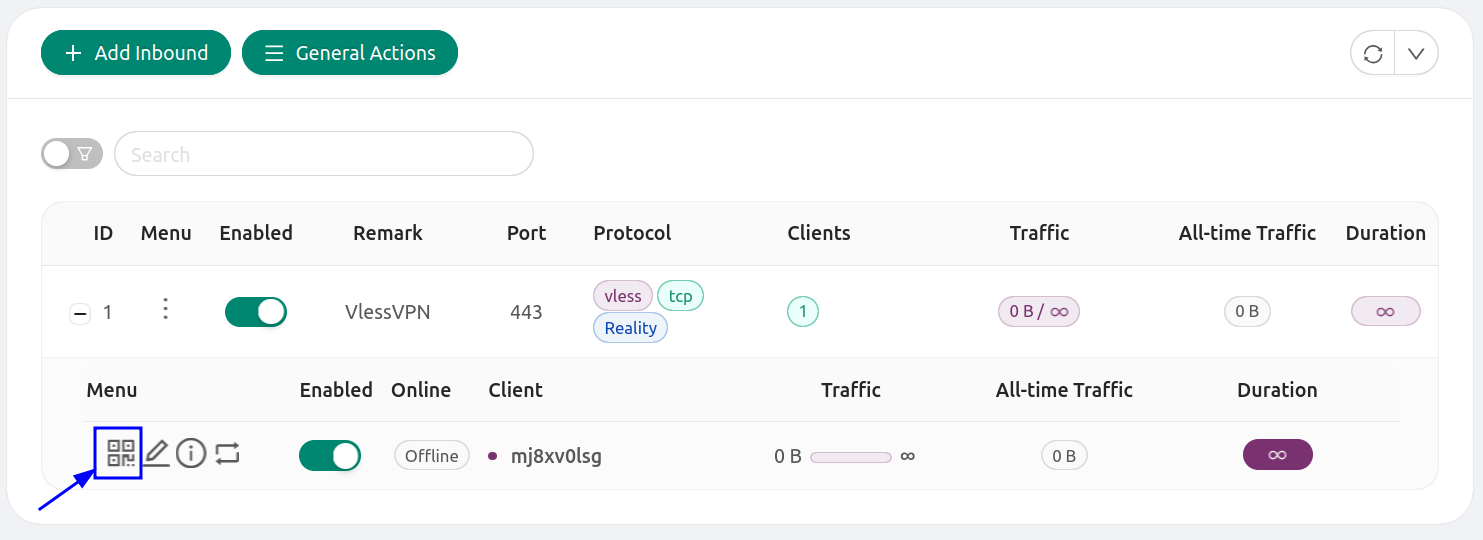
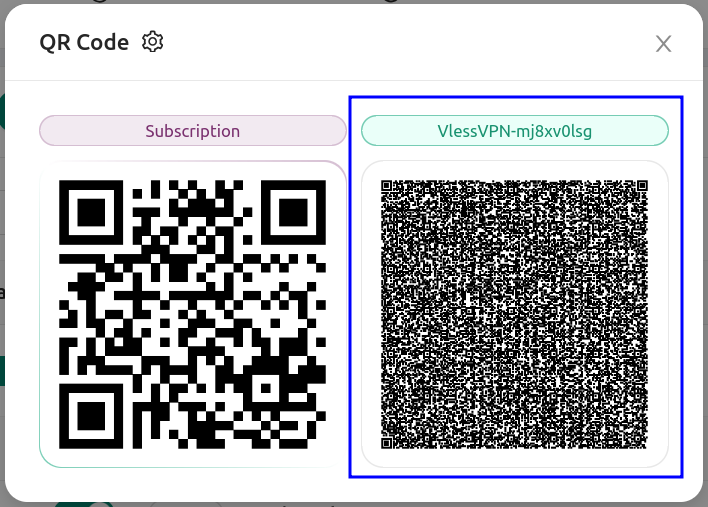
- Click on the Client drop-down list and click one by one to the Email, ID, Subscription to update.
- For Flow settings choose xtls-rprx-vision . The Flow will be visible after activation Reality for Security setting.
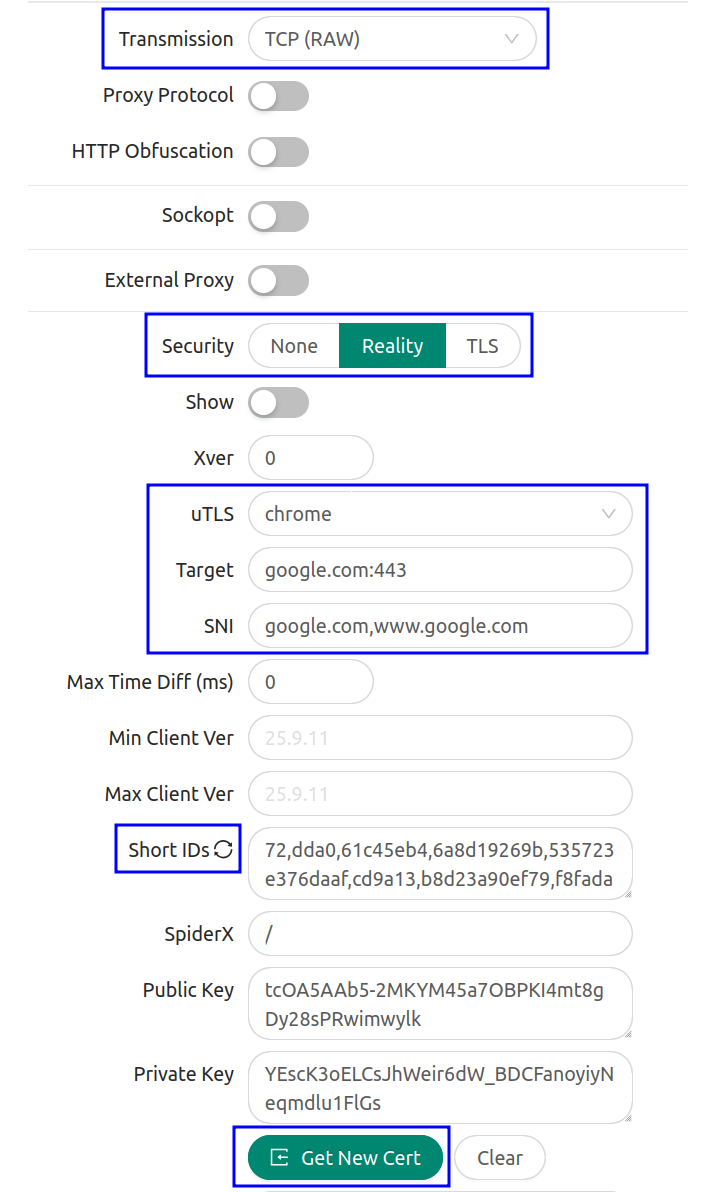
- Transmission - TCP(RAW)
- Security - Reality
- uTLS - chrome or firefox
- Target - google.com:443
- SNI - google.com,www.google.com
- Short IDs click to update
- Click to Generate New Cert
How to Connect to 3x-ui (PC, Android, iOS)
Description of 3X-UI clients for PC: Hiddify, v2rayN, v2RayTun, v2RayNG, Nekoray and others.
Links: