Reinstall your VPS with a fresh OS
You can reinstall your Virtual Private Server (VPS) with a clean operating system in just a few clicks.Whether you’re switching from Linux to Windows or simply starting fresh, the Reinstall OS feature lets you rebuild your VPS quickly and securely.
⚠️ Important: Reinstalling your VPS will permanently erase all data.
Make sure you have backups before proceeding.
▶️ Watch: Linux Auto-Install (video guide)
Watch this short tutorial to see how to reinstall your VPS with Linux.We’ll walk you through the essential steps to ensure a smooth and successful installation.
▶️ Watch: Windows Auto-Install (video guide)
This video shows you how to reinstall your VPS with Windows Server (RDP).Learn how to start the reinstall, set your administrator password, and re-enable remote access.
Step-by-Step Reinstallation
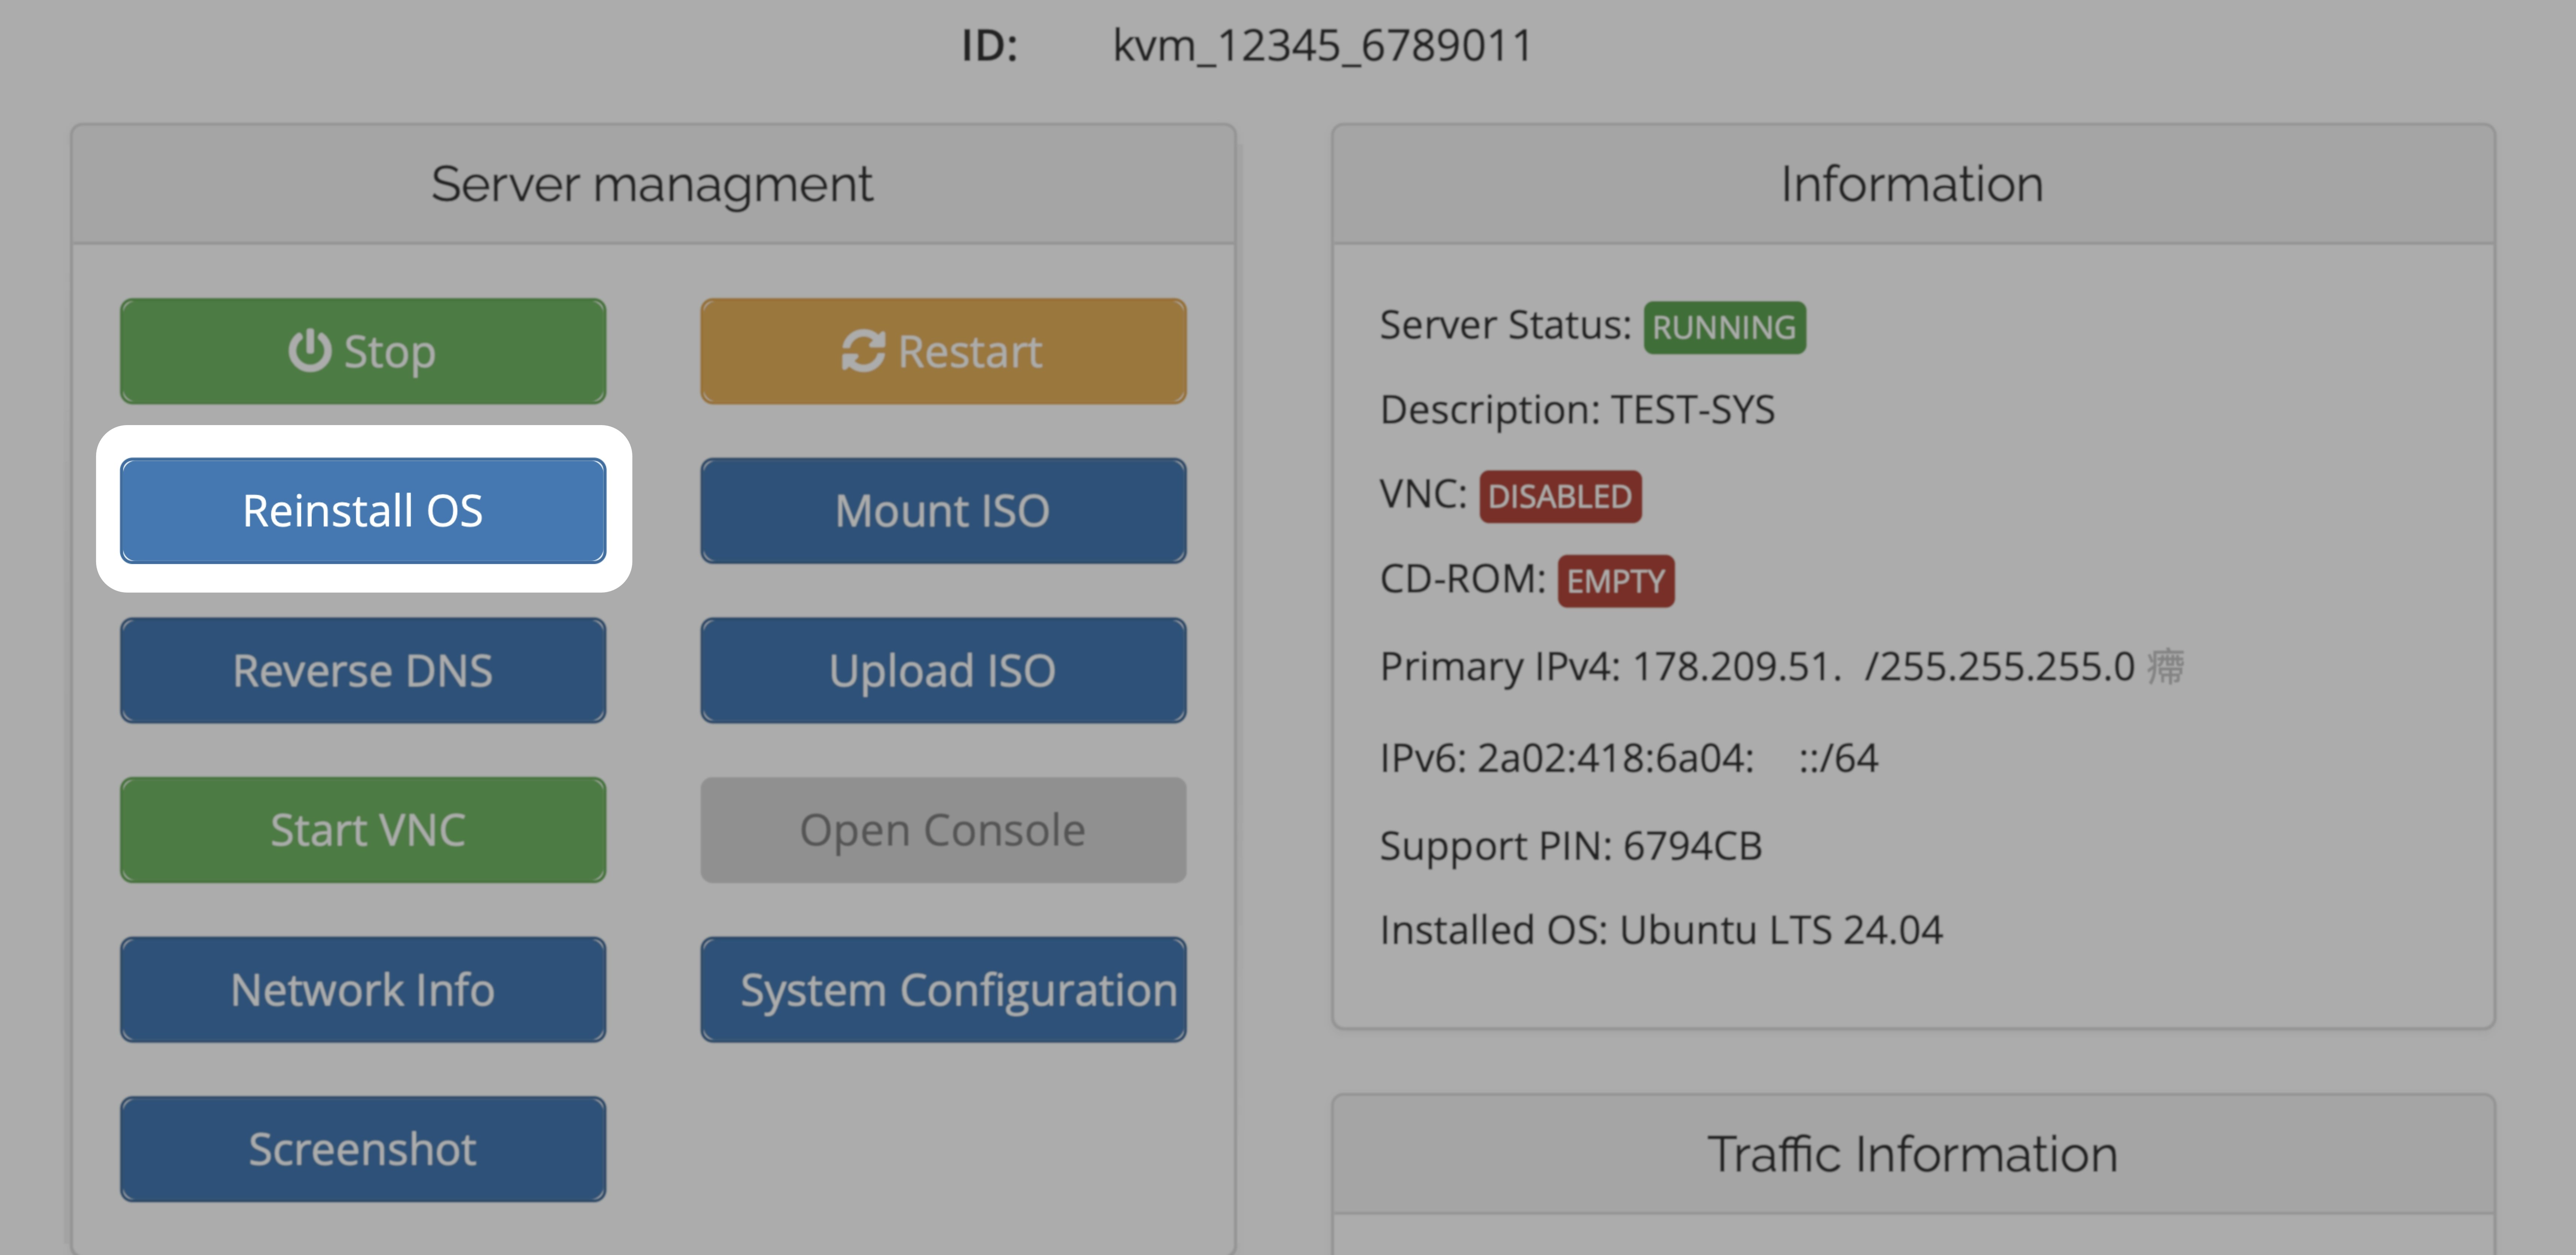
Log in to your Control Panel
Go to your VPS Management Portal and open the Services tab.
Installation time & port behavior
Once the reinstallation starts, your VPS will go through the automated setup process. The image below shows the typical duration and port behavior for each operating system: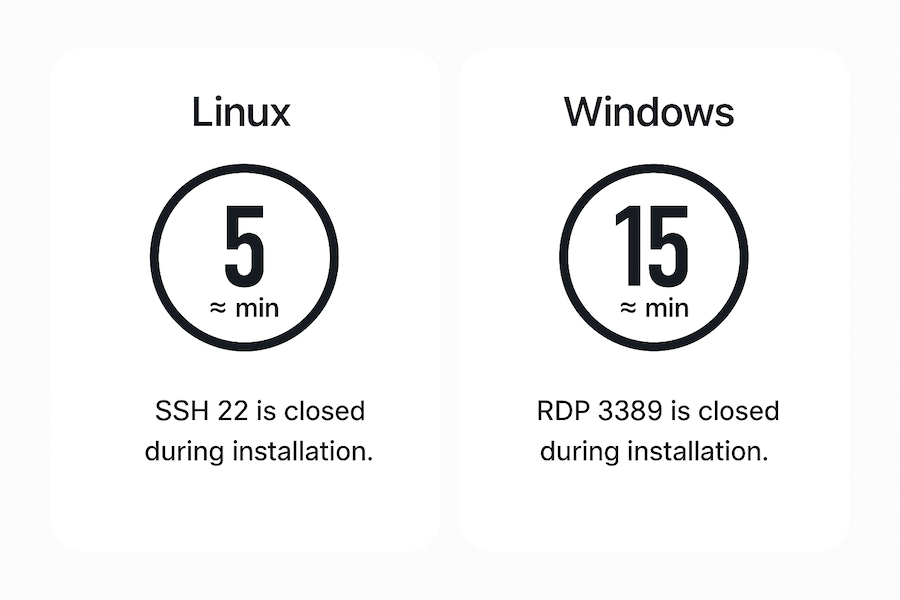
During reinstallation, remote access (SSH/RDP) is temporarily disabled while your VPS is being rebuilt.
You’ll be able to connect again once the installation has finished — typically after ≈ 5 minutes for Linux or ≈ 15 minutes for Windows.⚠️ Do not power off or reboot your VPS during this time, as it may interrupt the OS setup.
You’ll be able to connect again once the installation has finished — typically after ≈ 5 minutes for Linux or ≈ 15 minutes for Windows.⚠️ Do not power off or reboot your VPS during this time, as it may interrupt the OS setup.
Installation via Cloud-Init
If you prefer to use your own operating system image, EDIS Global also supports installations via Cloud-Init.This method is ideal for advanced users who want to bring their own (BYO) image — such as a custom or pre-built
.qcow2 file — and automatically configure it on first boot with Cloud-Init user-data.
Use Cloud-Init when you need to:
• deploy a custom or pre-configured operating system image
• automate user creation, SSH keys, or initial setup commands
• maintain full control over your server’s image and configurationIf you just need a clean Linux or Windows environment, the Reinstall OS option is simpler and faster.
• deploy a custom or pre-configured operating system image
• automate user creation, SSH keys, or initial setup commands
• maintain full control over your server’s image and configurationIf you just need a clean Linux or Windows environment, the Reinstall OS option is simpler and faster.