For illustration purposes only!
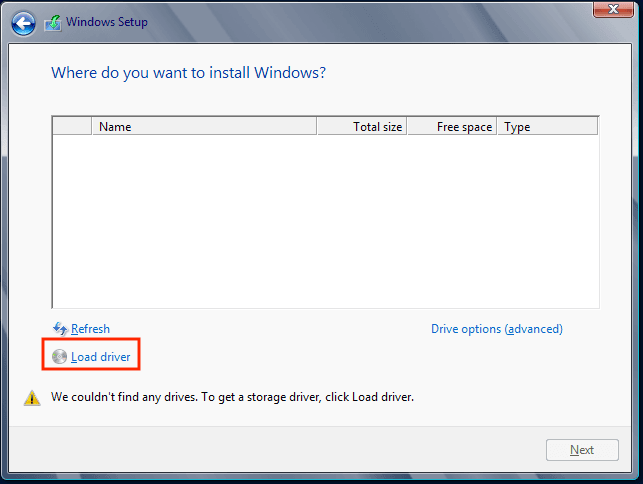
Manual Installation of Windows Server on EDIS KVM using VNC. This guide was created to document the process. You can do it this way if you are interested to experiment. If you want to quickly install Windows or Linux, please use provided auto-installers. EDIS offers 1-click installation of Windows 2016, 2019, and 2022 Server as well as for Windows 10 - There is no need to manually install Windows! This manual was created to guide you through a *manual* installation of Windows Server editions 2016, 2012 / R2, 2012, 2008, 2008 / R2. This guide does not work if you have a Windows Desktop .iso file.Minimal system requirements:A KVM VPS with 20GB disk space (KVM Starter and up)A Windows license (2016, 2012 R2, 2012, 2008, 2008 R2) for activationA VNC client or a noVNC session from the KVM panel
Installation
1
Log in to your
2
Mount the Windows .ISO file of your choice
3
Enable VNC
4
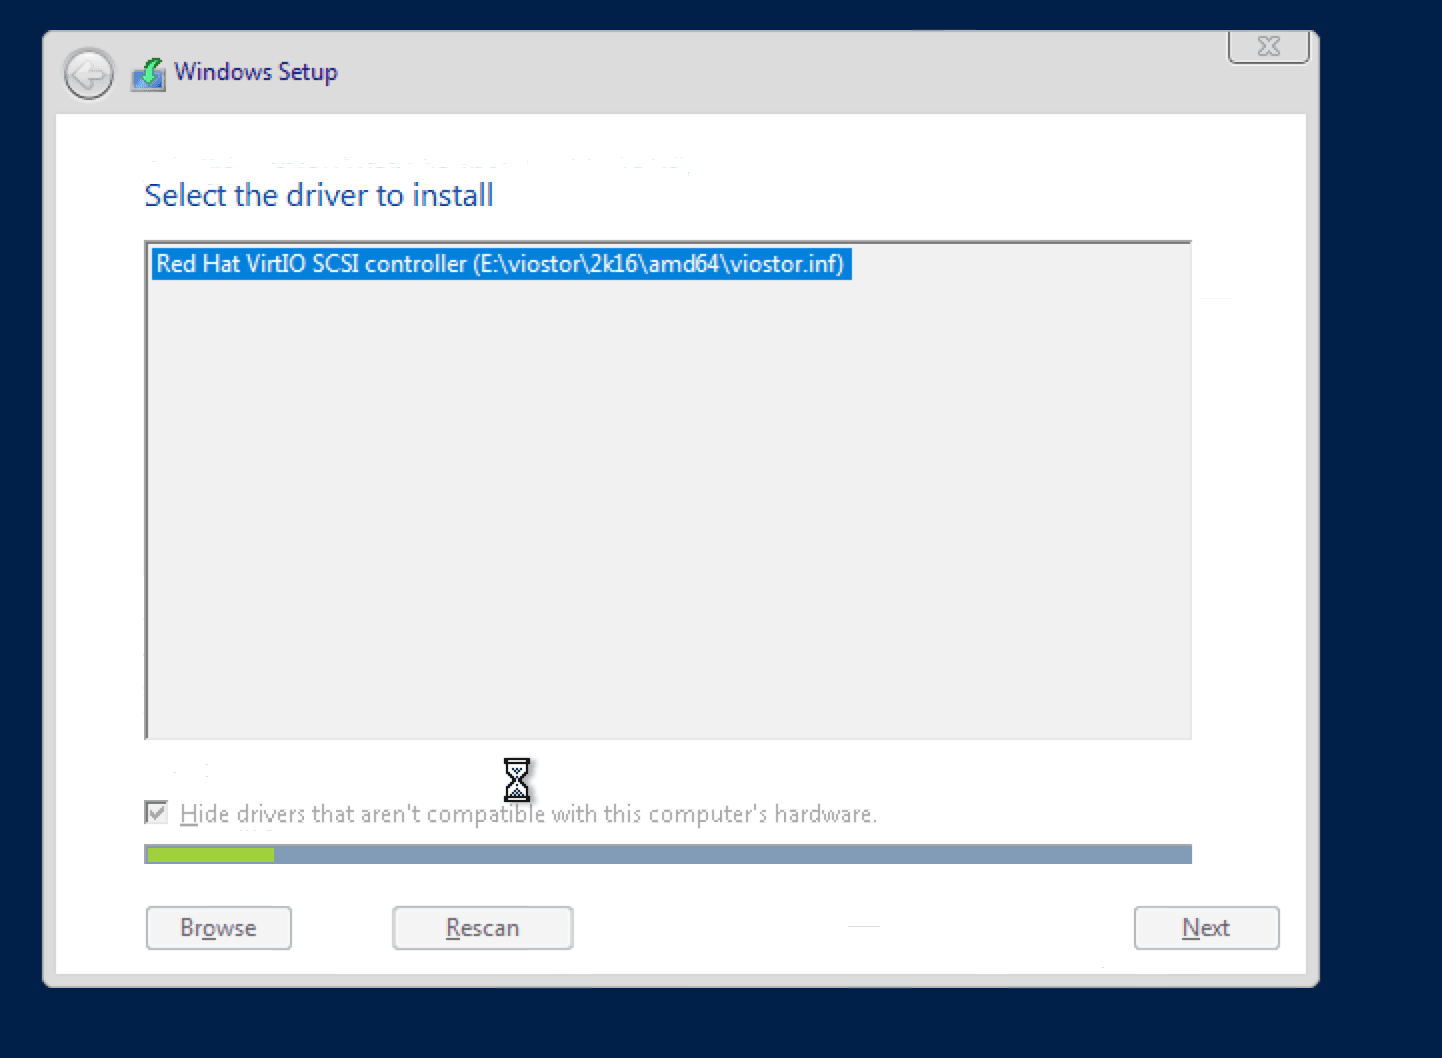
KVM Settings >> Disk driver >> set to Virtio (default value)
5
KVM Settings >> Network driver >> set to Virtio (default value)
6
Start a noVNC session and
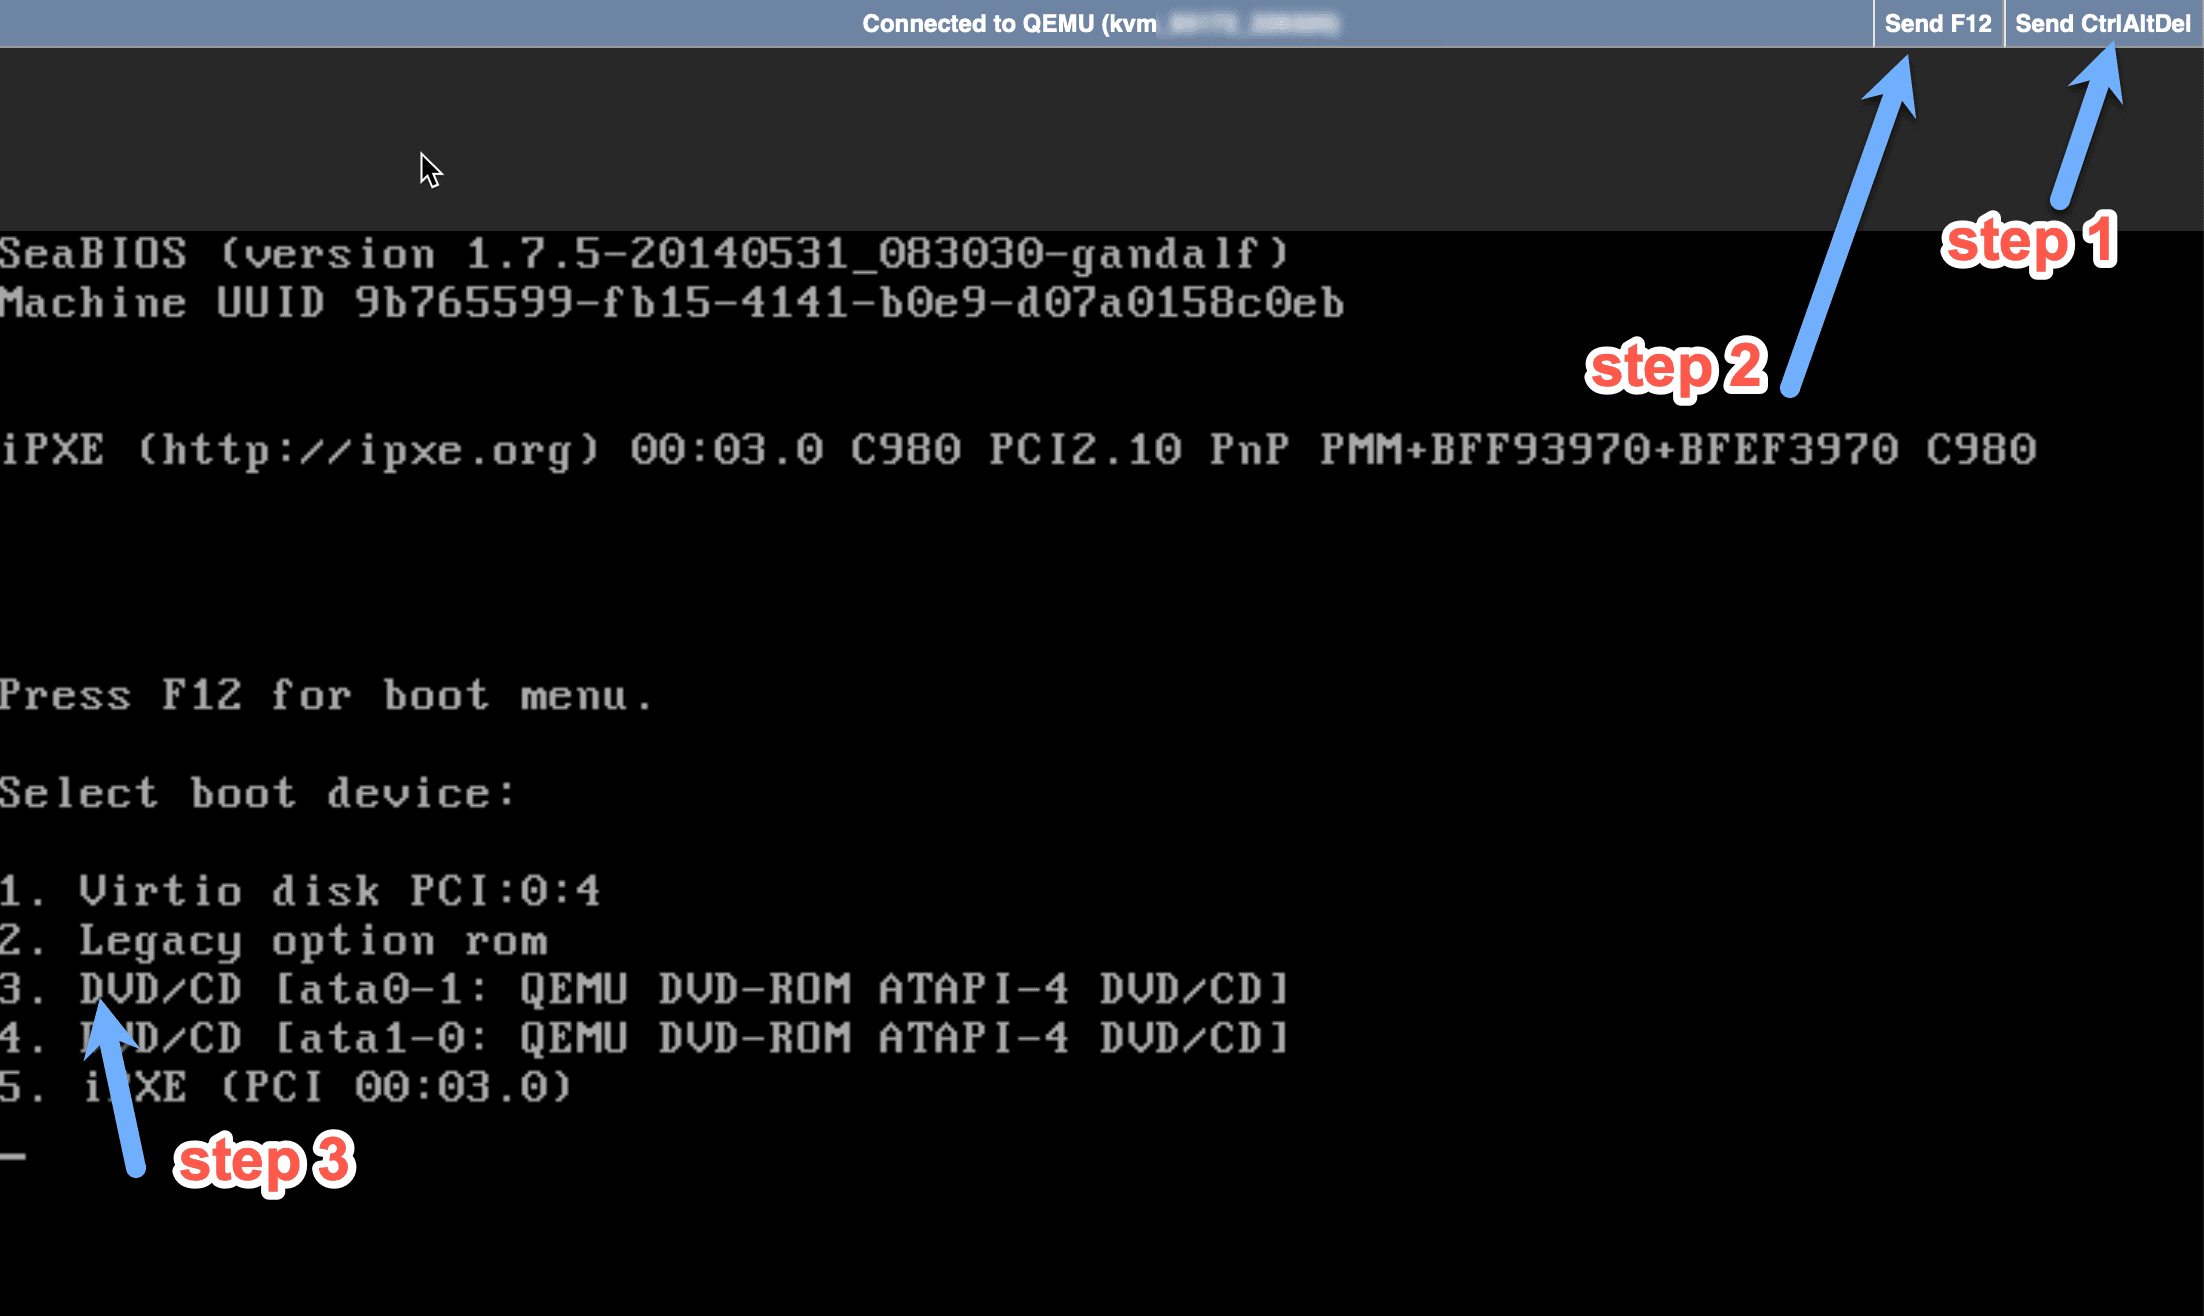
1
Send CtrlAltDel (top right corner of your noVNC window)
2
Send F12 immediately after step 1) or press `Esc` to bring up the Boot menu
3
Press `3` to boot from mounted .iso (DVD/CD)
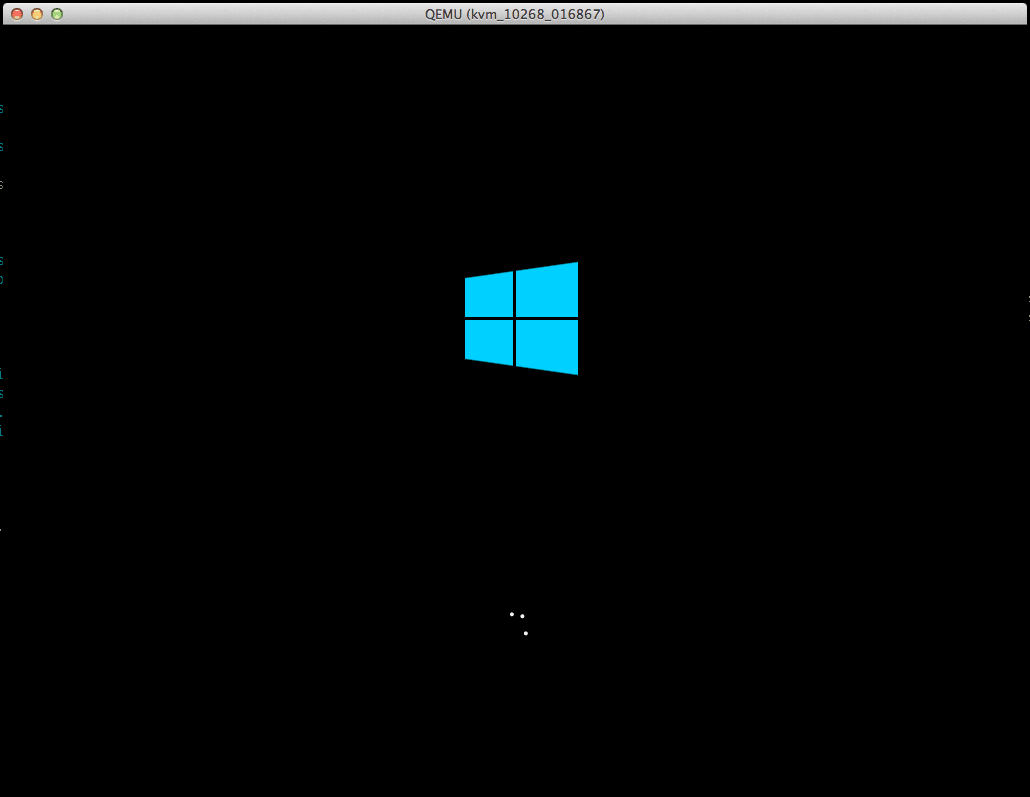
Everything is good. ;-)
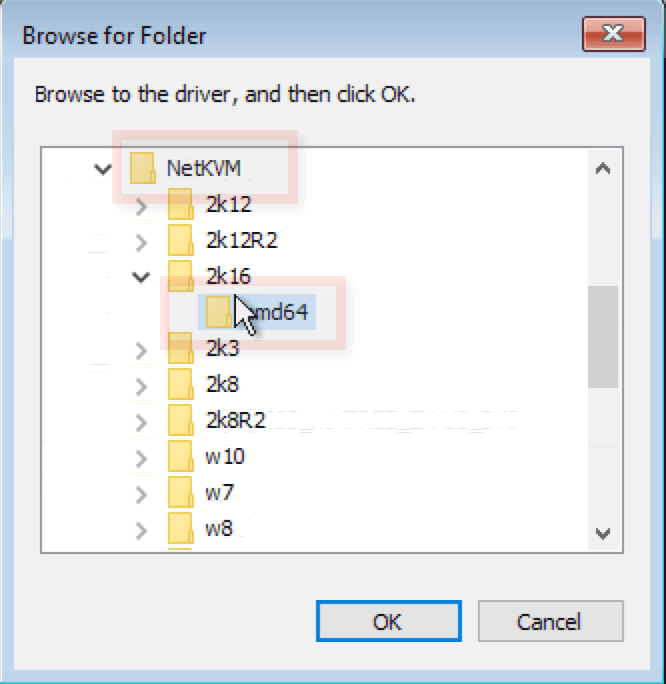
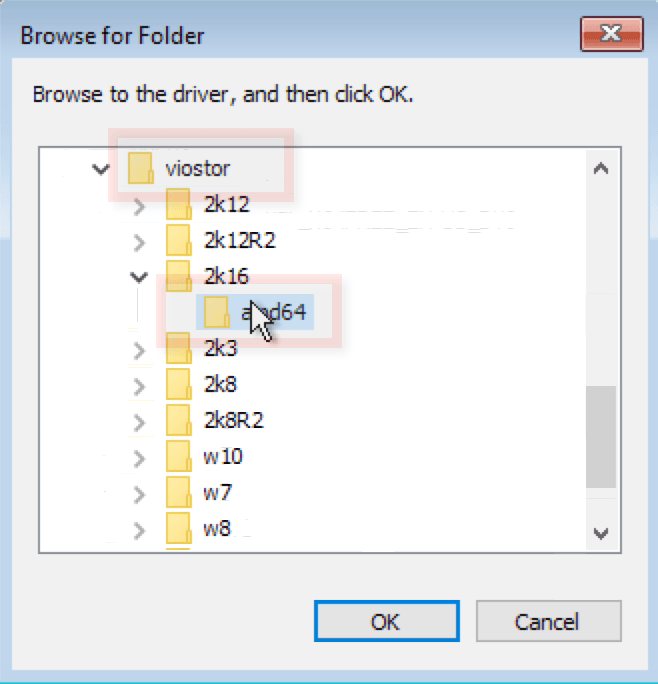
- For Windows 2016 select the 2k16 folder
- For Windows 2012 / R2 select the 2k12 or 2k12R2 folder
- For Windows 2008 / R2 select the 2k8 or 2k8R2 folder