

Introduction
Managing disk space effectively is a crucial task on Windows Server. The File and Storage Services feature in Server Manager provides an intuitive way to resize volumes, whether you need to expand or shrink a drive. This guide walks you through the process. Use this guide after a VPS plan upgrade or after adding up to 400 GB with Drive Size Boost. EDIS Global enlarges the virtual drive; Windows does not automatically extend the existing partition.NOTE: To fully apply your upgrade, first shut down your OS, power off the server from the portal, and then power it back on through the portal. This process ensures the system recognizes the updated drive specifications.Keep in mind, the additional space will remain unavailable until you resize your disk or partition. Reformatting is only necessary if you intend to create a new partition.
How to resize a hard drive
Step 1: Access Server Manager
- Log in to the server: Access your server via Remote Desktop or the local console.
- Open Server Manager:
- Click the Start button and select Server Manager.
- If it doesn’t open automatically, search for
ServerManager.exeand run it.
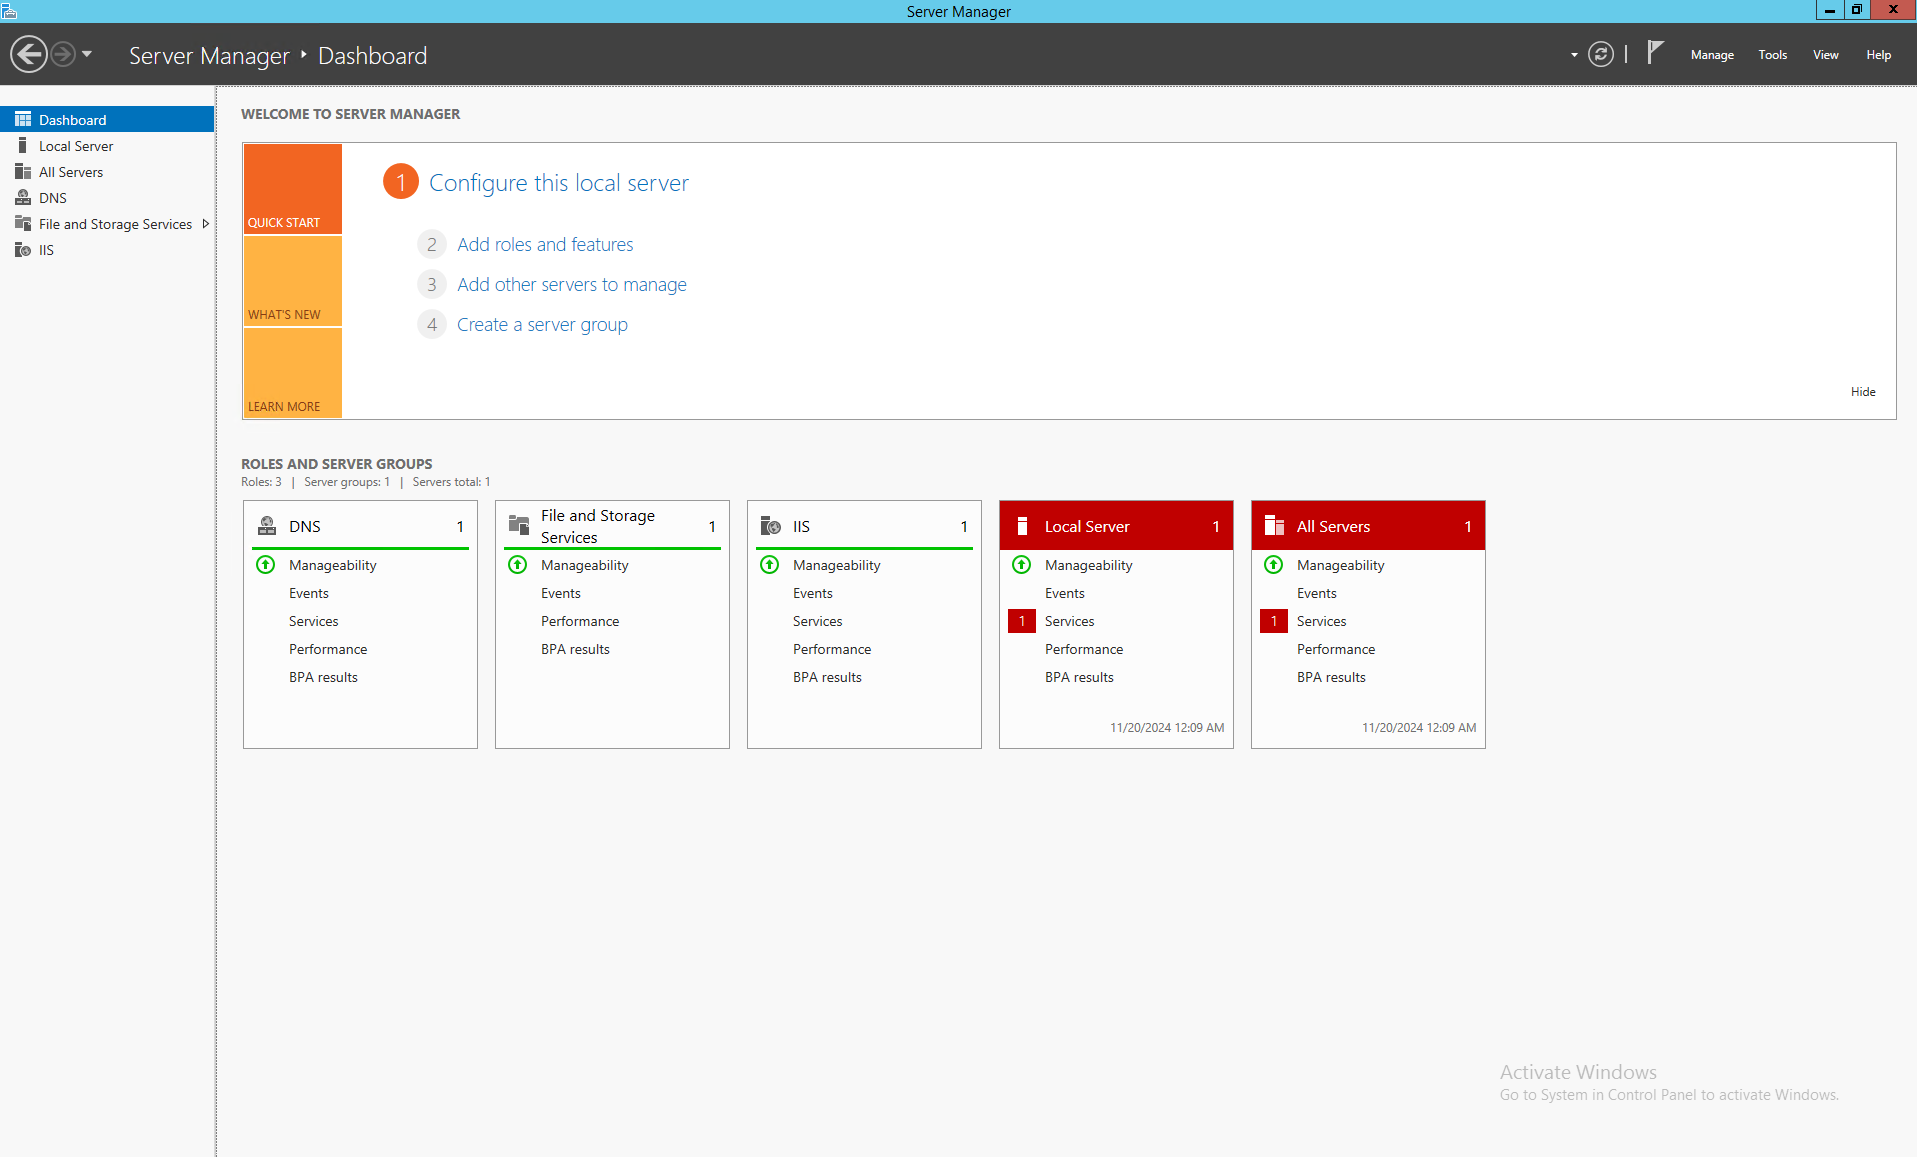
Step 2: Navigate to File and Storage Services
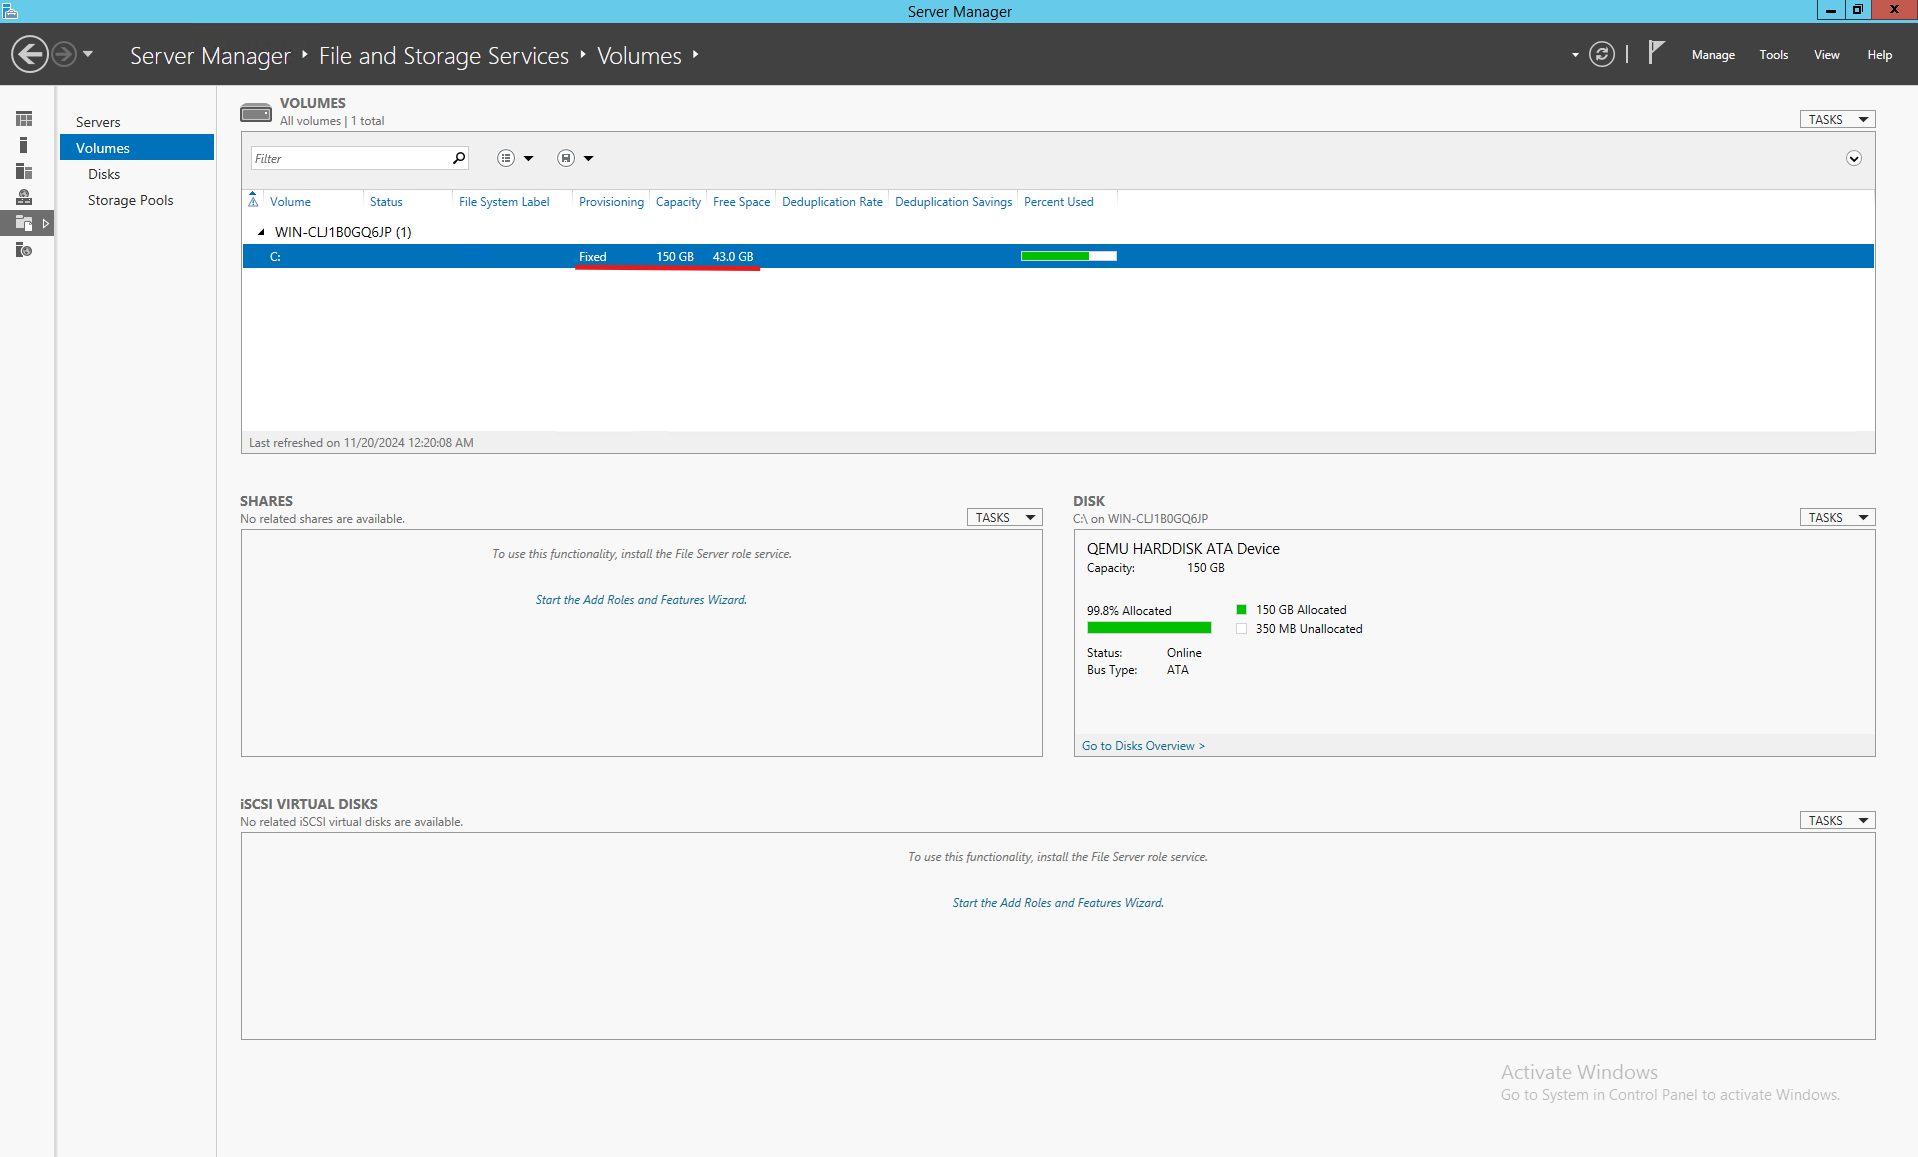
- In the Server Manager dashboard, select File and Storage Services from the left-hand panel.
- Click Volumes to display all configured drives on your server.
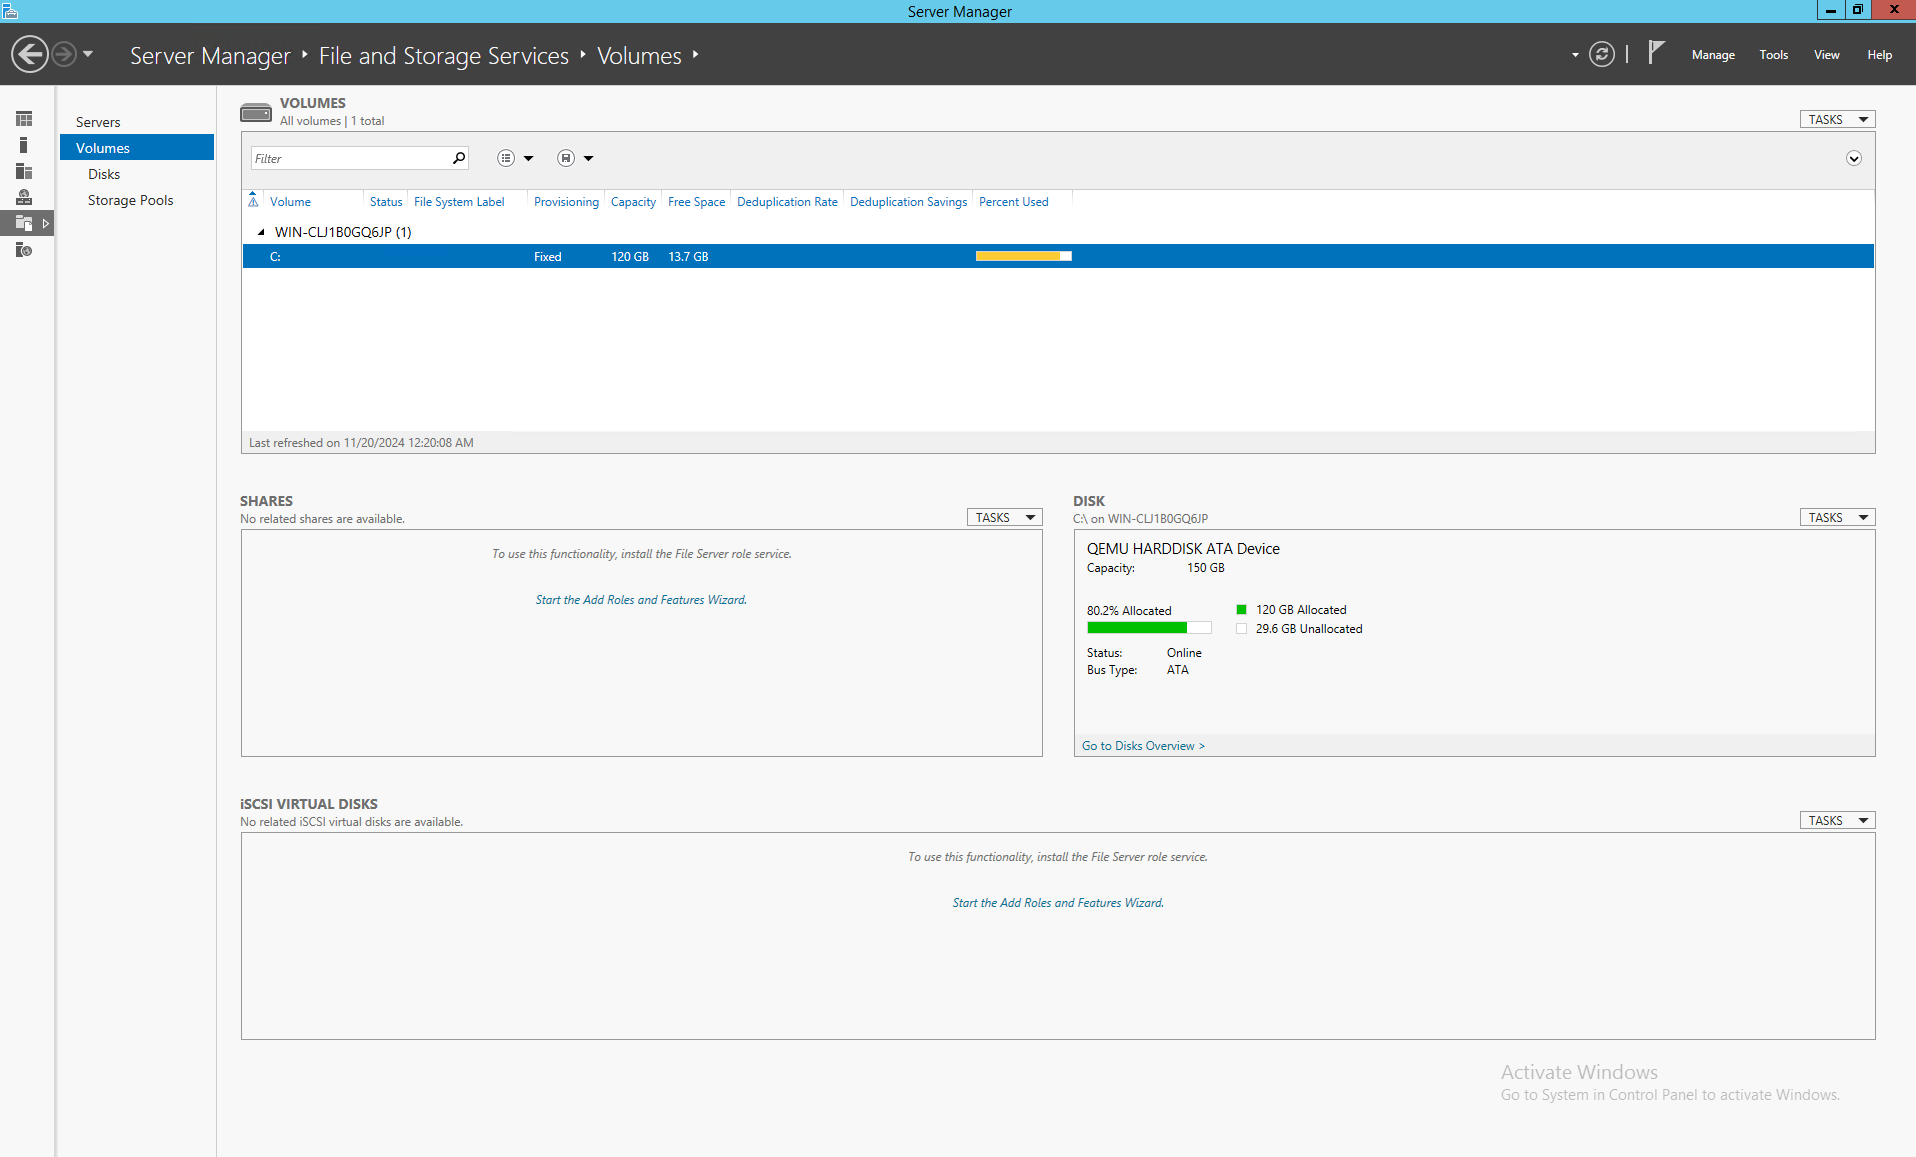
Step 3: Select the target volume
- In the Volumes section, locate the drive you want to resize.
- Right-click the drive and select:
- Extend Volume to increase its size.
- Shrink Volume to reduce its size.
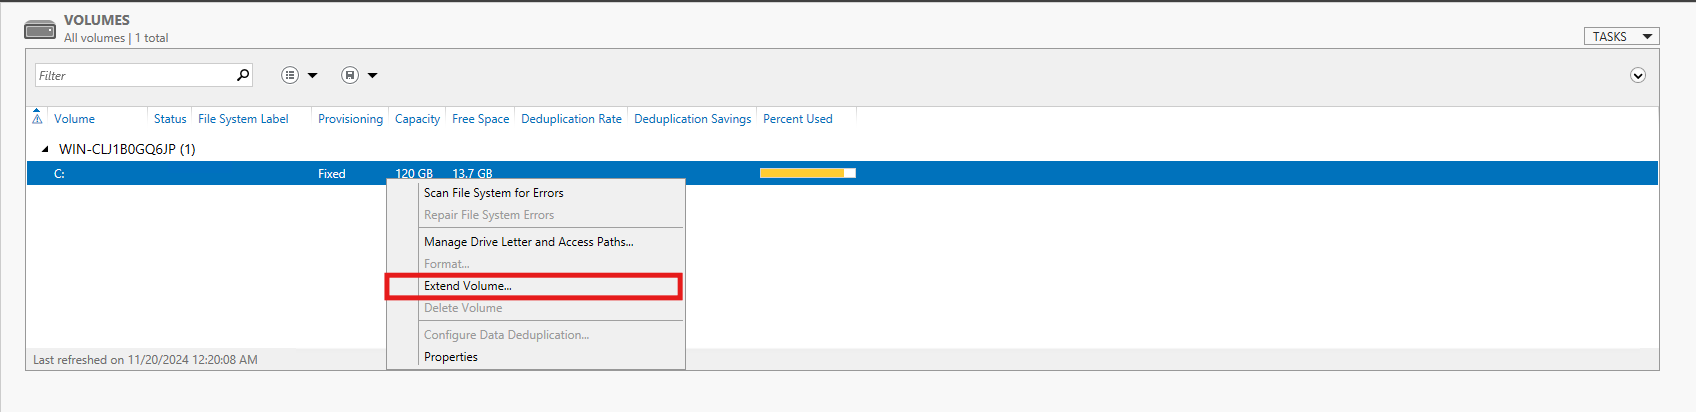
Step 4: Extend a volume
- If there’s unallocated space available on the disk:
- Selecting Extend Volume will launch a wizard that allows you to allocate the unused space to the volume.
- Specify the amount of space to add to the volume.
- Click OK to apply the changes.
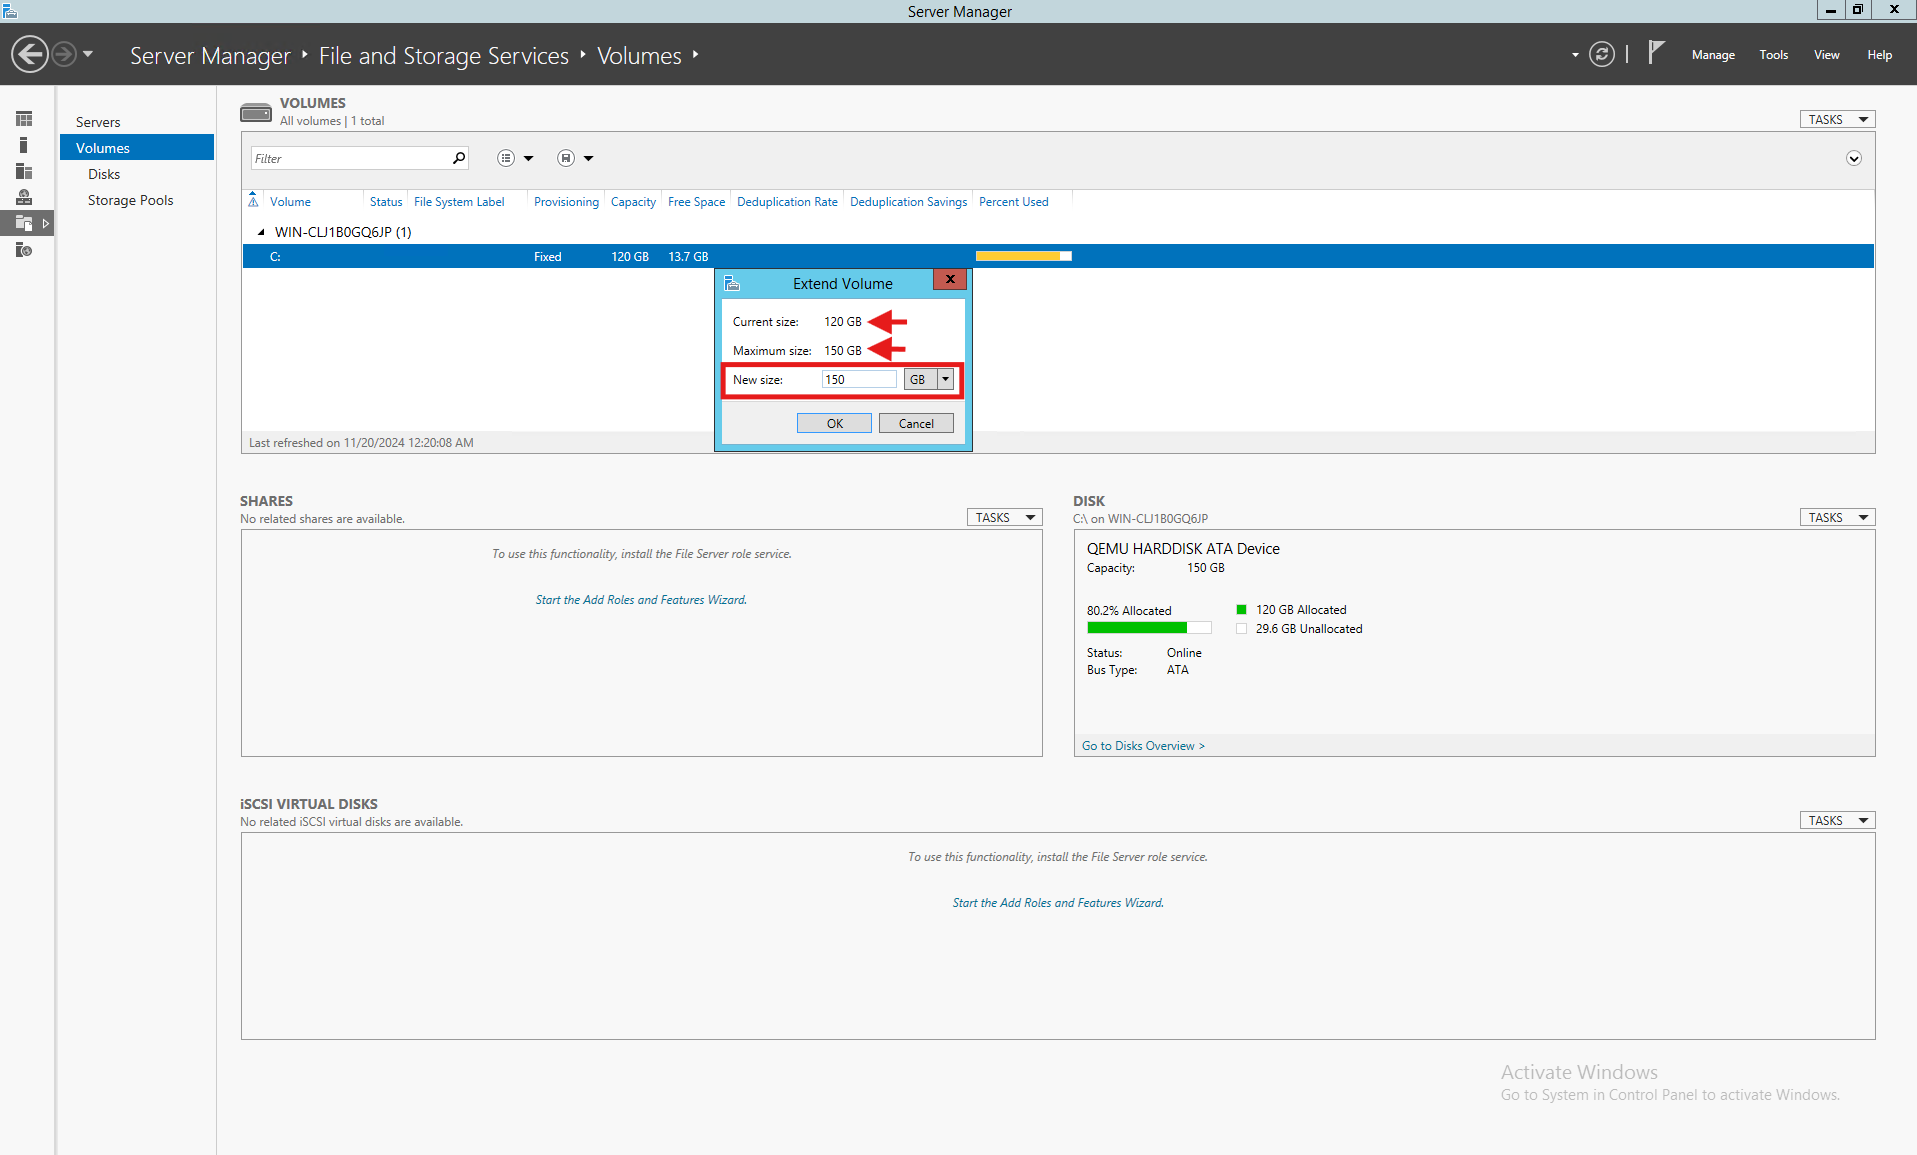
Step 5: Shrink a volume
- To shrink a volume, right-click the desired drive and select Shrink Volume.
- Enter the amount of space you want to reduce from the drive.
- Click OK.
- The freed-up space will appear as Unallocated Space.
Step 6: Verify changes
- Return to the Volumes section in Server Manager to confirm the updated volume size.
- For a more detailed view, you can use Disk Management.
Important notes
- Back up data: Always back up important data before making any changes to the disk.
- Unallocated space requirement: For a basic volume, free space must be on the same disk and immediately after the target volume. An intervening recovery or other partition blocks a normal extension.
- In-use volumes: If the volume is in use by active services or applications, a restart may be required.
Common issues and solutions
- Extend Volume is grayed out:
This occurs when there’s no contiguous unallocated space next to the volume.
- Inspect the layout in Disk Management (
diskmgmt.msc). Do not delete a recovery, EFI, or data partition just to enable the button. Back up first and use a procedure appropriate to the layout. Microsoft explains the supported options in Extend a volume.
- Inspect the layout in Disk Management (
- Limited Shrink Volume:
- System files or reserved partitions can limit how much space you can shrink.
- Use advanced tools like Diskpart for further management.
Alternative tools
If File and Storage Services cannot meet your requirements:- Use Disk Management for basic disk operations.
- Use Diskpart or PowerShell for advanced disk management.
- Consider third-party software such as MiniTool Partition Wizard or EaseUS Partition Master.