

Quick guide on how to change IP address on Windows Server via VNC
This guide shows you how to configure an already assigned IPv4 address on Windows Server through VNC. Record your current settings before editing them. Windows versions and adapter names may look slightly different.Change IP address on Windows Server
Step 1: Connect to your Windows Server via VNC
1
Log in to the VPS Management Portal
Open the VPS Management Portal.
2
Enable your VNC server
Follow the instructions in Enable VNC server.
3
Open VNC
Use the VNC toolbar’s Send CtrlAltDelete control if Windows requests it, then sign in with an administrator account.
Step 2: Open network connections
- Once connected, right-click on the Start button and select Run.
- Type
ncpa.cpland press Enter. This will open the Network Connections window.
Step 3: Access properties of the network adapter
- In the Network Connections window, find the network adapter you wish to configure (e.g., Ethernet).
- Right-click on the adapter and select Properties from the context menu.
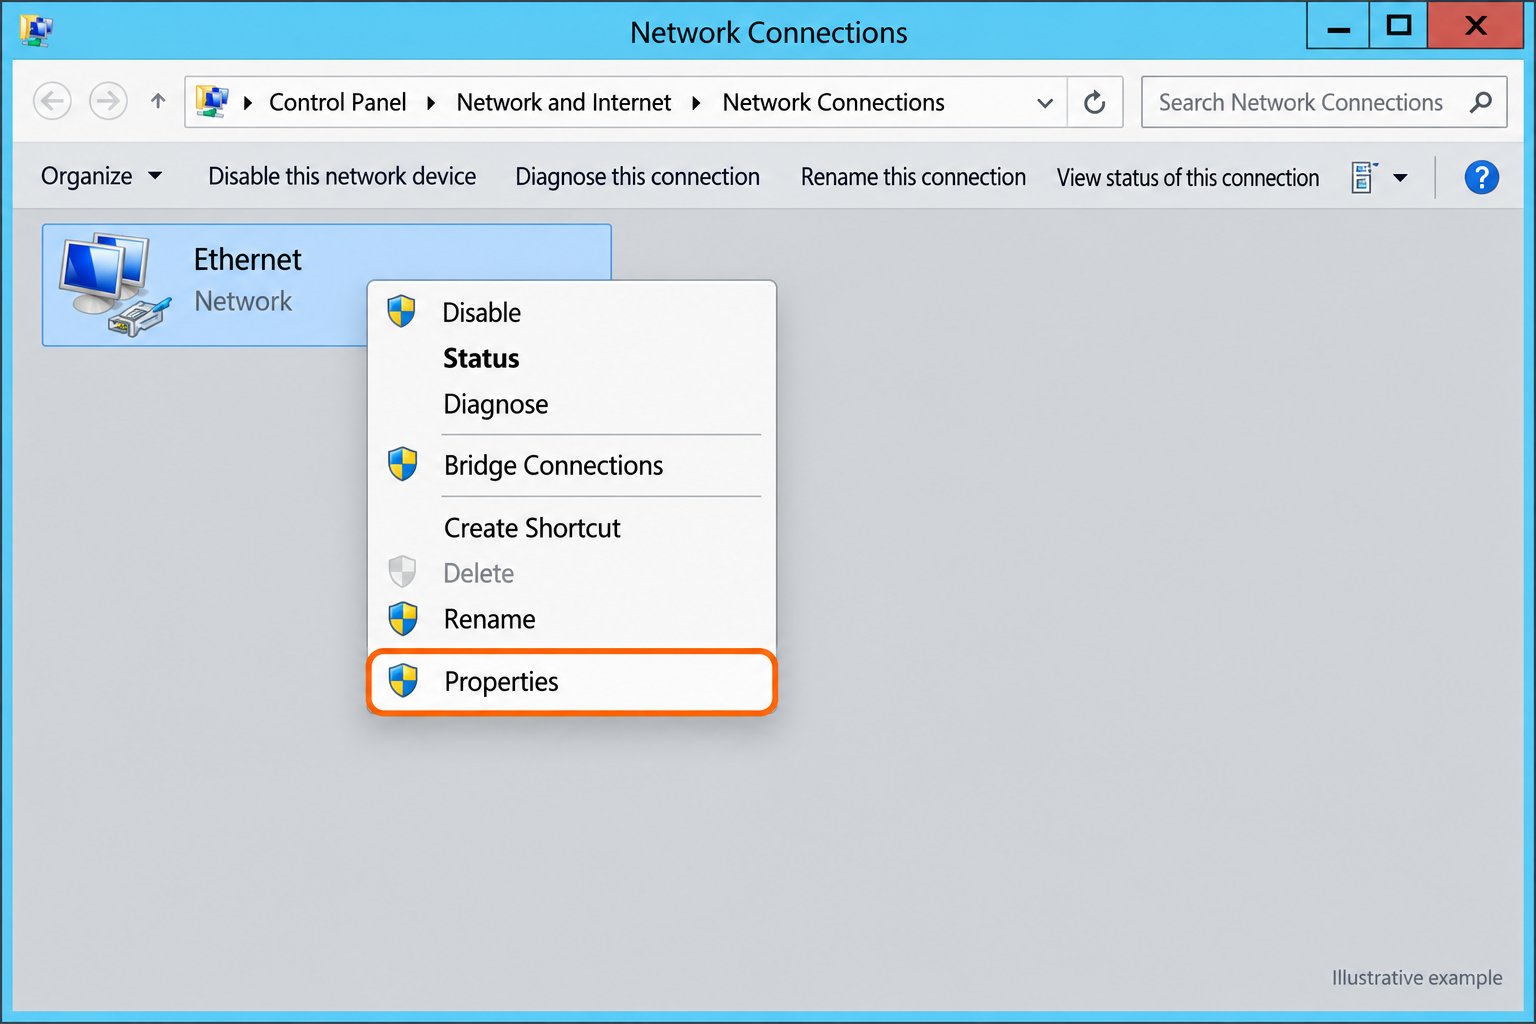
Reconstructed example: open Properties for the adapter connected to your VPS network.
Step 4: Select internet protocol version
- In the Properties window, locate and select Internet Protocol Version 4 (TCP/IPv4).
- Click the Properties button.
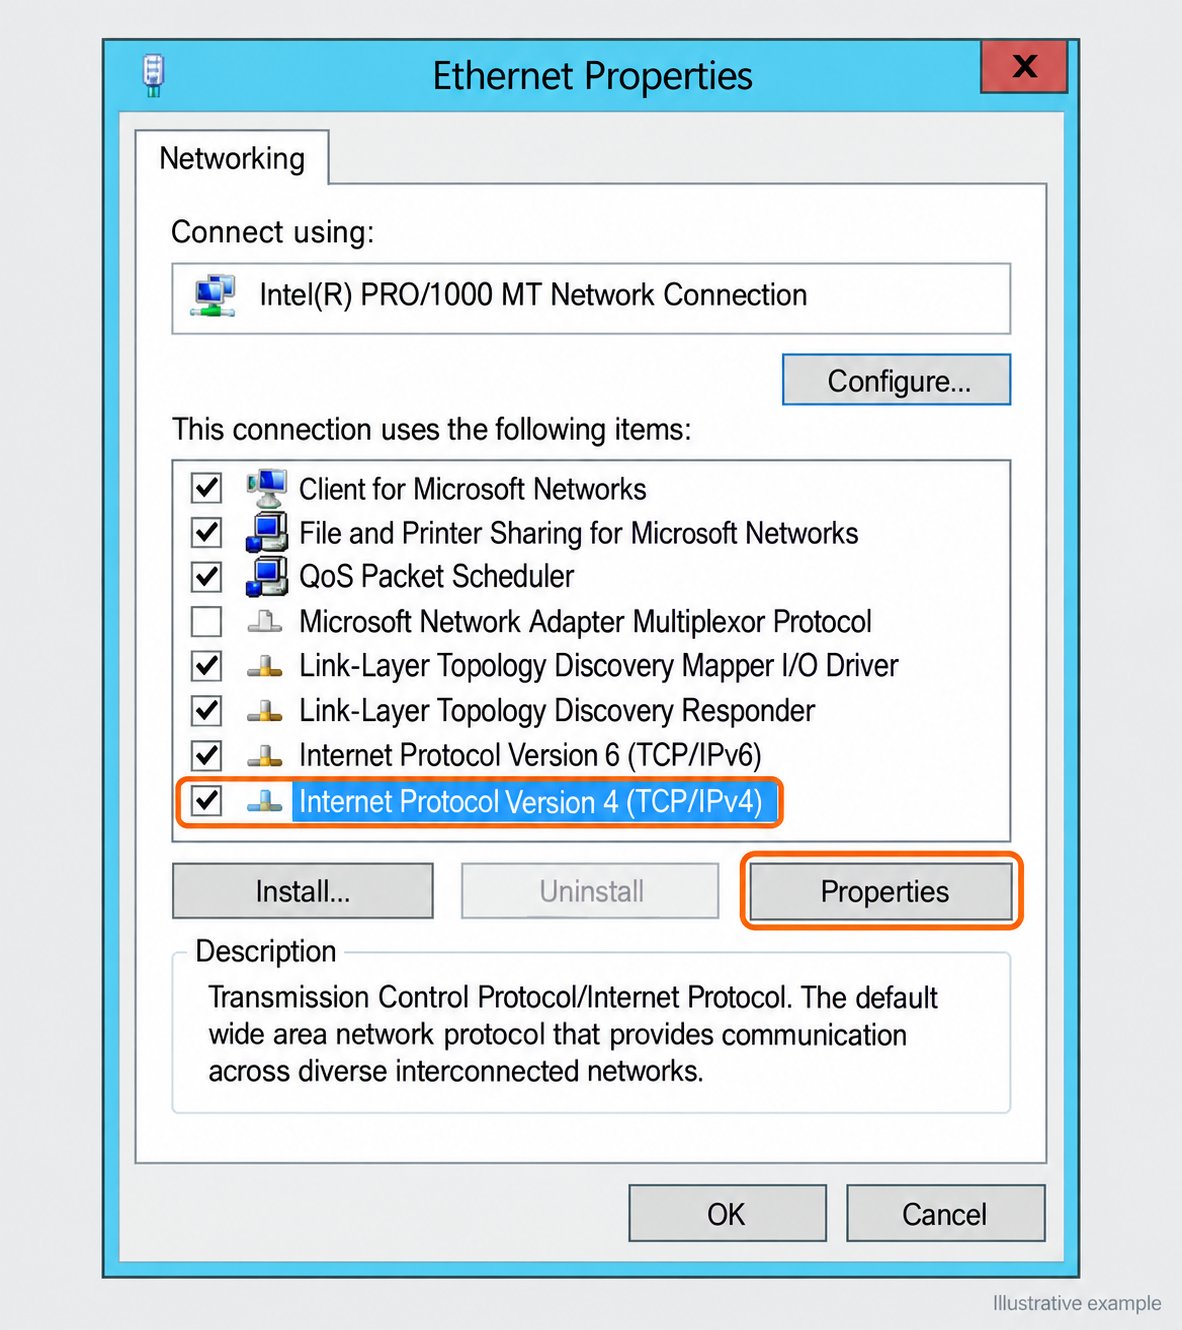
Select the IPv4 row, then Properties. Leave the protocol checkbox enabled.
Step 5: Change the IP address
- In the TCP/IPv4 Properties window, select Use the following IP address.
- Enter the IP address, Subnet mask, and Default gateway assigned to your VPS. Read all three from Network Info; do not assume the gateway or mask.
192.0.2.20, 255.255.255.0, and 192.0.2.1 solely to show where each value goes.
Step 6: Configure DNS servers (optional)
- If needed, select Use the following DNS server addresses.
- Enter the DNS servers appropriate for your VPS. The illustration uses
1.1.1.1and1.0.0.1as public-resolver examples. If this server belongs to an Active Directory domain, retain its required domain DNS servers.
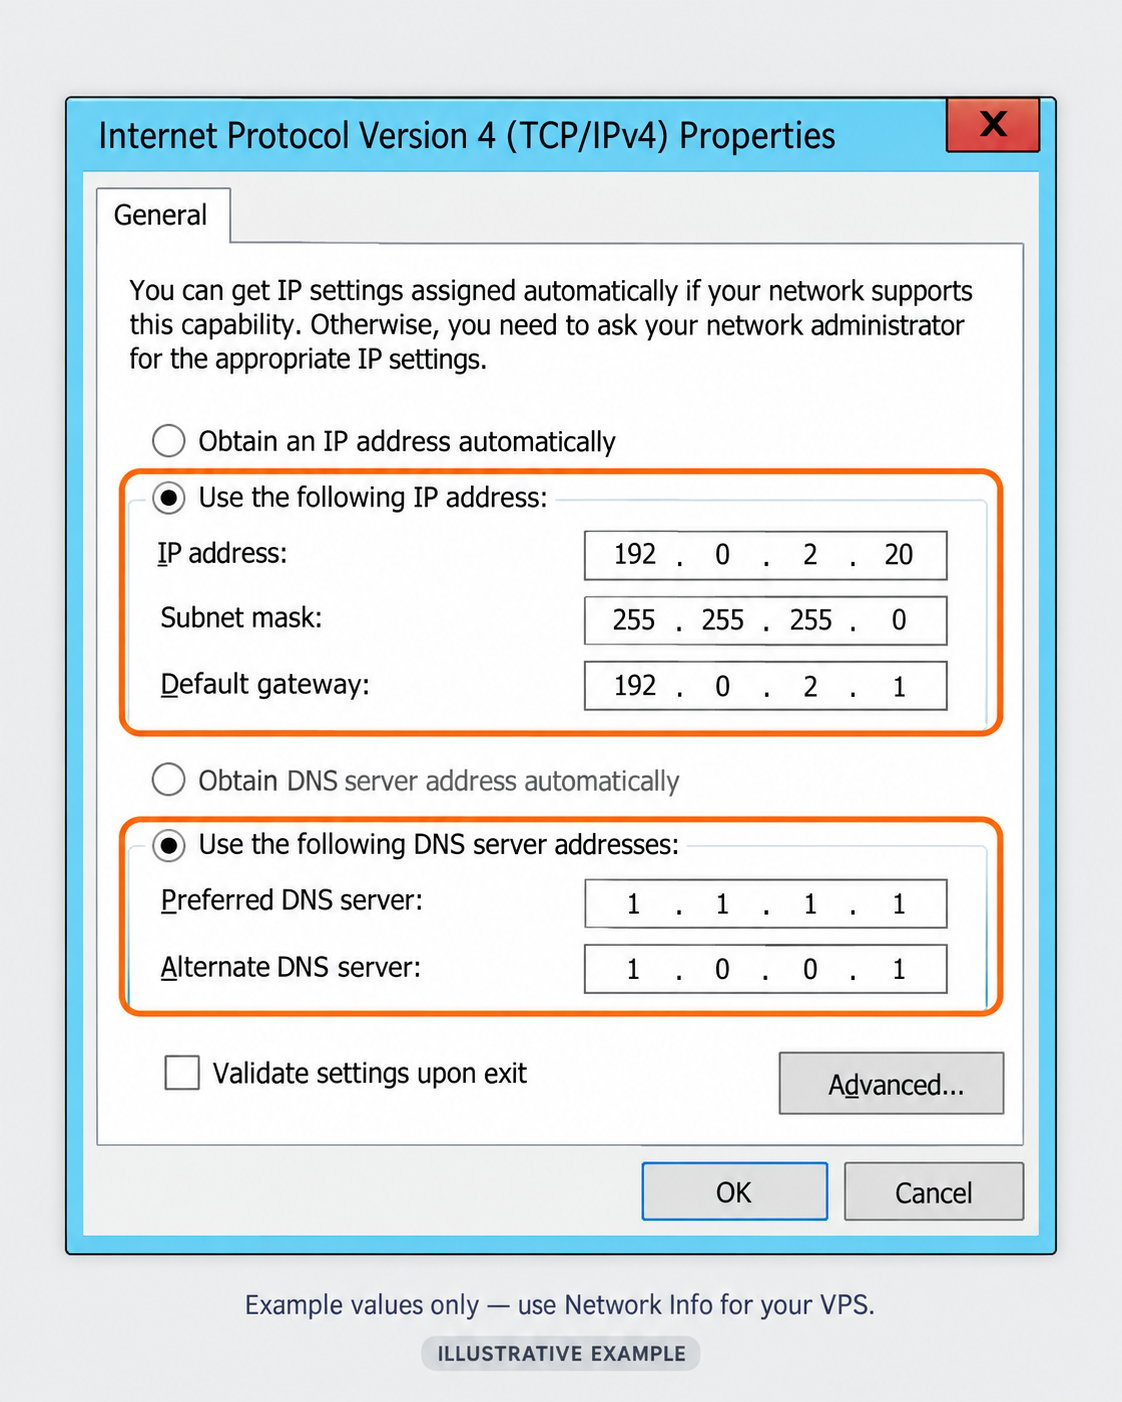
Documentation-only IP values. Enter the settings assigned to your VPS.
Step 7: Save changes
- Click OK to close the TCP/IPv4 Properties window.
- Click Close in the Network Adapter Properties window.
Step 8: Verify the changes
- Open Command Prompt or PowerShell by right-clicking the Start button and selecting it from the menu.
- Type the following command and press Enter:
ipconfig - Check the adapter’s IPv4 address, subnet mask, and default gateway against Network Info.
- From your computer, start a new RDP connection to the new IP address. Keep VNC open until the connection works. Update DNS records or application settings that still reference the old IP.
Important notes
- Admin privileges: Changing network settings requires administrative privileges. Ensure you have the necessary permissions.
- Backup settings: Always note your previous network settings before making changes, in case you need to revert.