Try the shorter Password Reset Helper guide first. This article describes the classic Windows installer method. Do not continue into Windows installation or format any partitions.
Access the VPS Management Portal
- Activate VNC access for VPS
- Launch noVNC or a VNC client
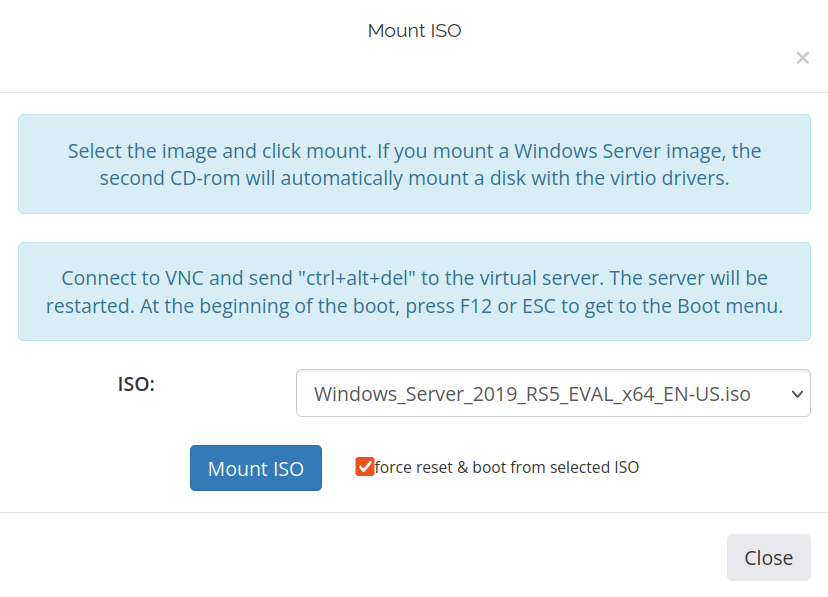
- Mount ISO in the Server management section.
- In the drop-down list, select for example: Windows Server 2019
-
Select the force reset & boot from the selected ISO checkbox, then click the Mount ISO button
- Open the noVNC tab in your browser or VNC client.
-
Press
2to boot from the mounted .iso (DVD/CD). For example: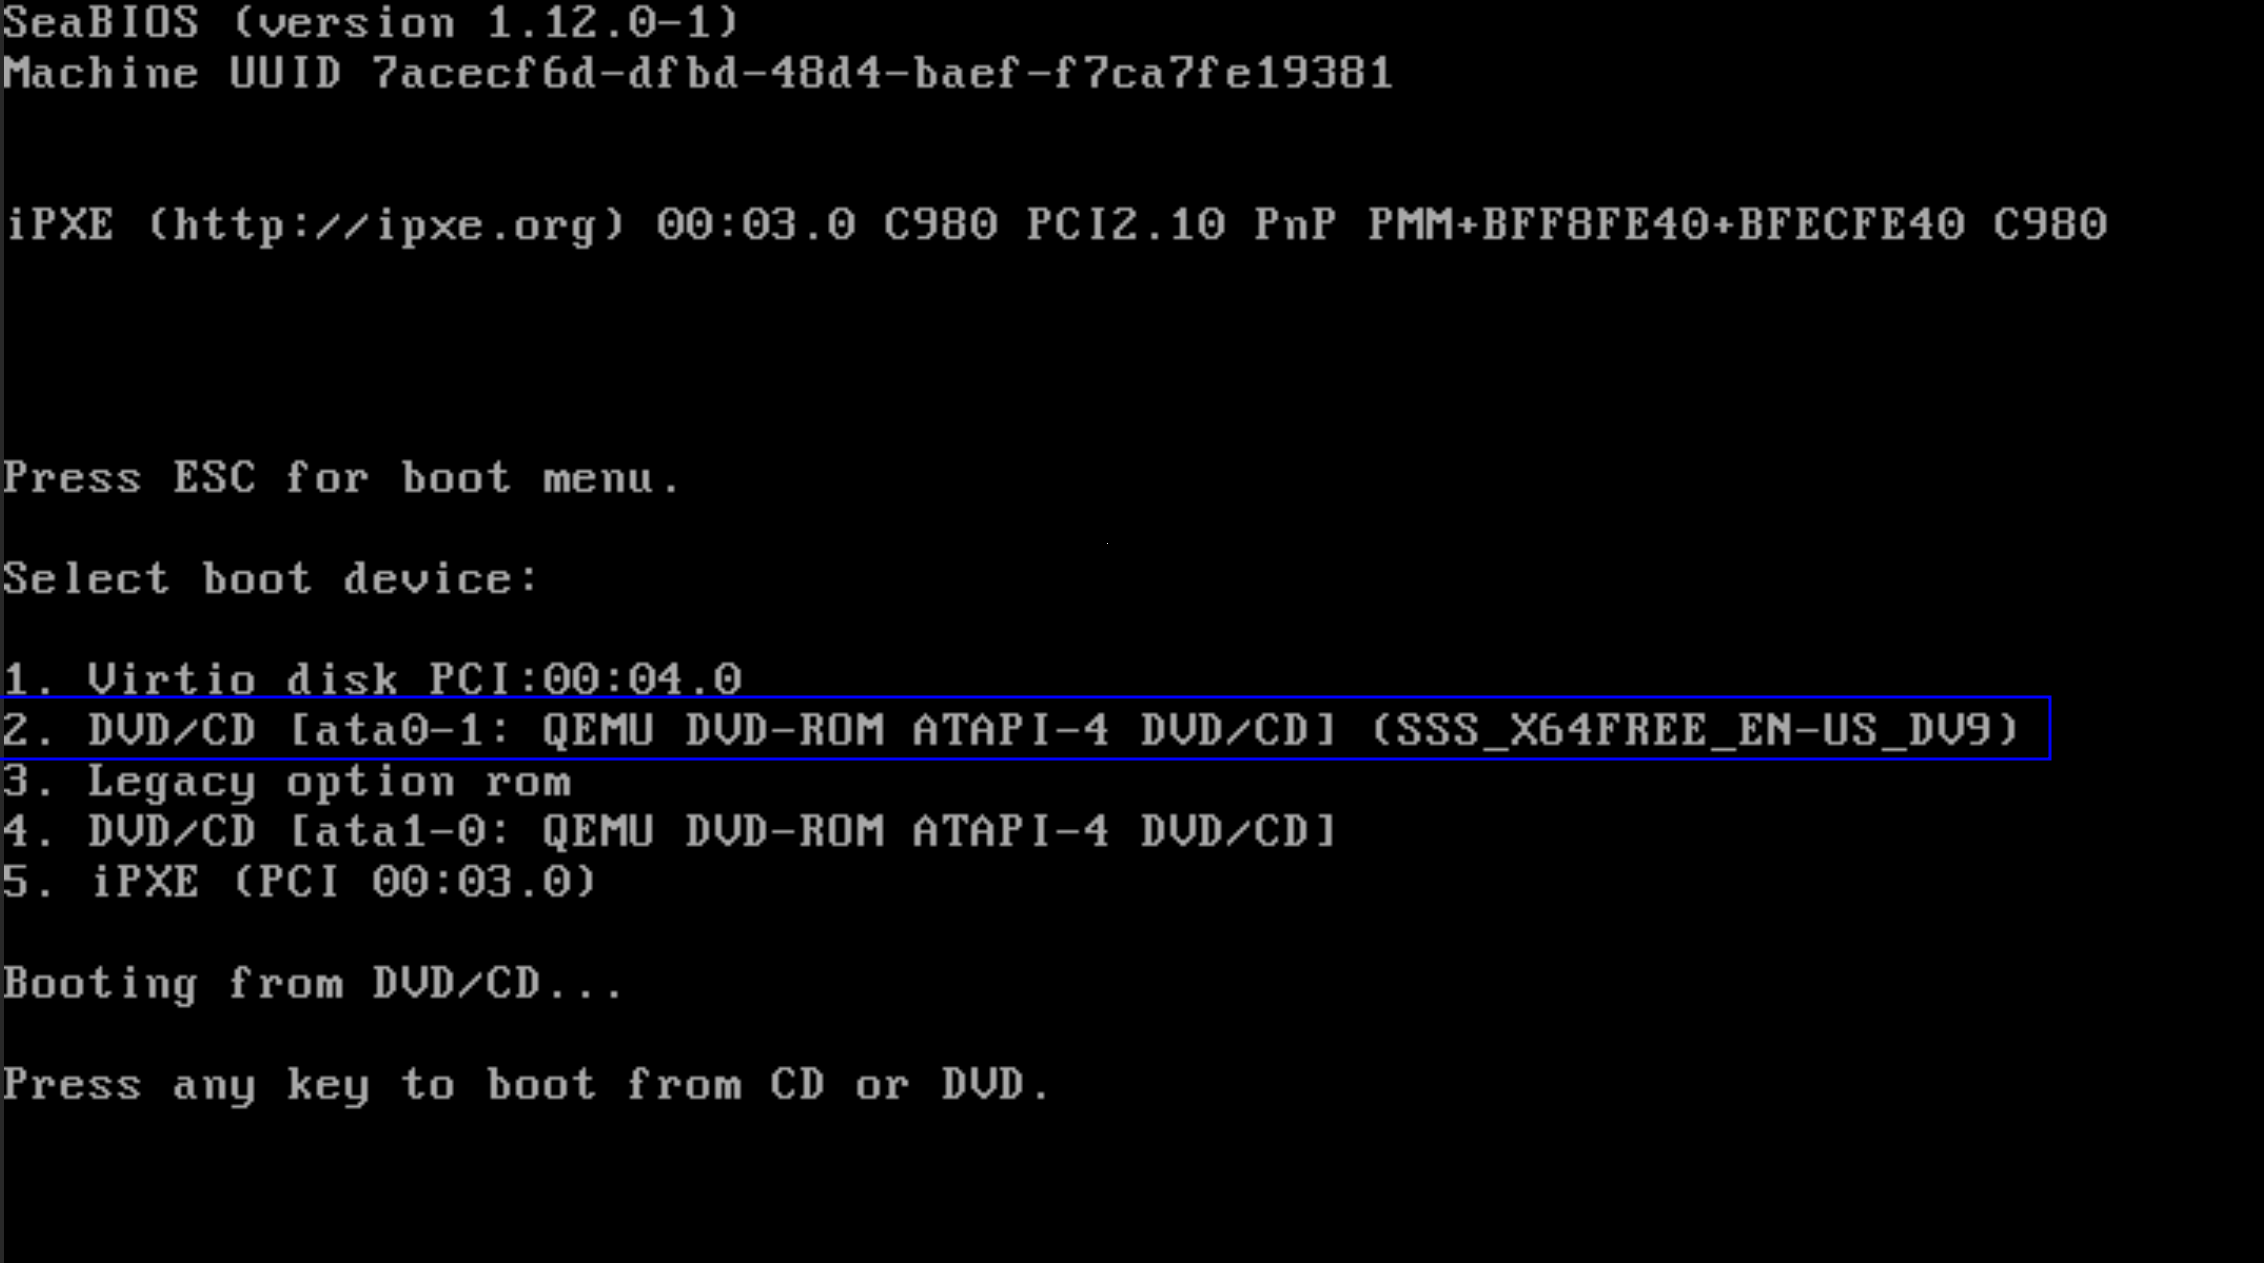
Windows installation setup
-
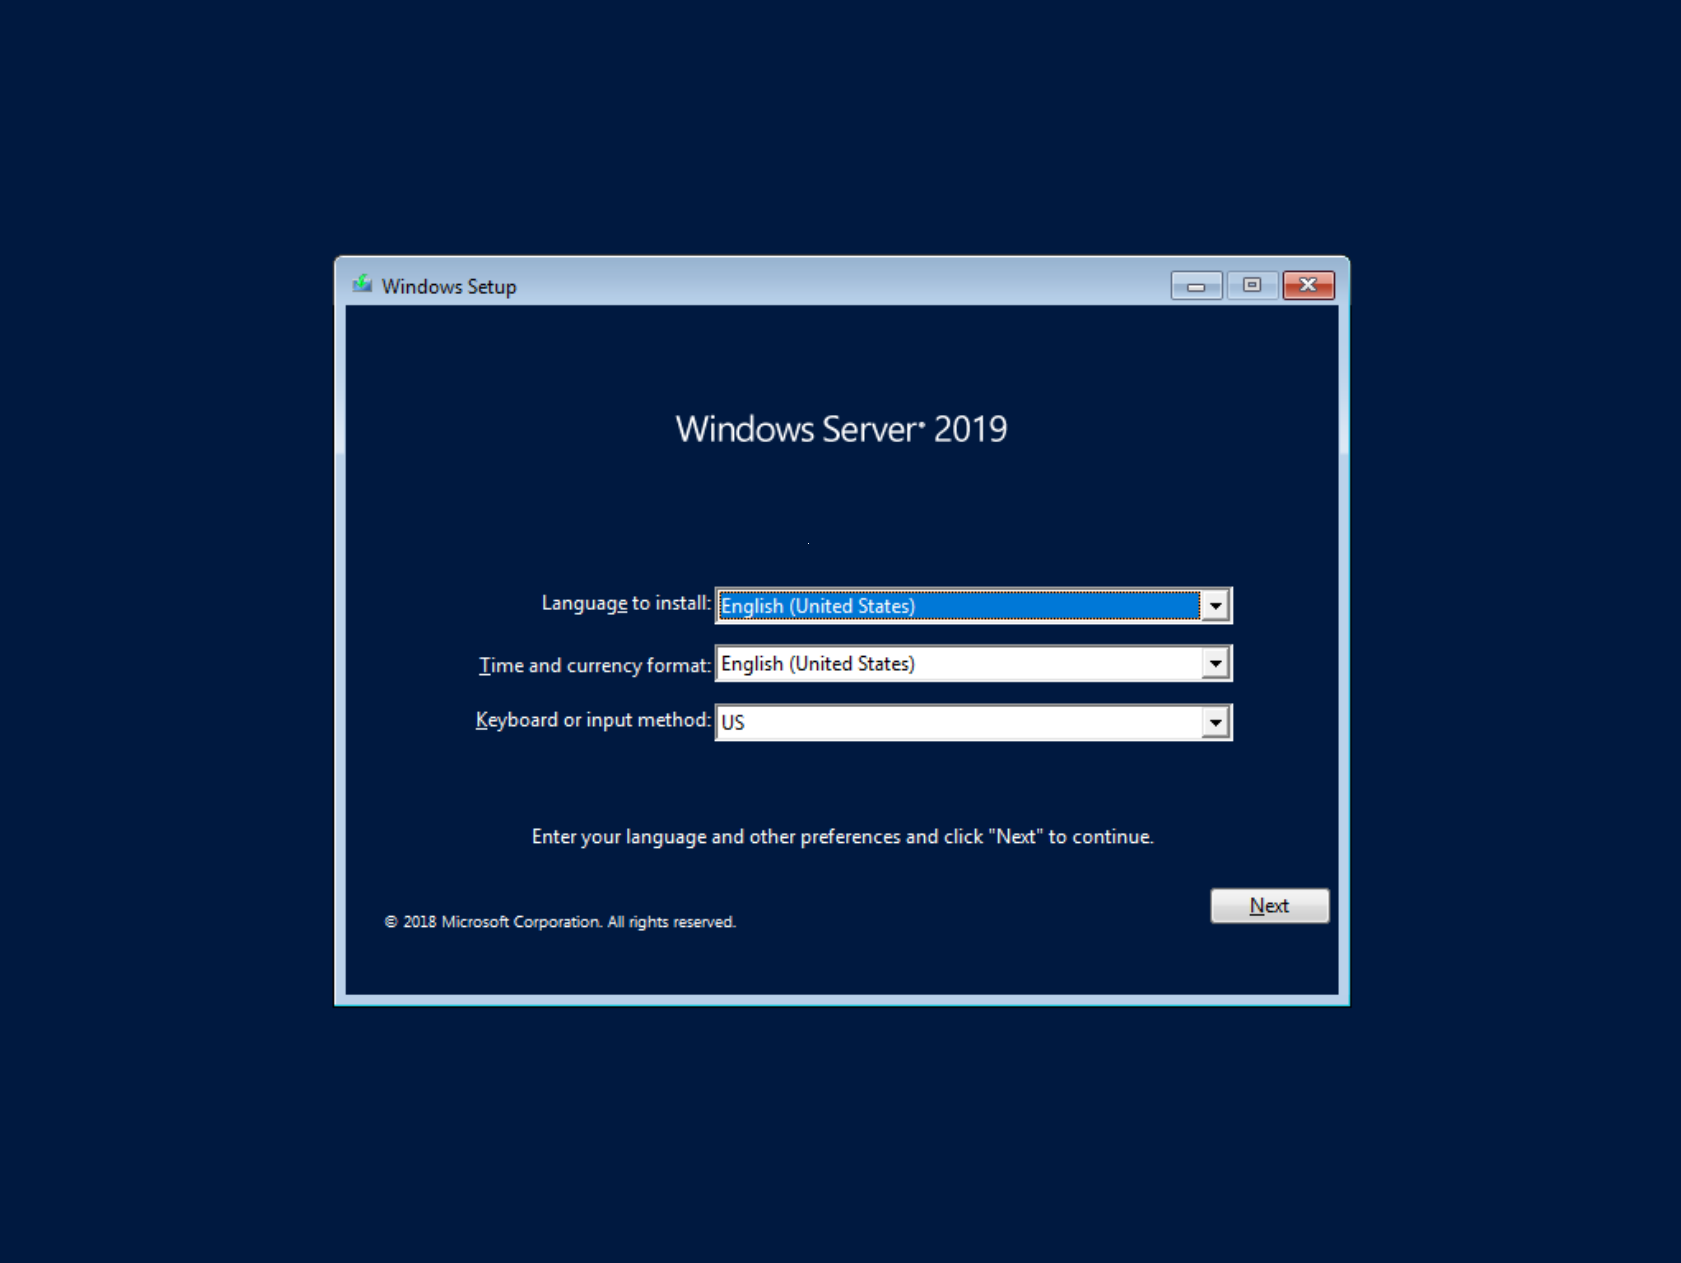
Wait until the Windows installation is loaded, then on the Windows Setup window click the Next button.
-
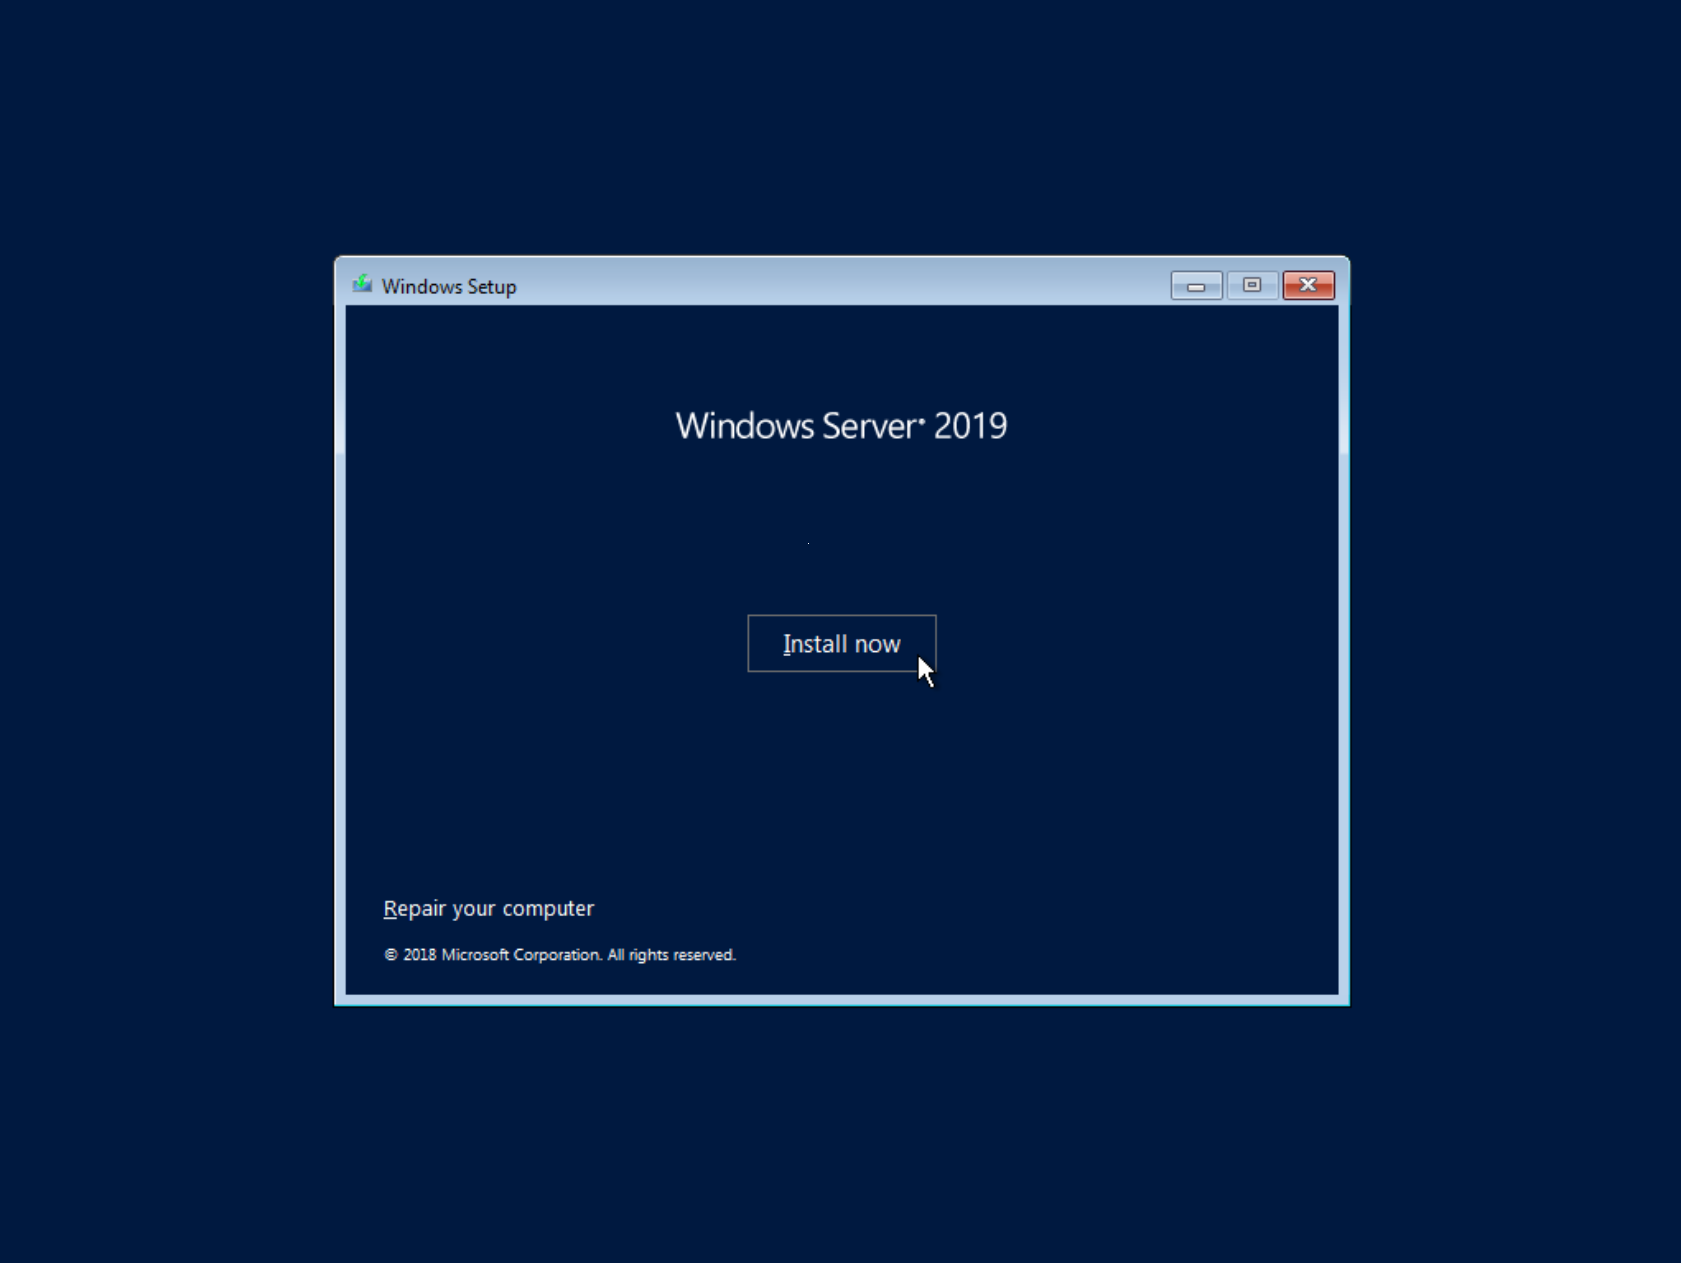
Click the Install now button in the center of the new window.
-
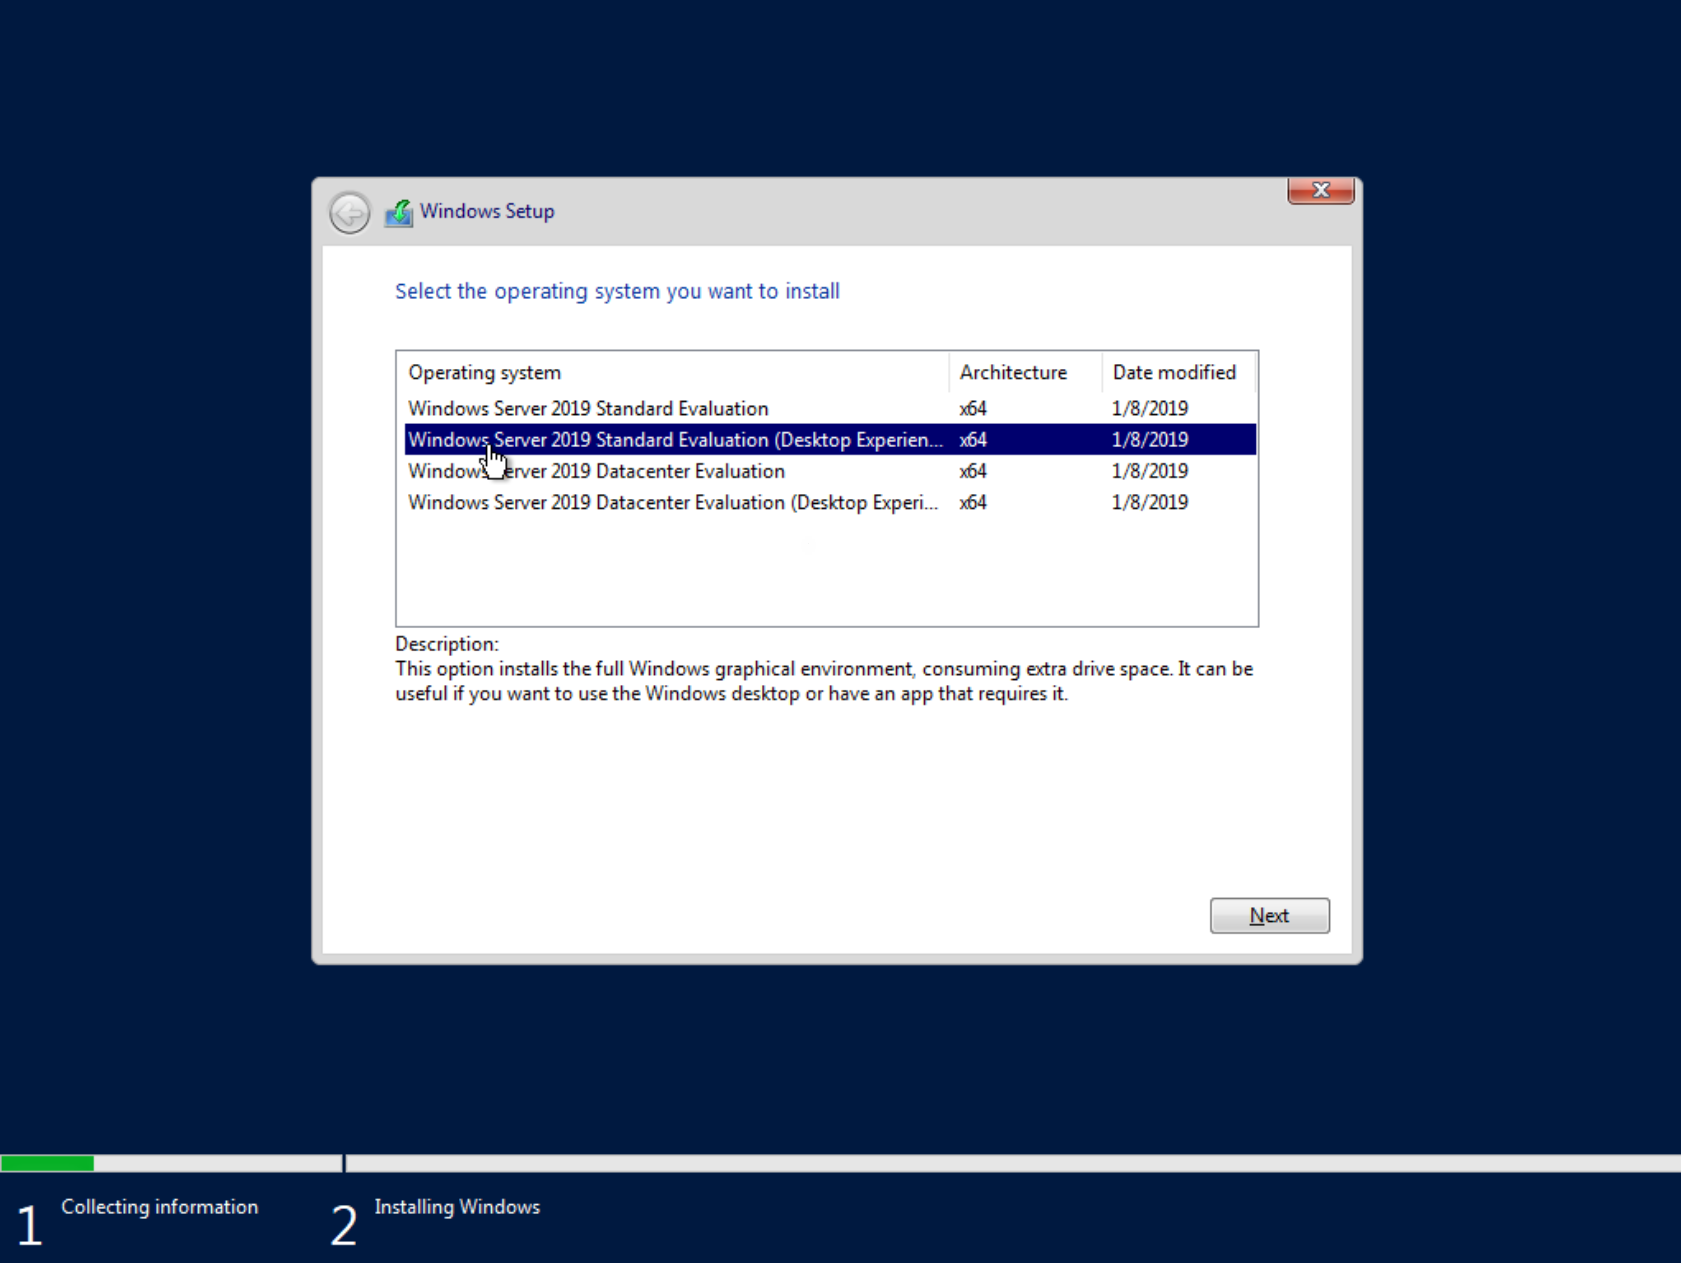
Select Windows Server 2019 Standard Evaluation (Desktop Experience) and click Next:
-
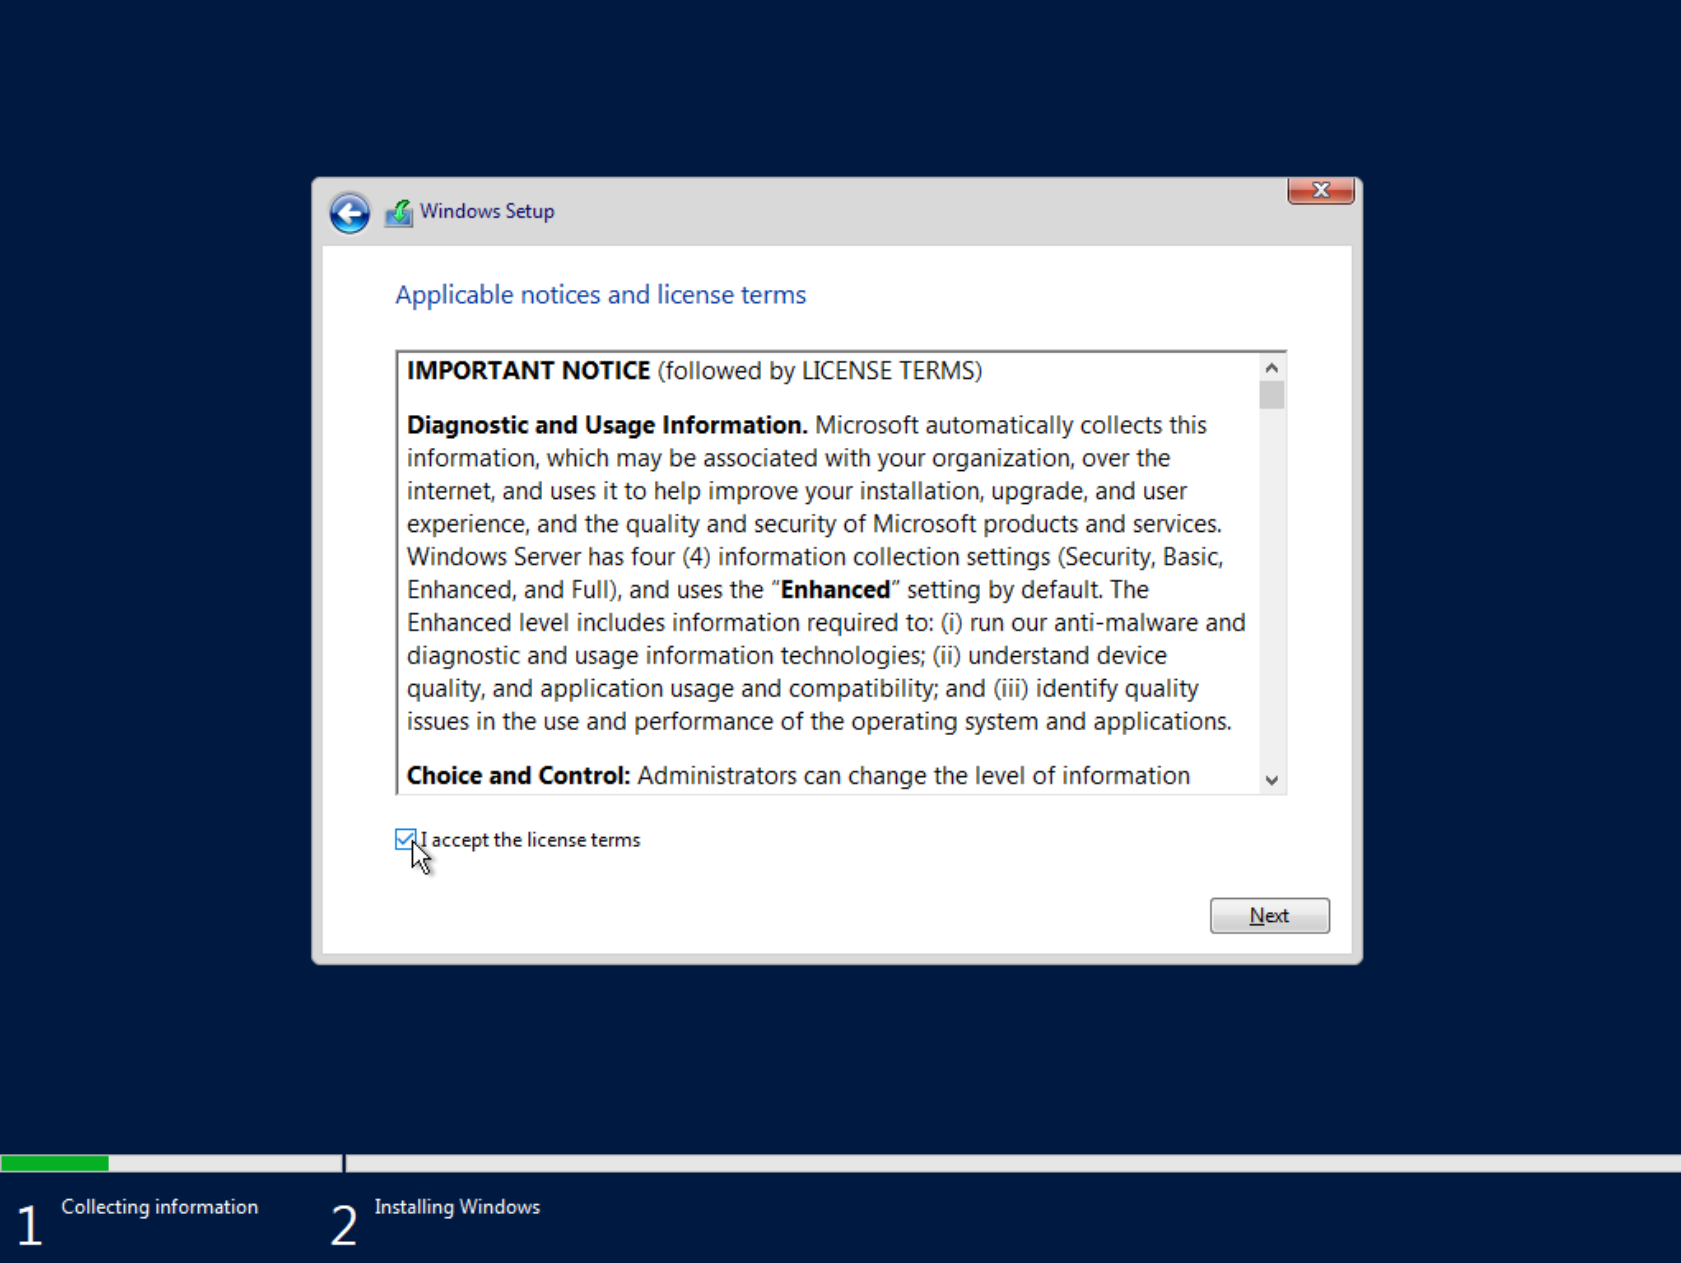
Select the checkbox to accept the license terms, then click the Next button.
-
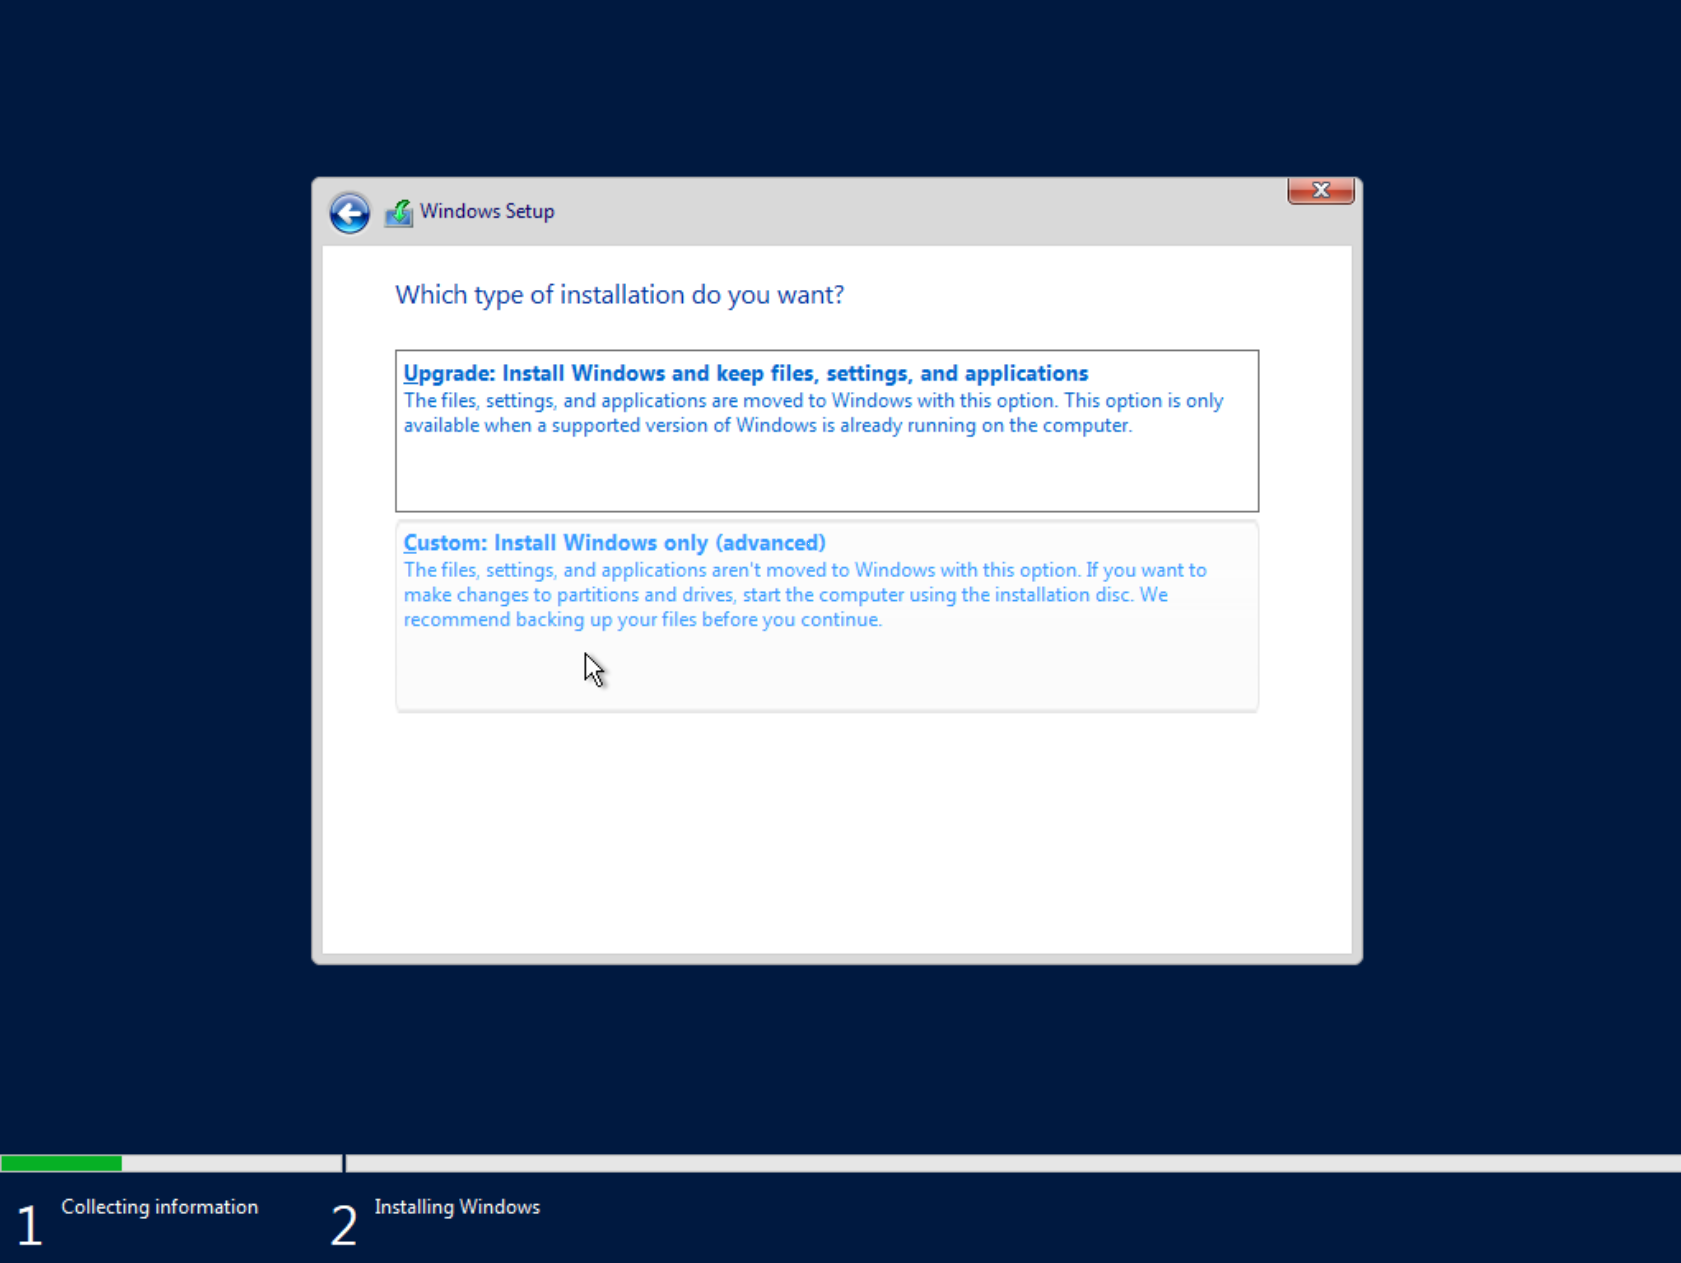
Select the Custom: Install Windows only (advanced) option:
-
On the new window, click Load Driver:
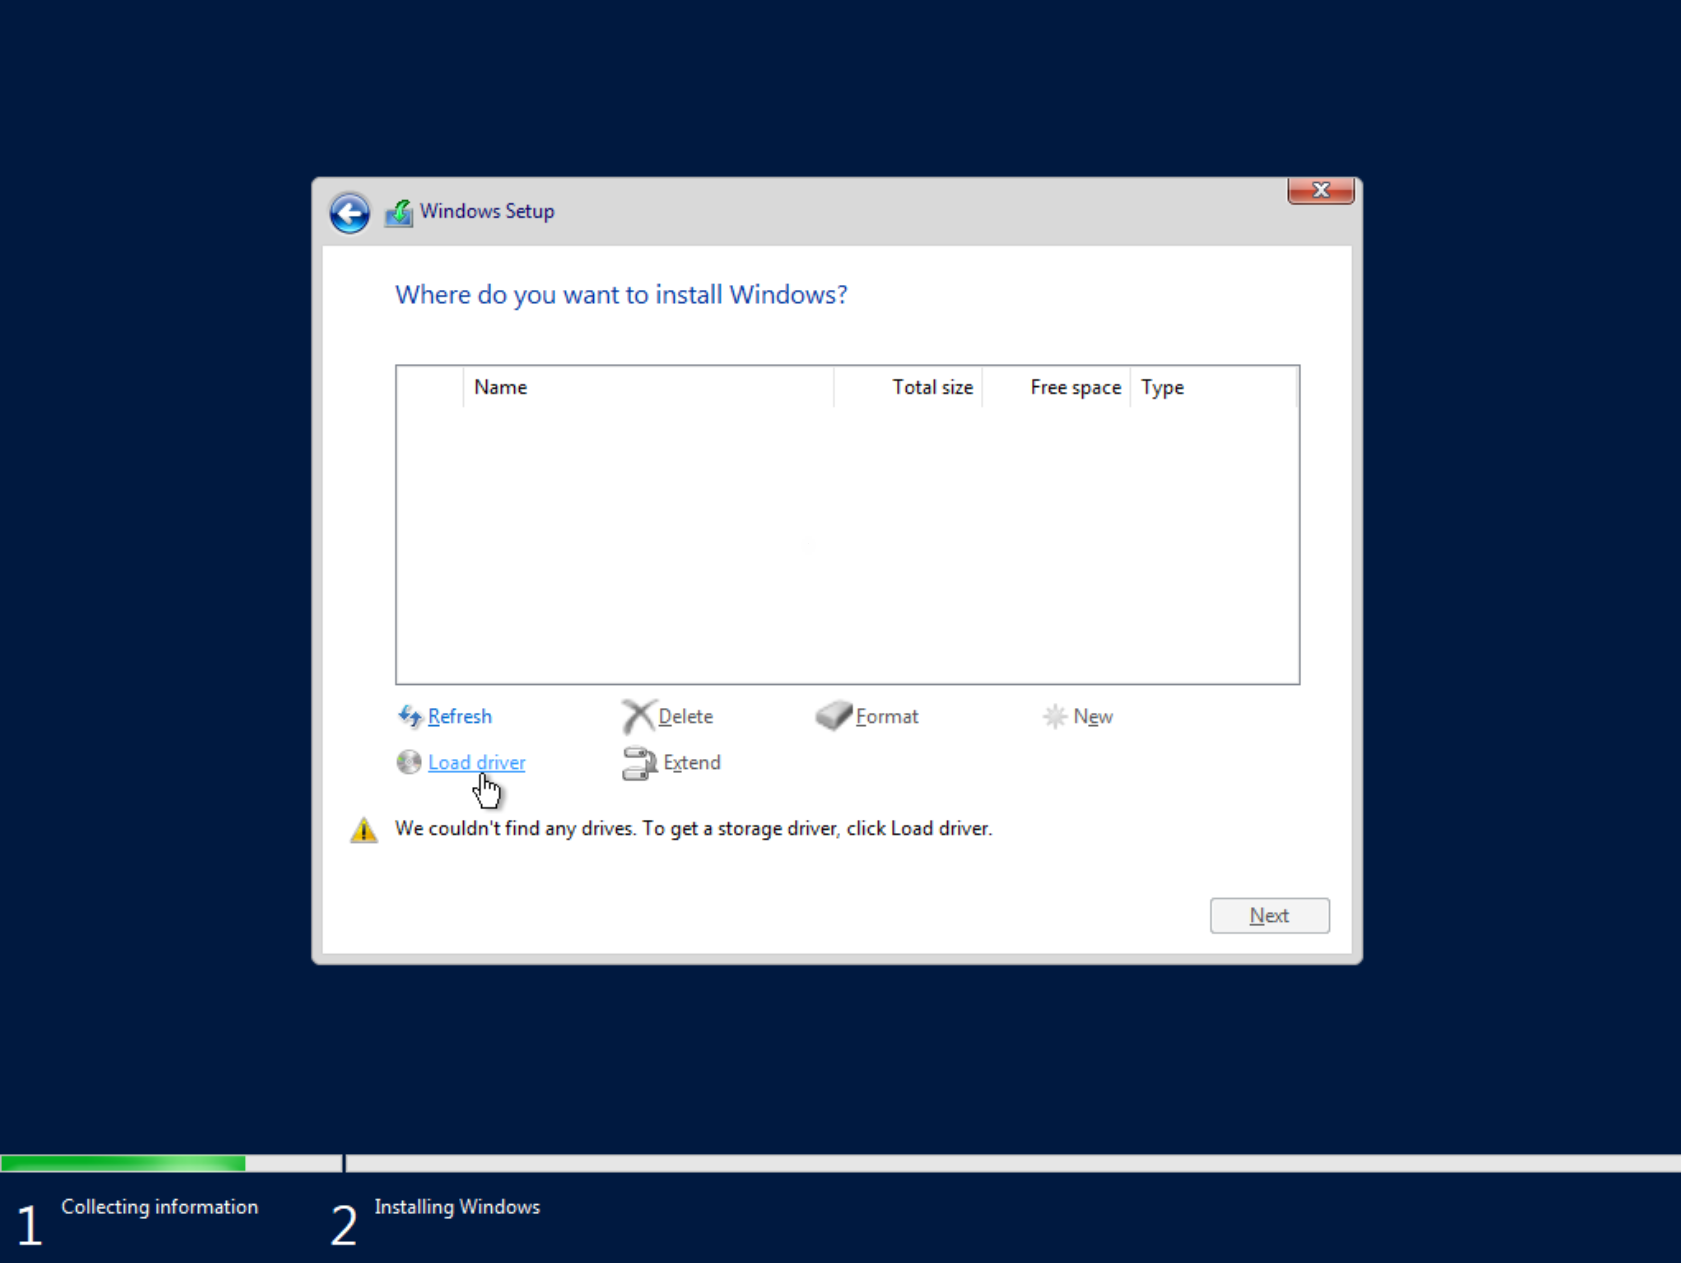
Load the virtio driver
-
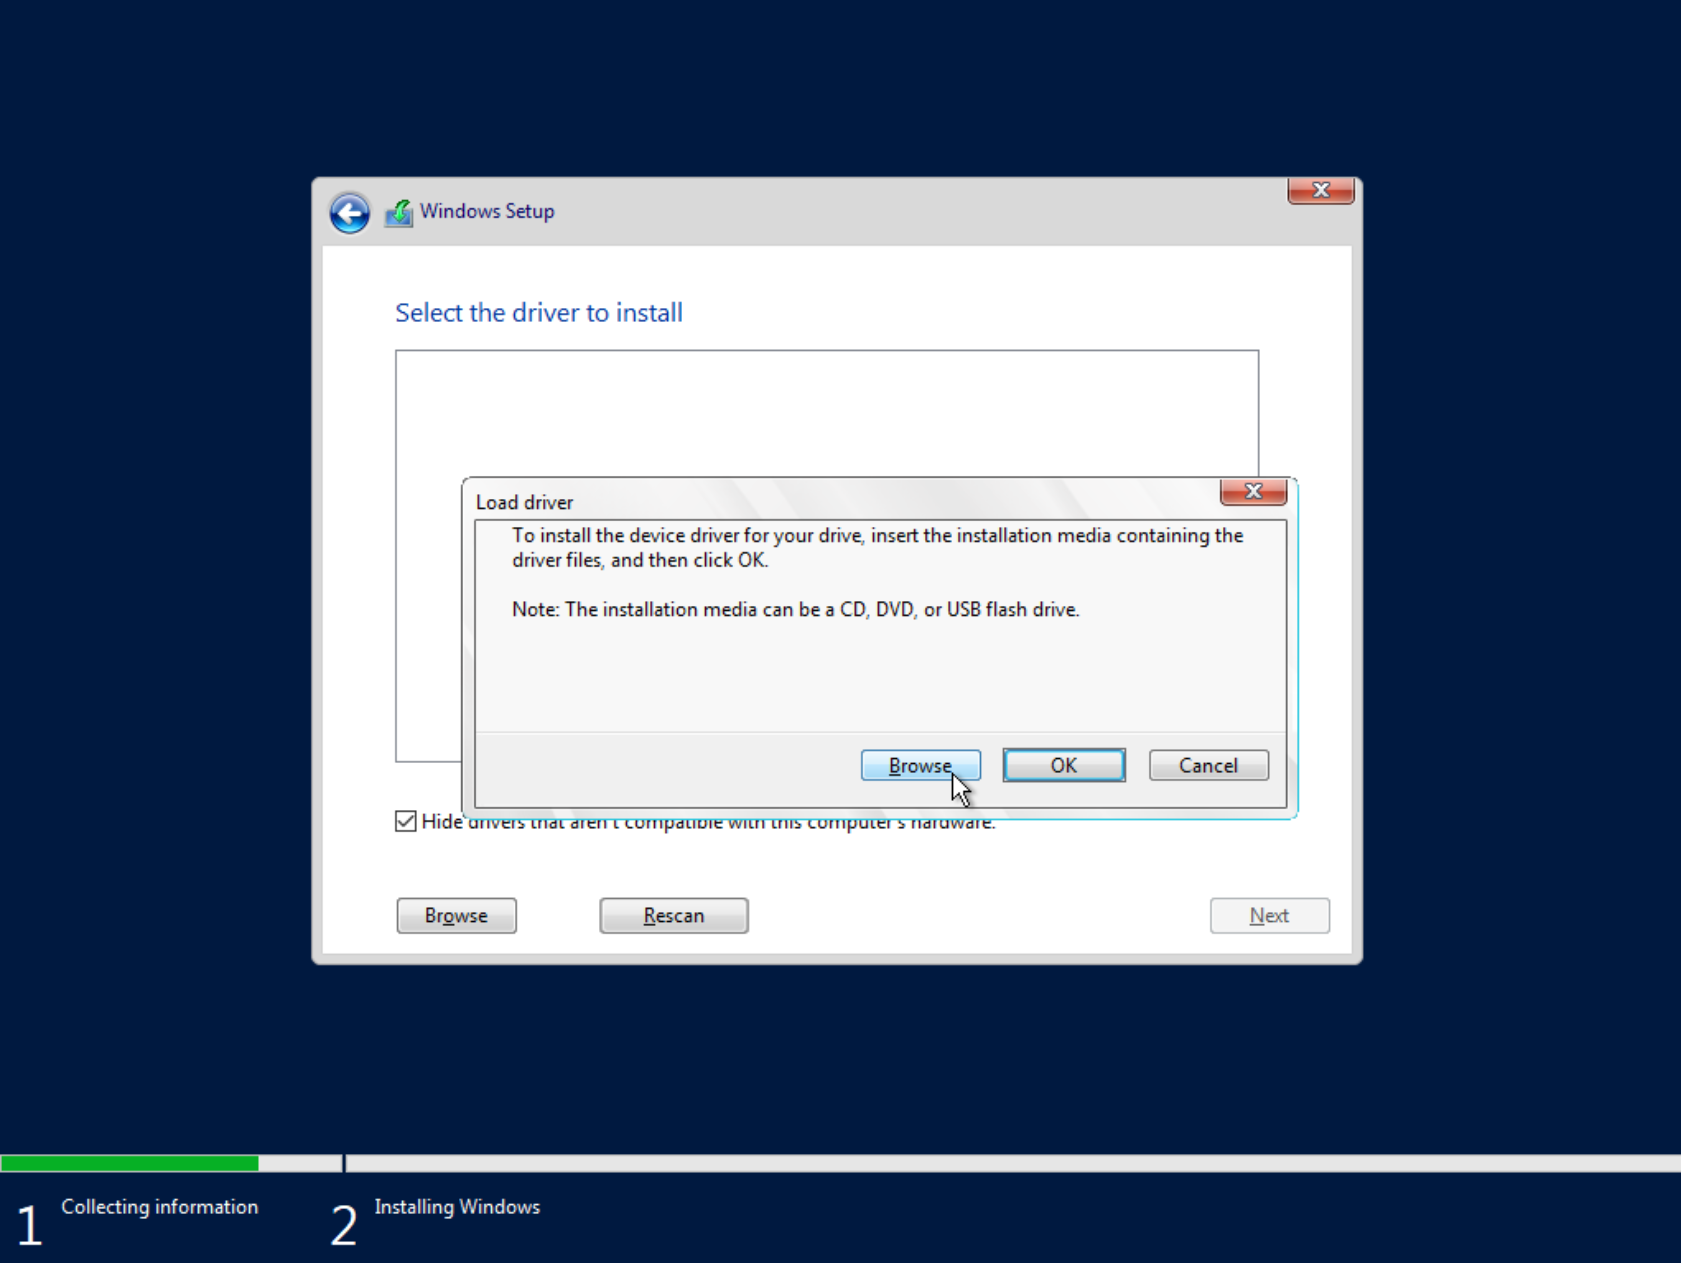
On the Load driver window, click the Browse button
-
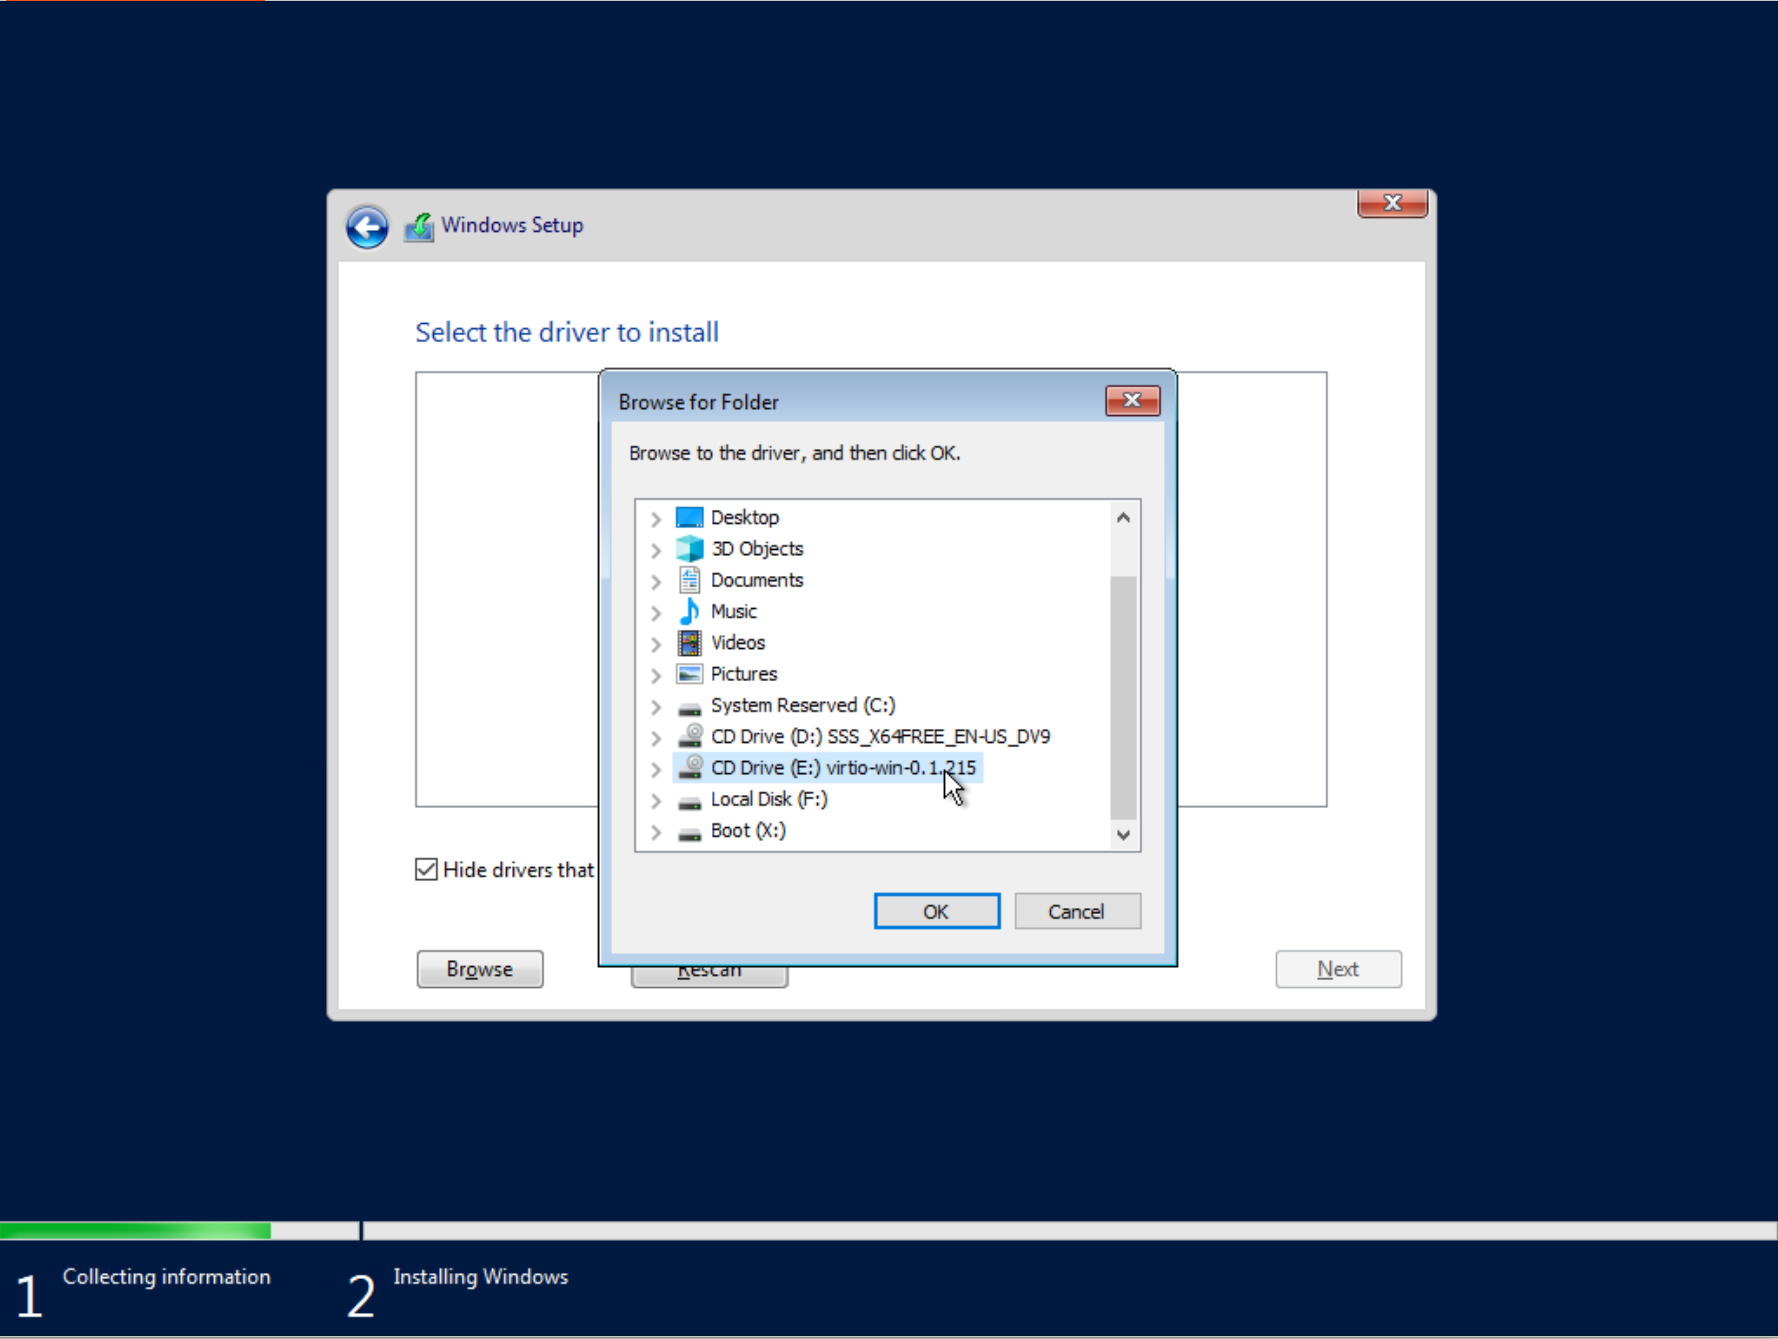
Select the drive labeled “virtio-win-0.1.215” to load the necessary Virtio drivers for the installation.
-
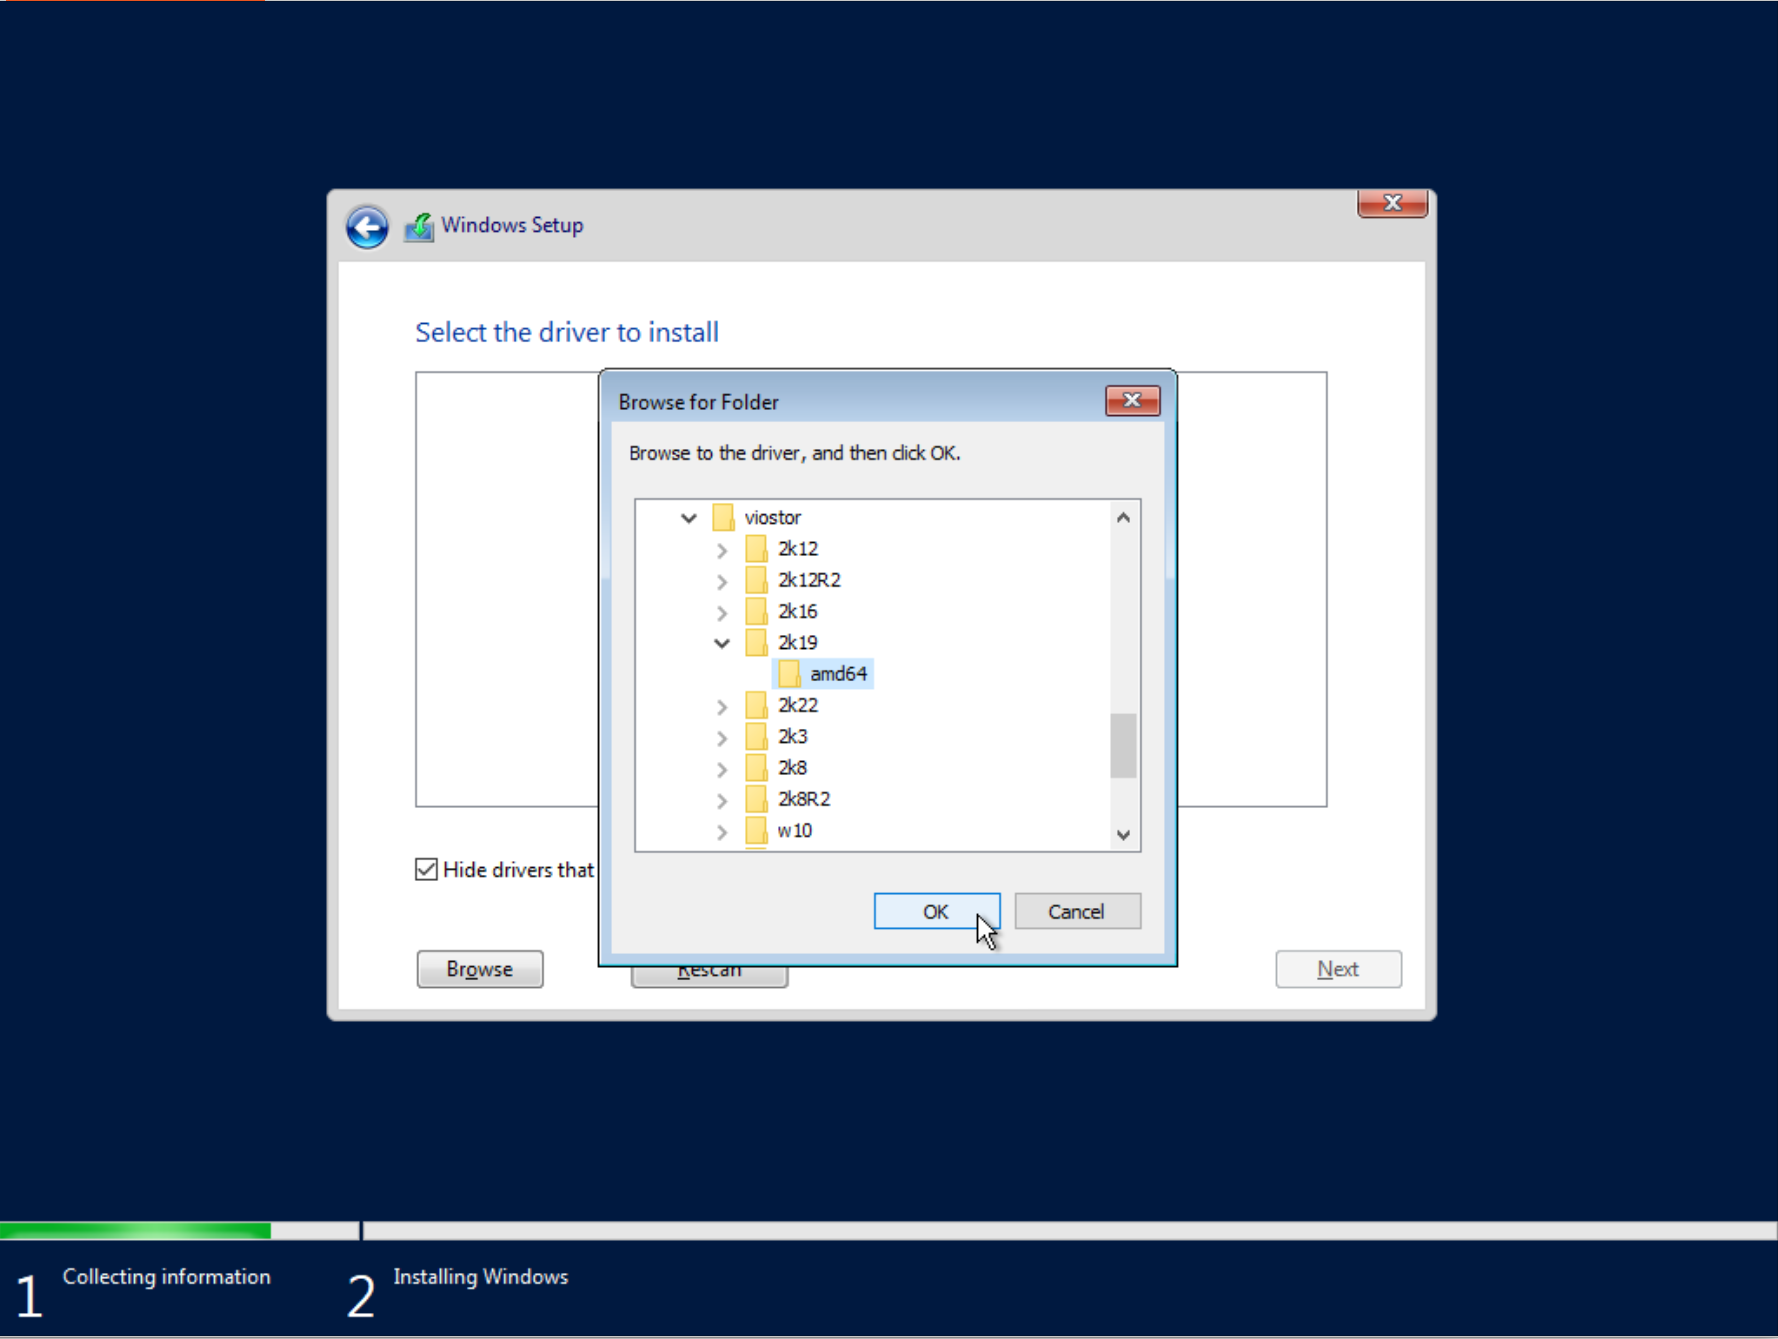
Select the viostor directory -> 2k19 -> amd64, and click OK:
-
When the driver is loaded, click the Next button:
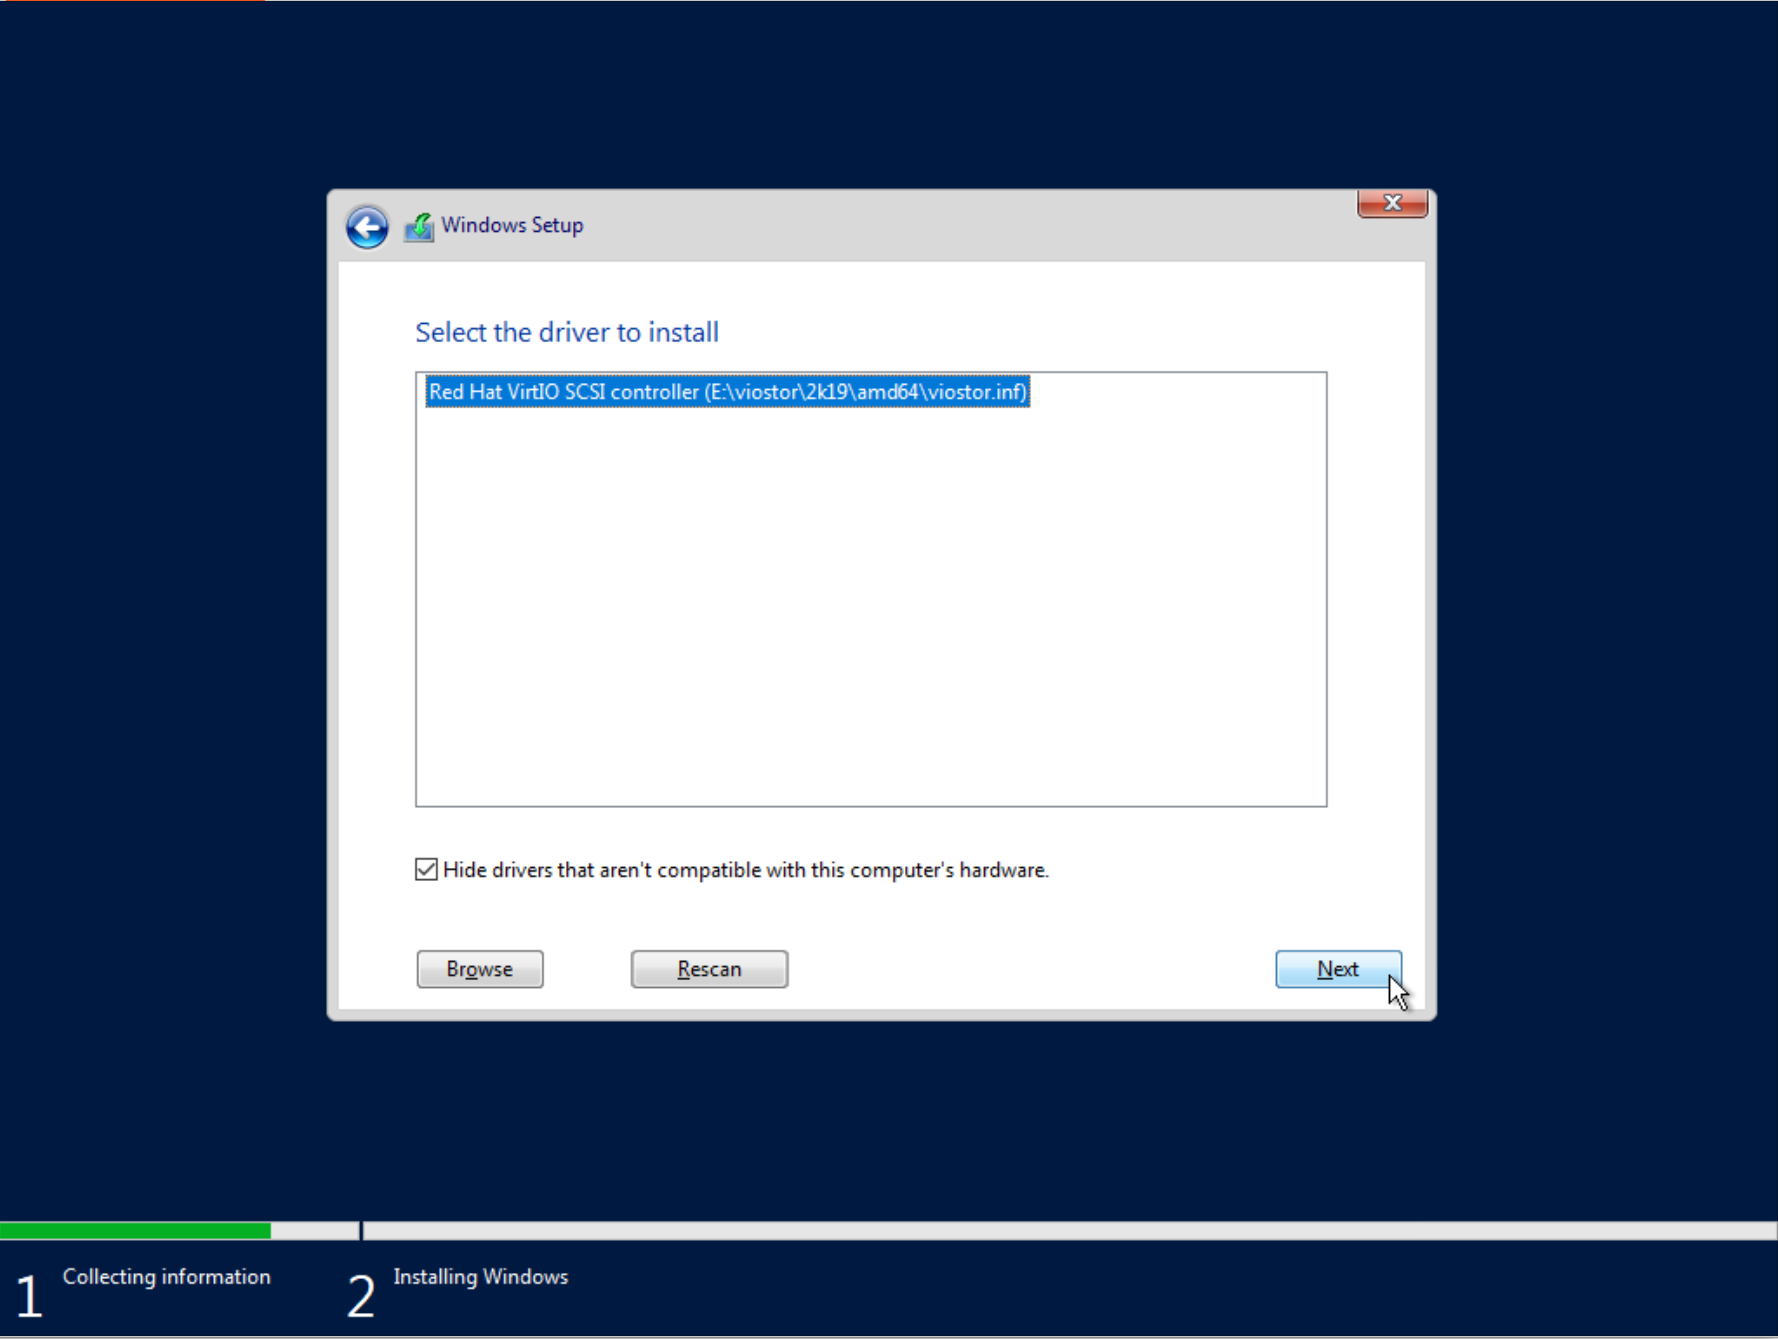
Open command prompt via Windows setup
-
When drives are displayed, do not click the next button! Otherwise, you start the system reinstall process and wipe all the data!
Press
SHIFT+F10on your keyboard to open the command terminal. The console window opens: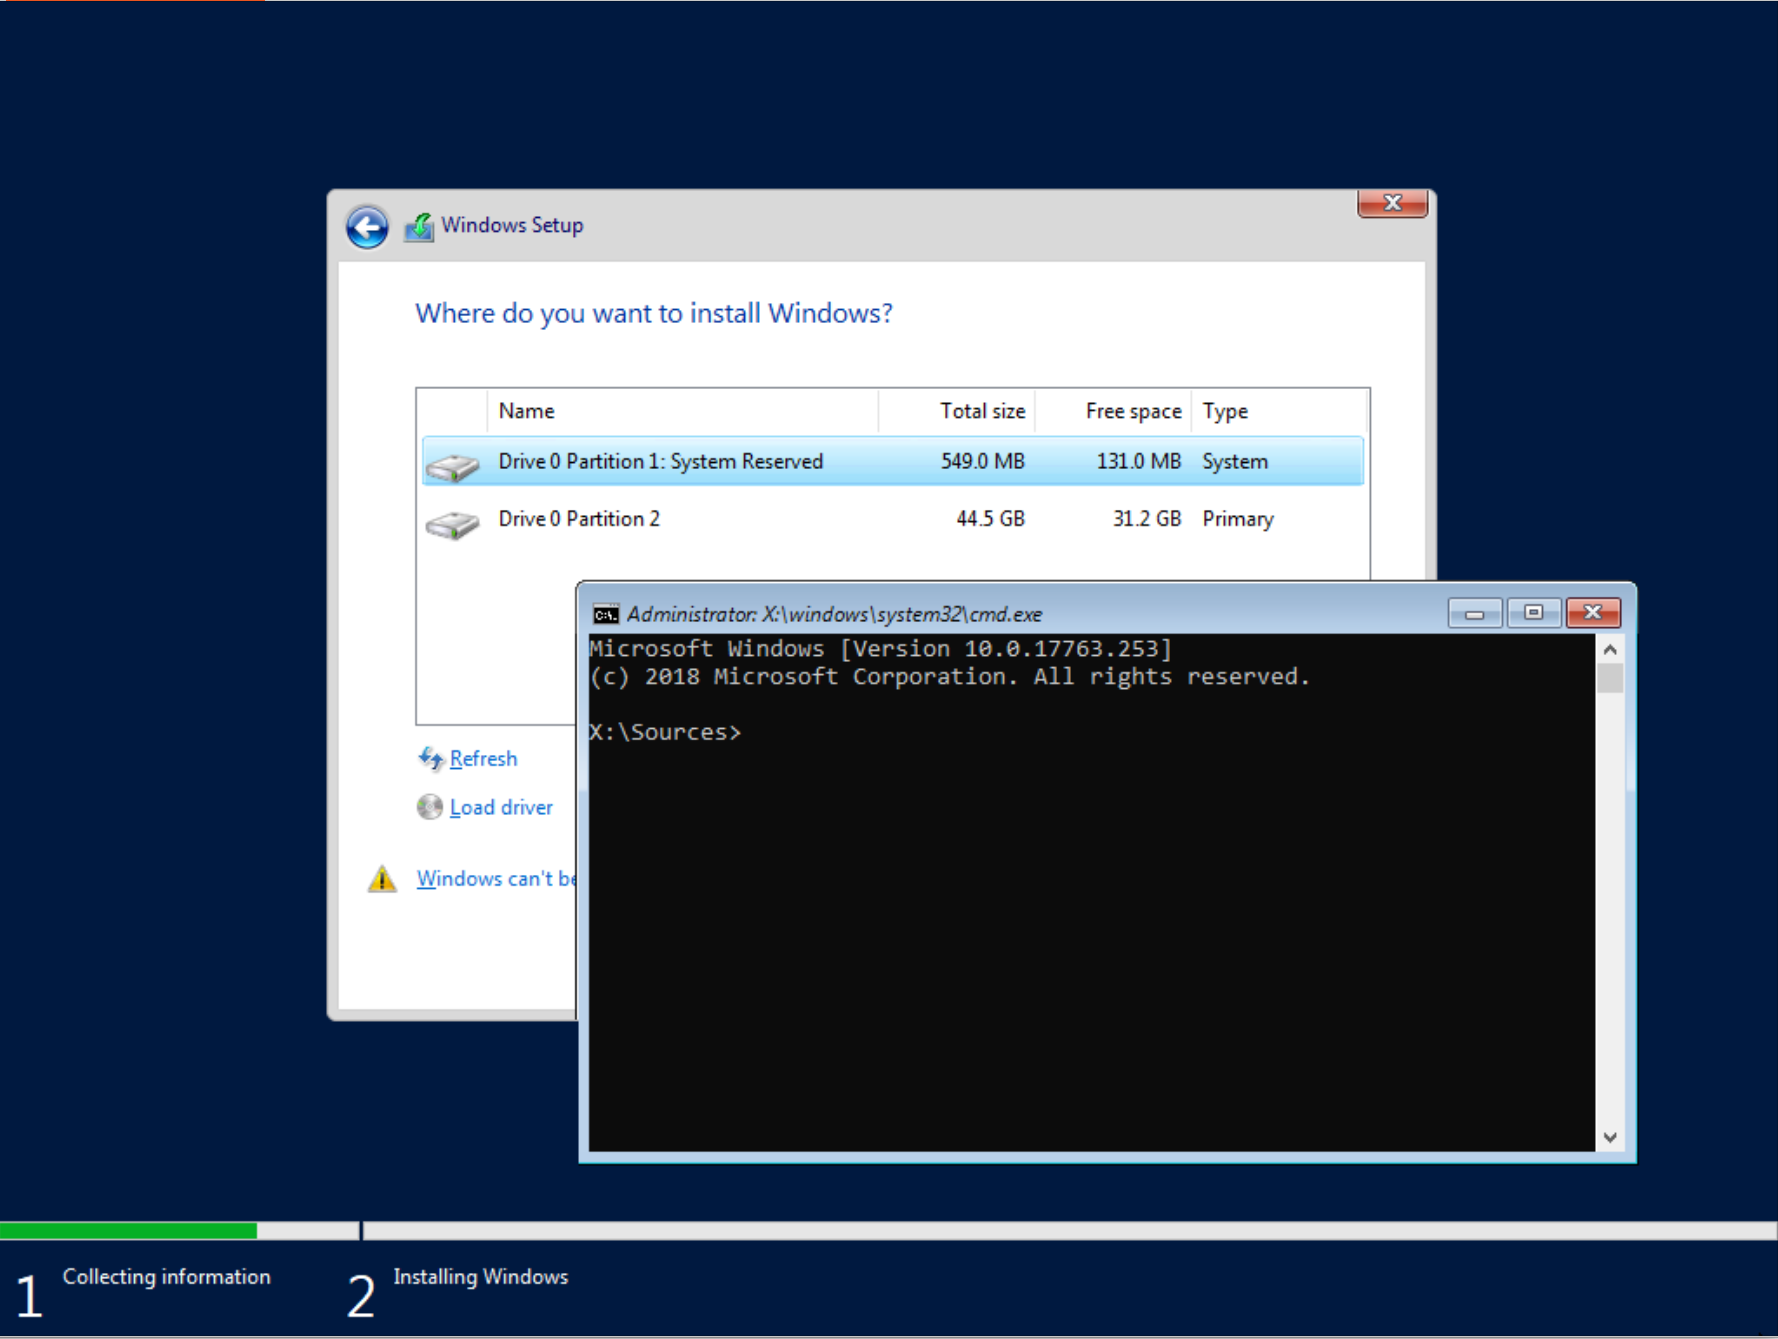
-
Enter the
diskpartcommand in the console: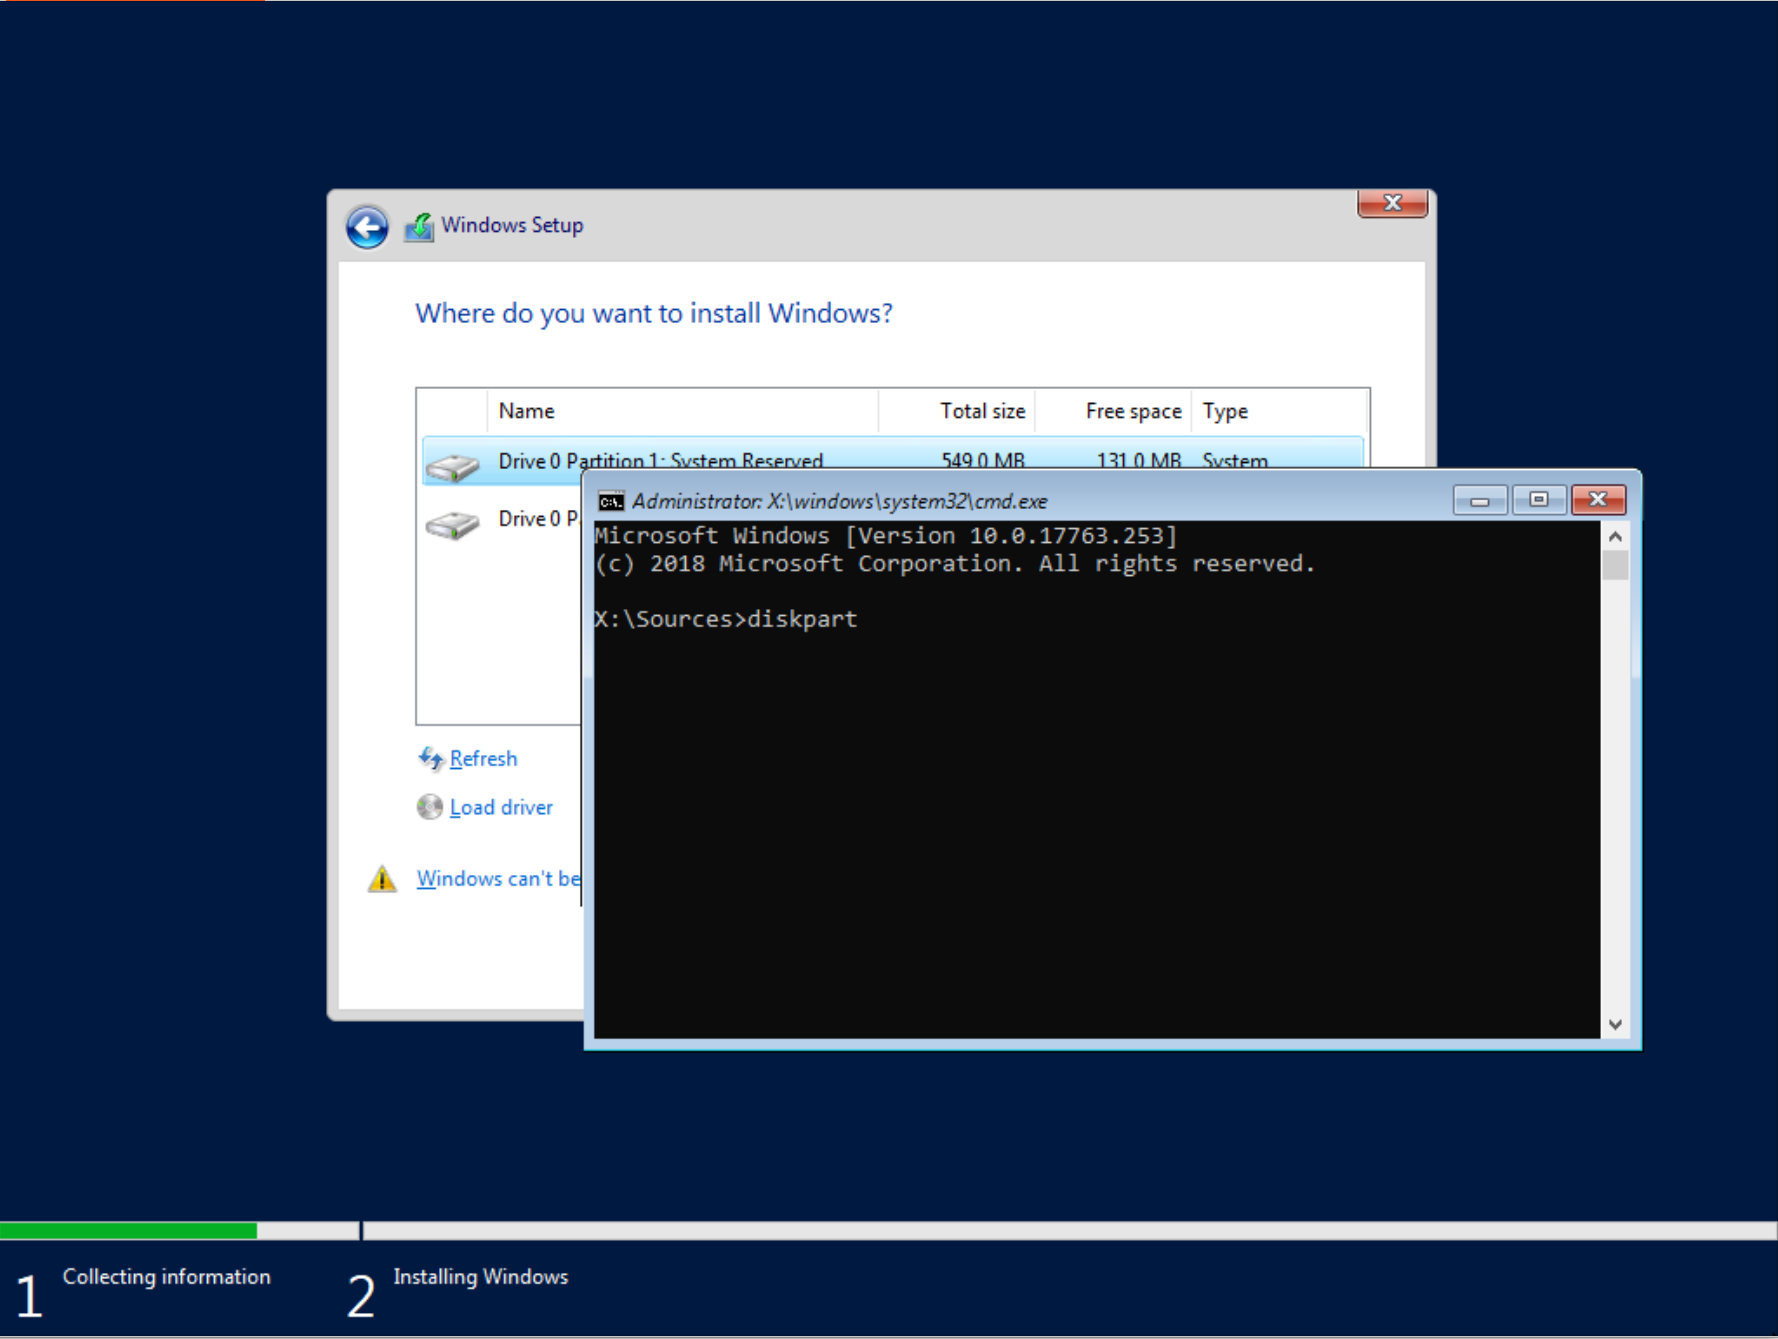
-
Enter the
list volumecommand. The screenshot shows Windows on F:, but drive letters in the recovery environment can differ from normal Windows. Typeexitto leave DiskPart, then check candidate volumes with commands such asdir F:\Windows\System32. Confirm the Windows directory before continuing; partition size alone does not identify it.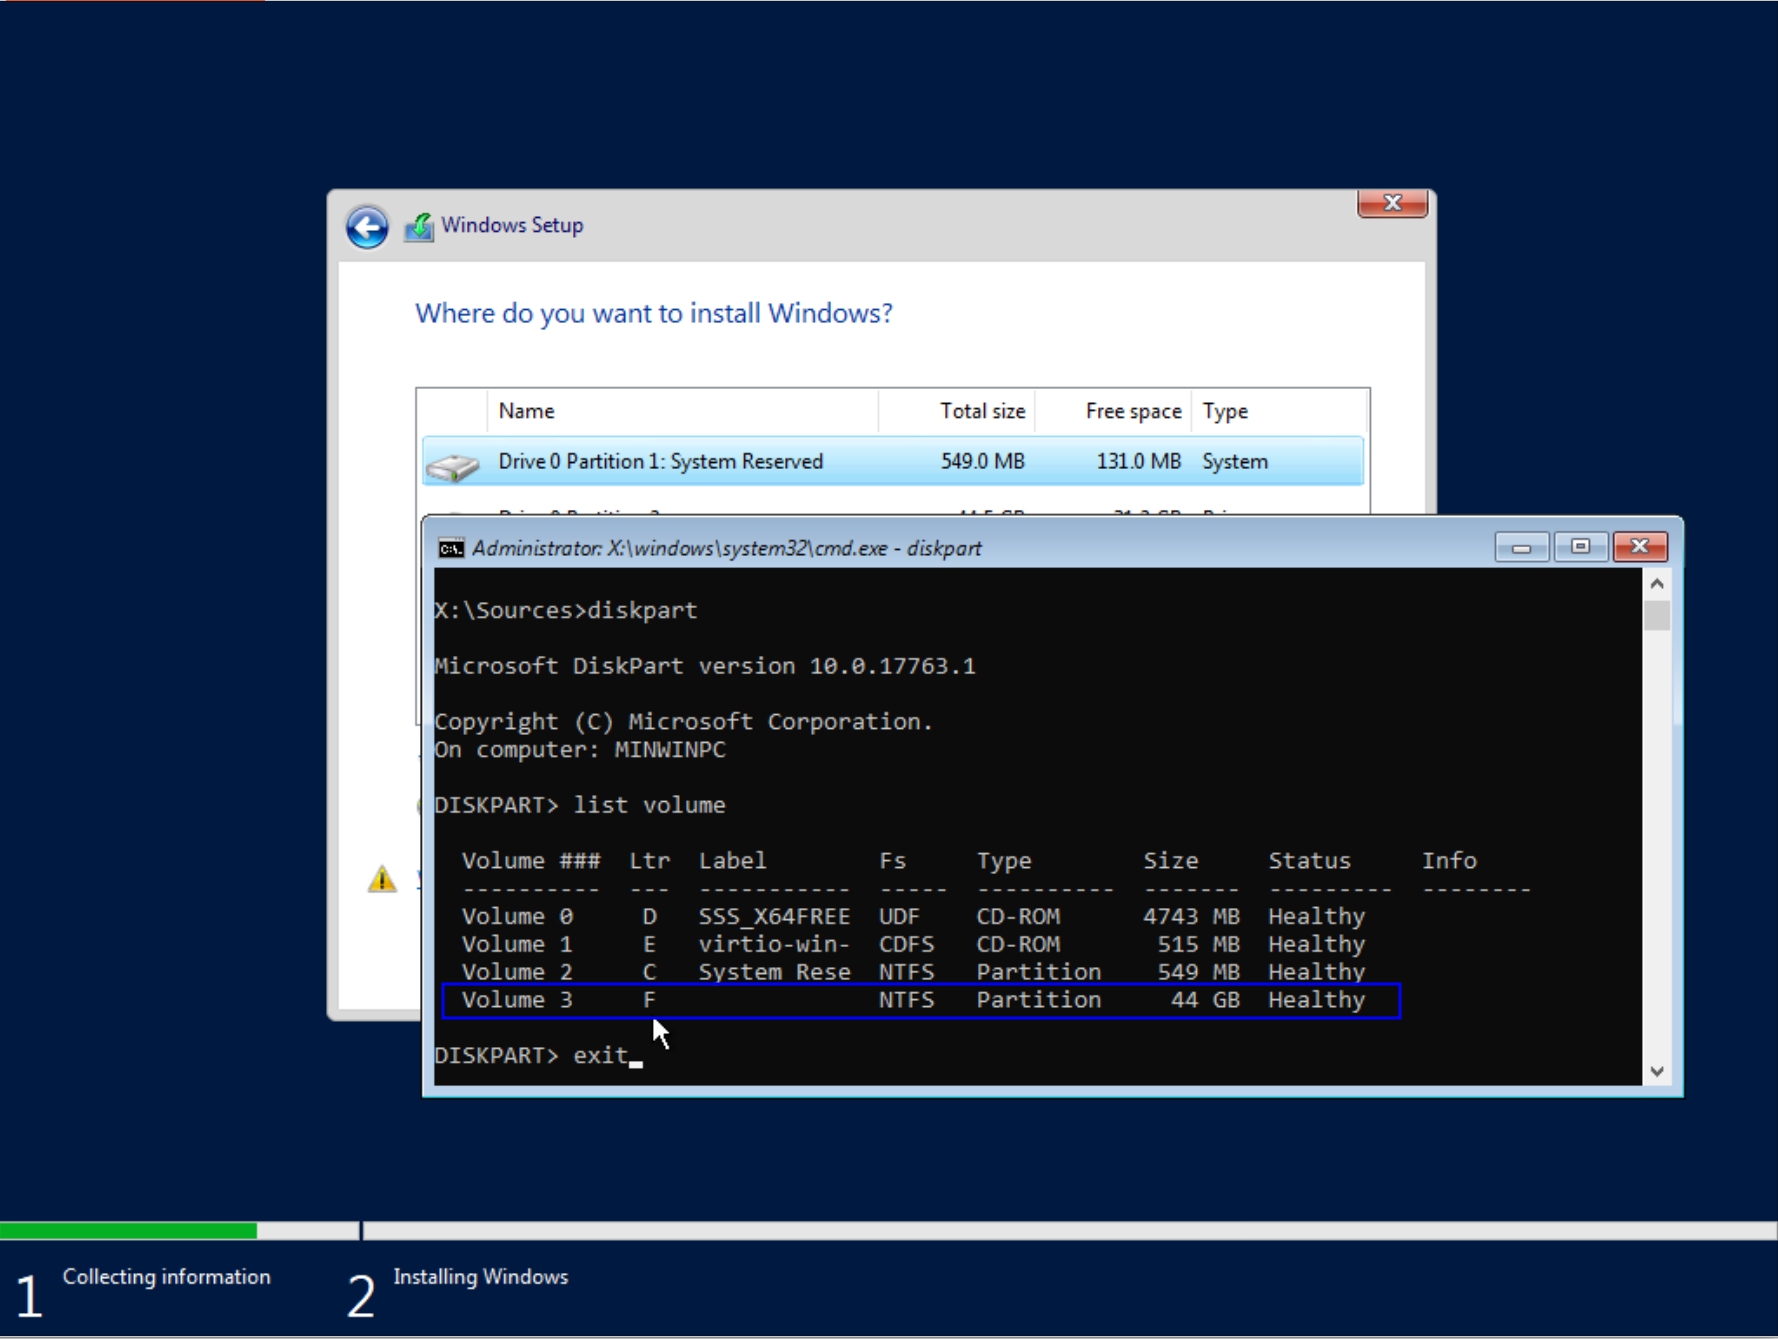
-
Enter the command
F:to switch to disk F (where the Windows OS is located)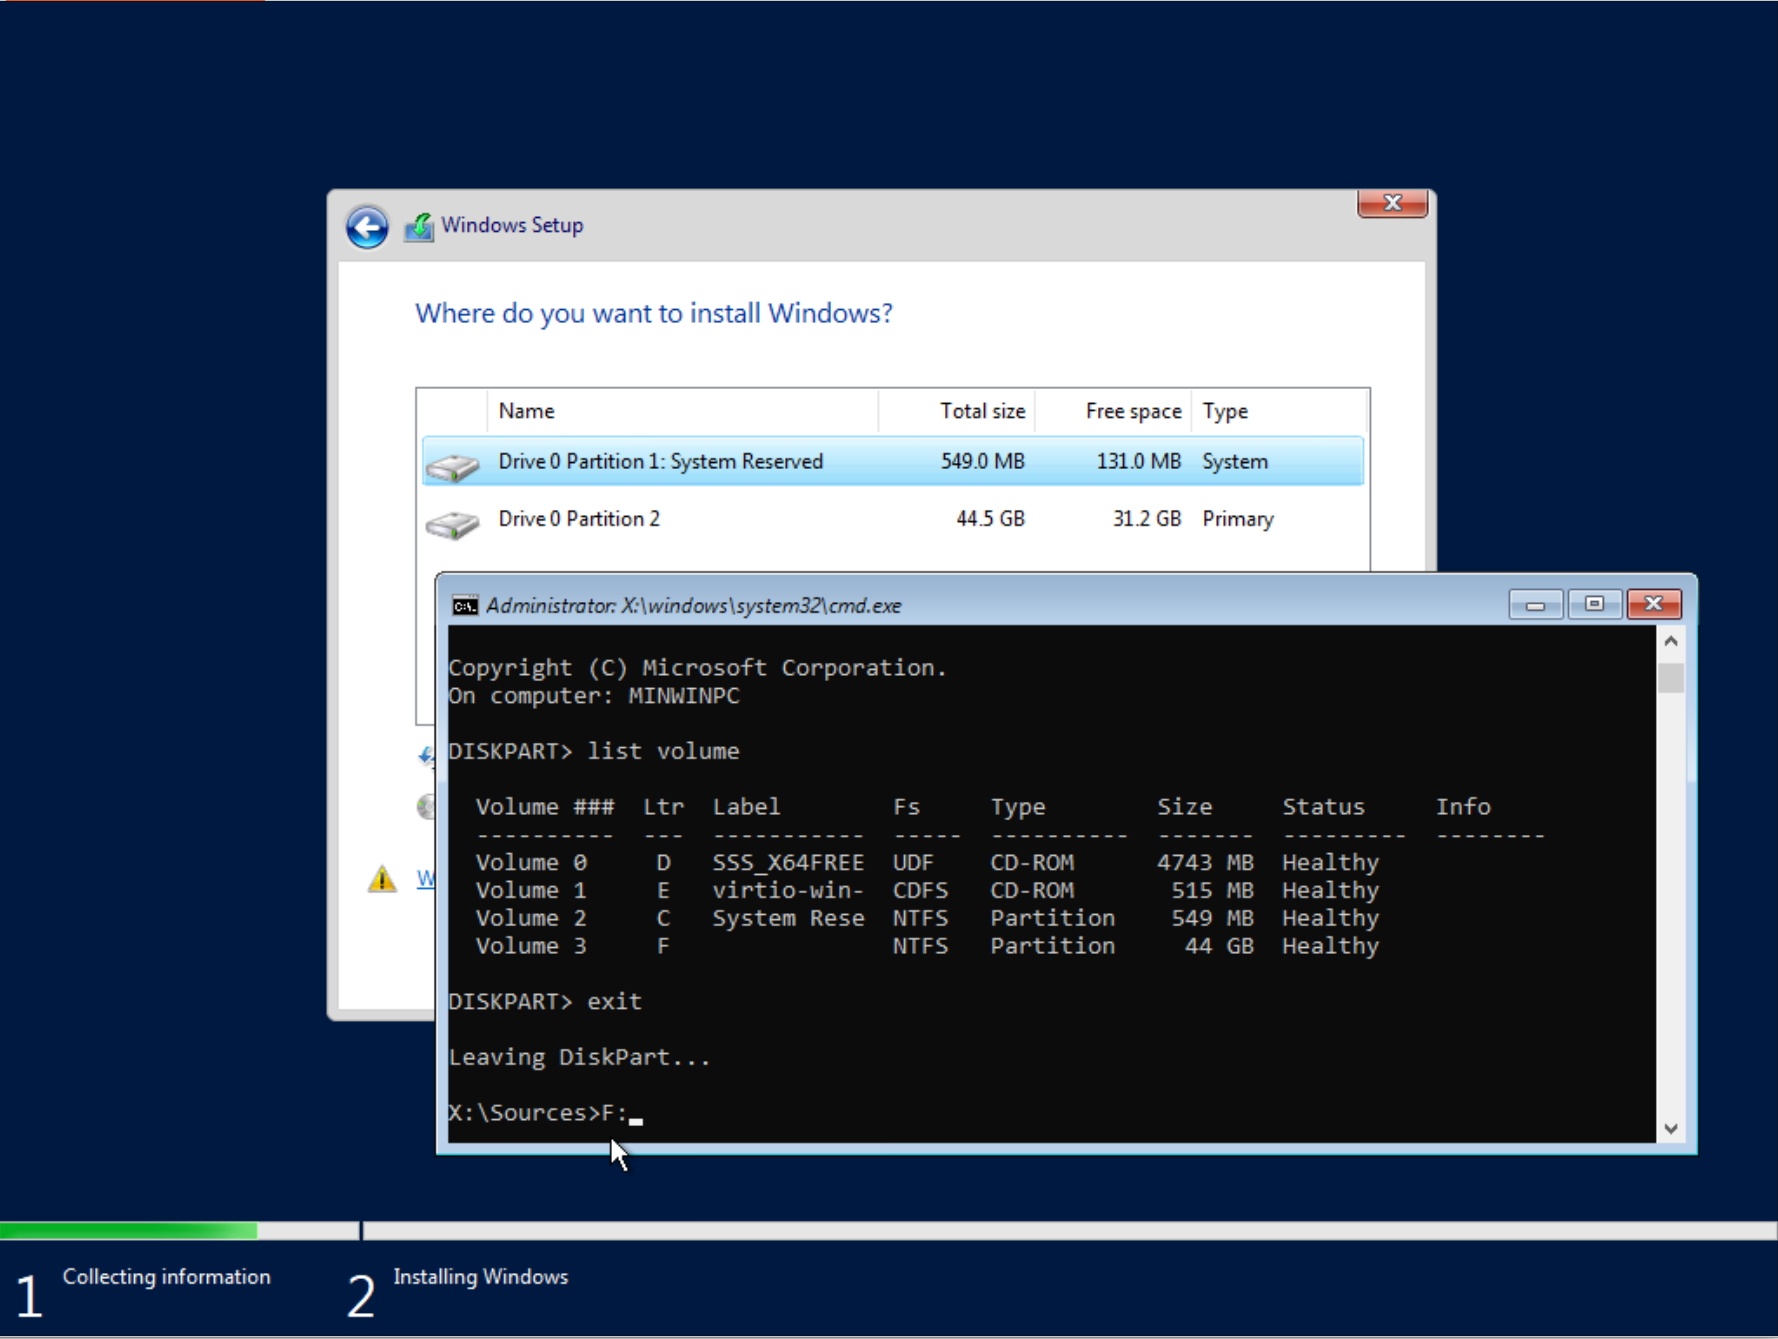
-
Navigate to the directory by typing
cd Windows/System32, then make a backup of Utilman.exe by enteringmove Utilman.exe Utilman.exe.bakand press Enter.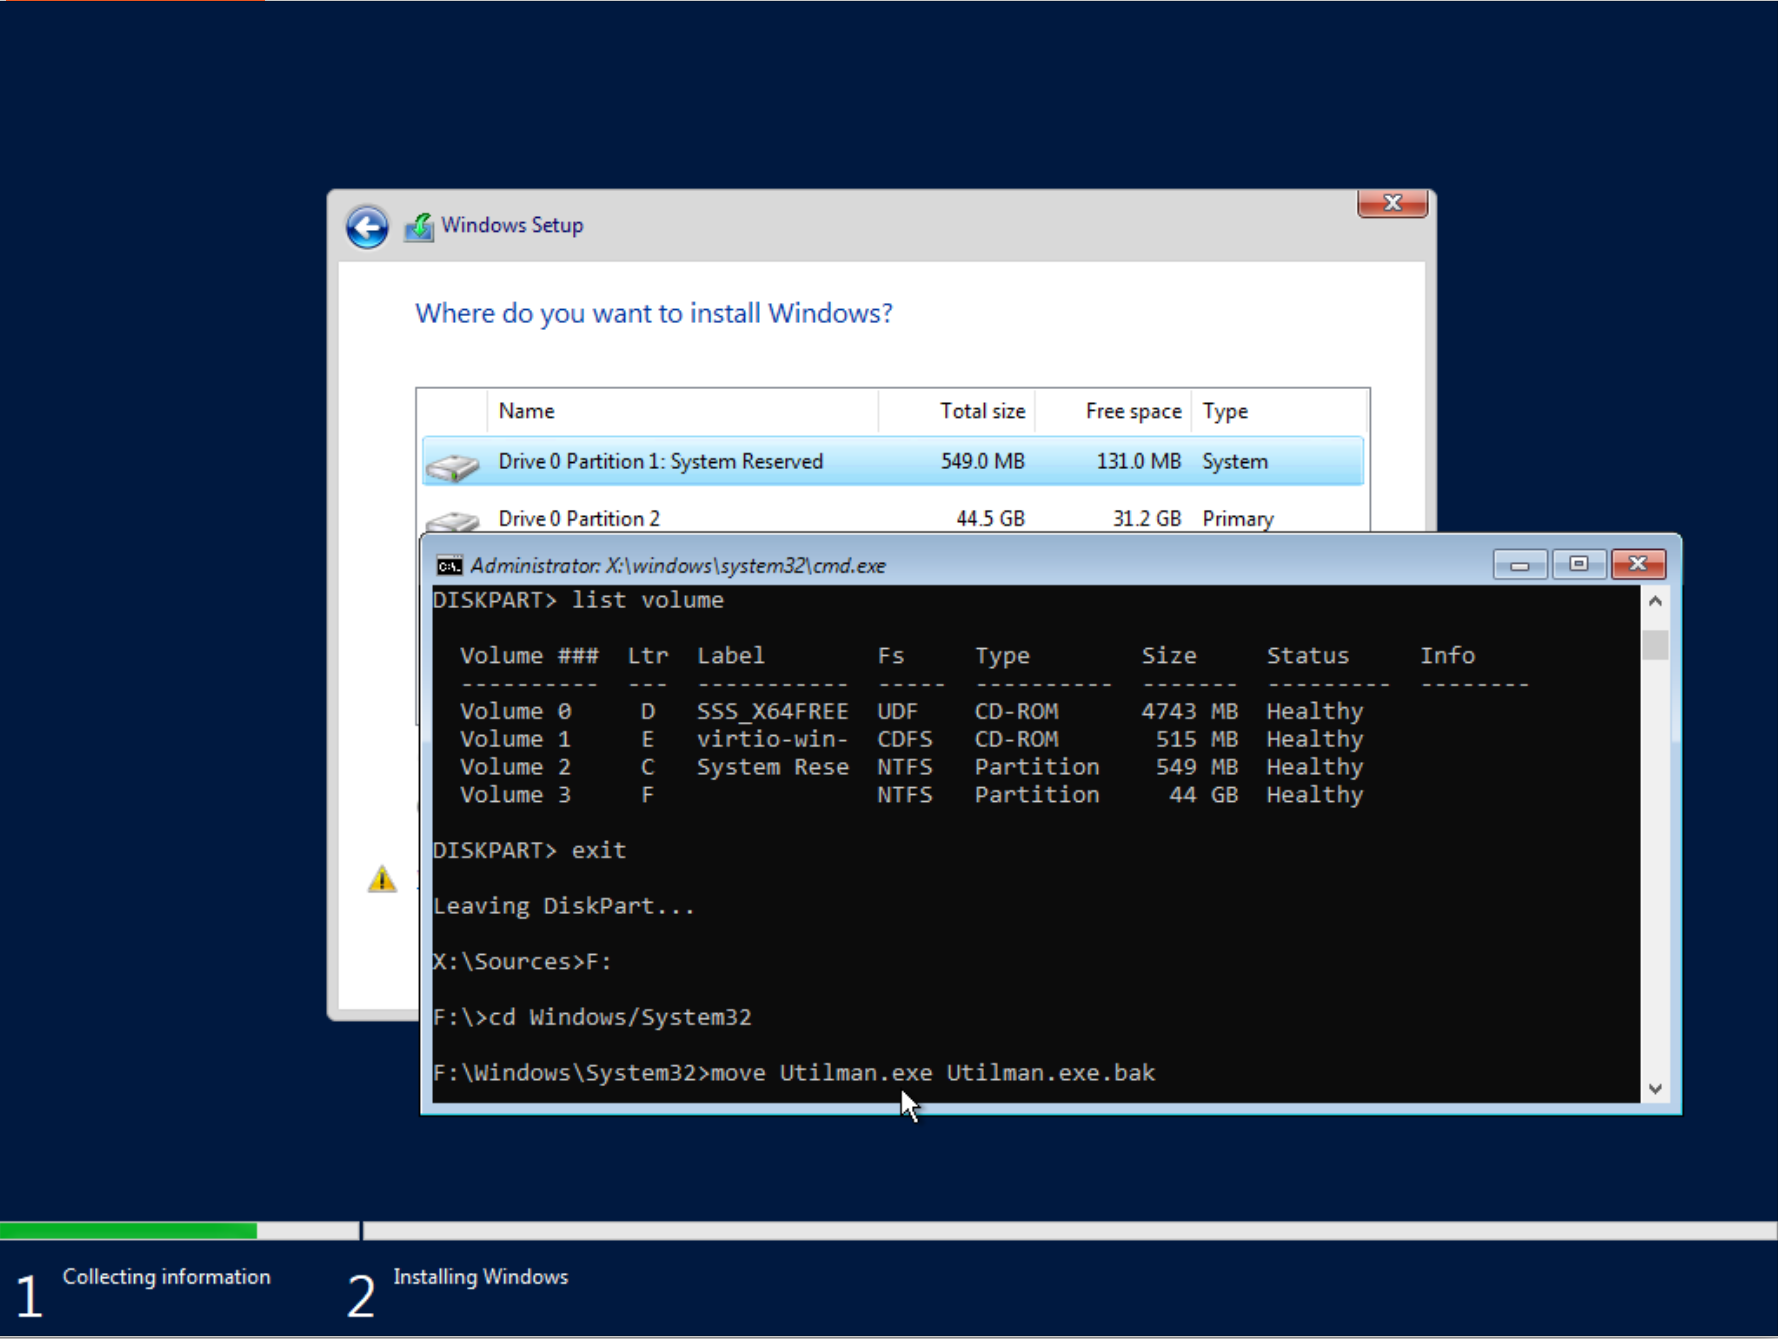
-
Run the command -
copy cmd.exe Utilman.exe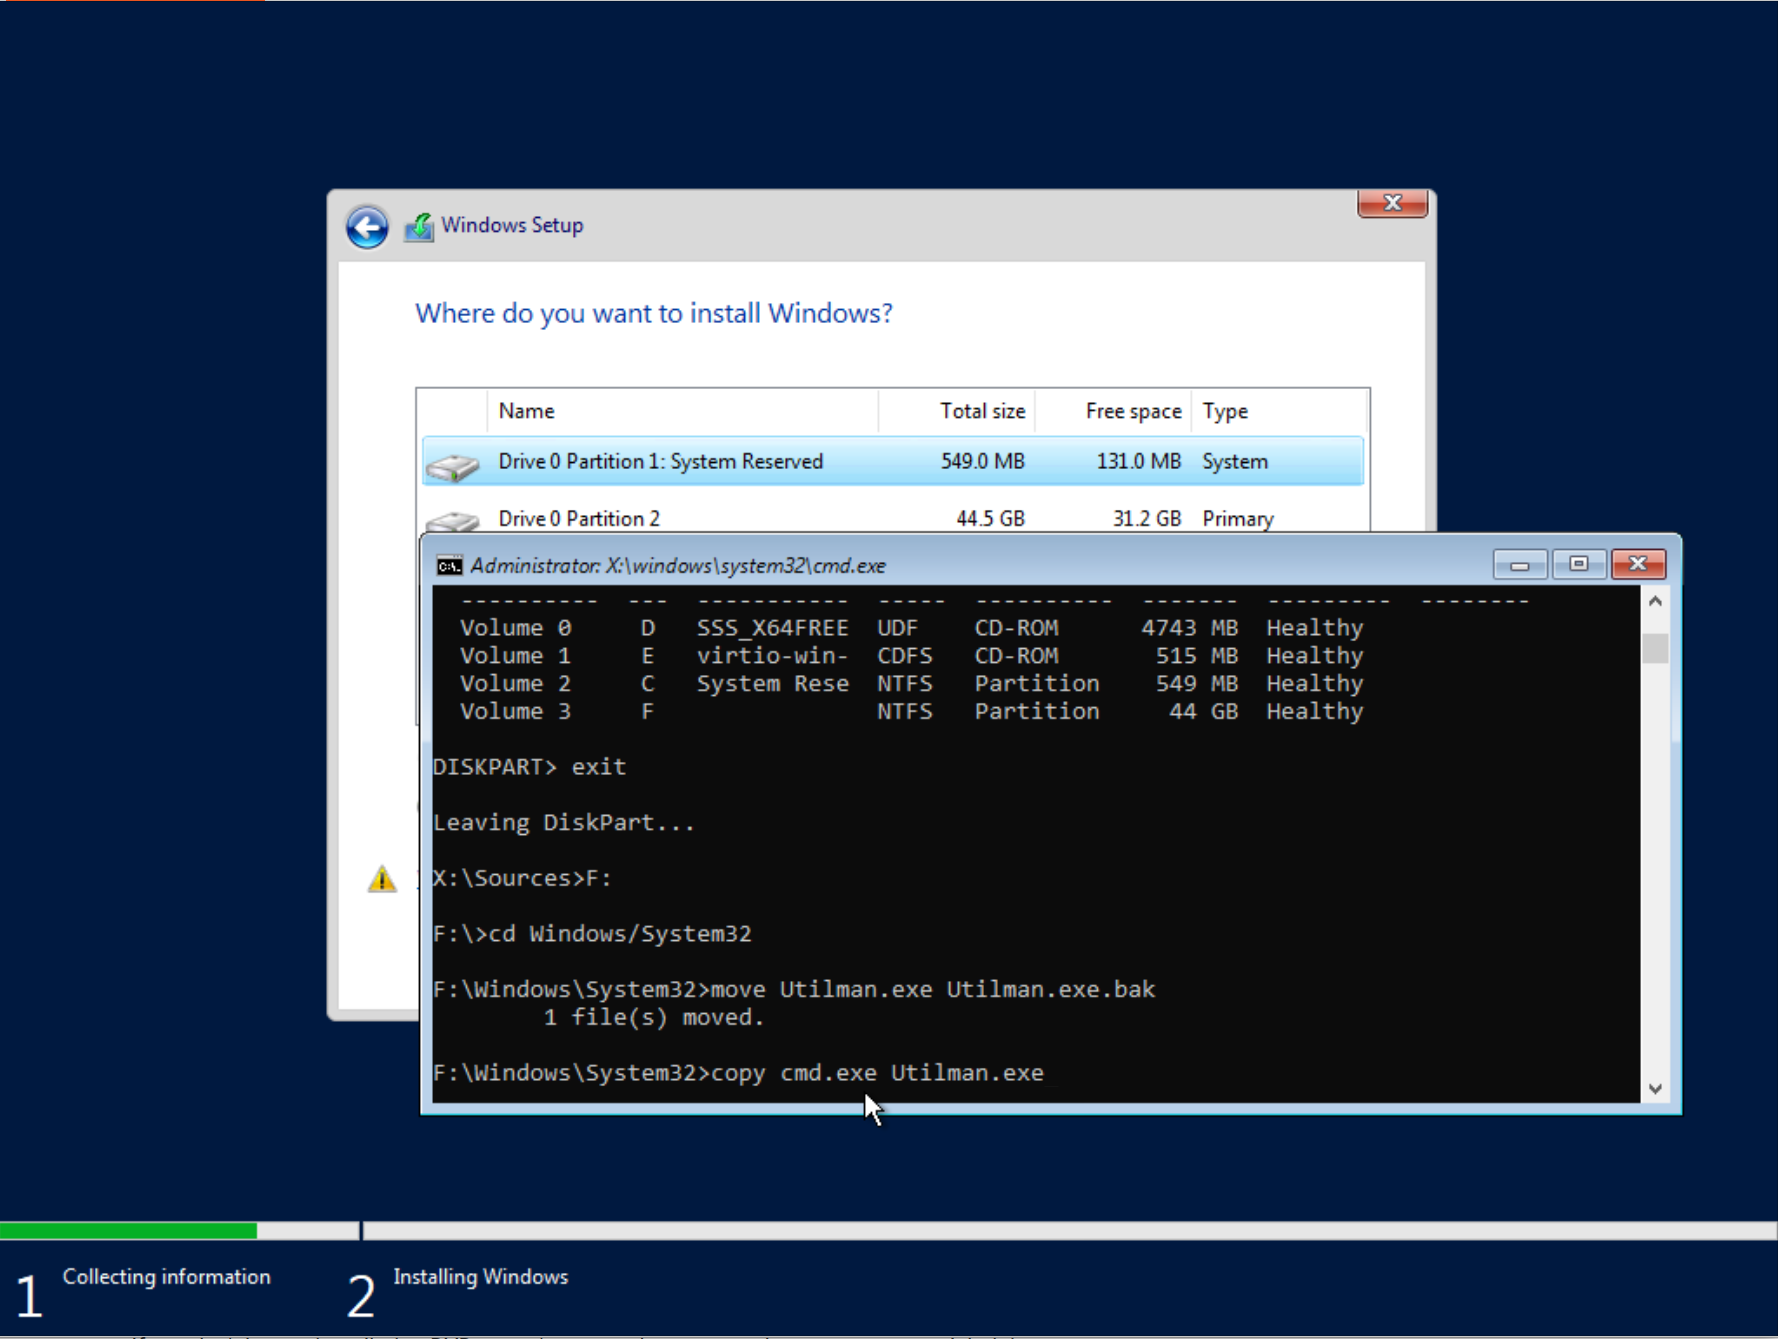
Reset the administrator password
-
Return to the KVM Manager panel and unmount the Windows Server ISO. Make sure the disk is unmounted and return to VNC. Run the command
wpeutil rebootto restart the VPS.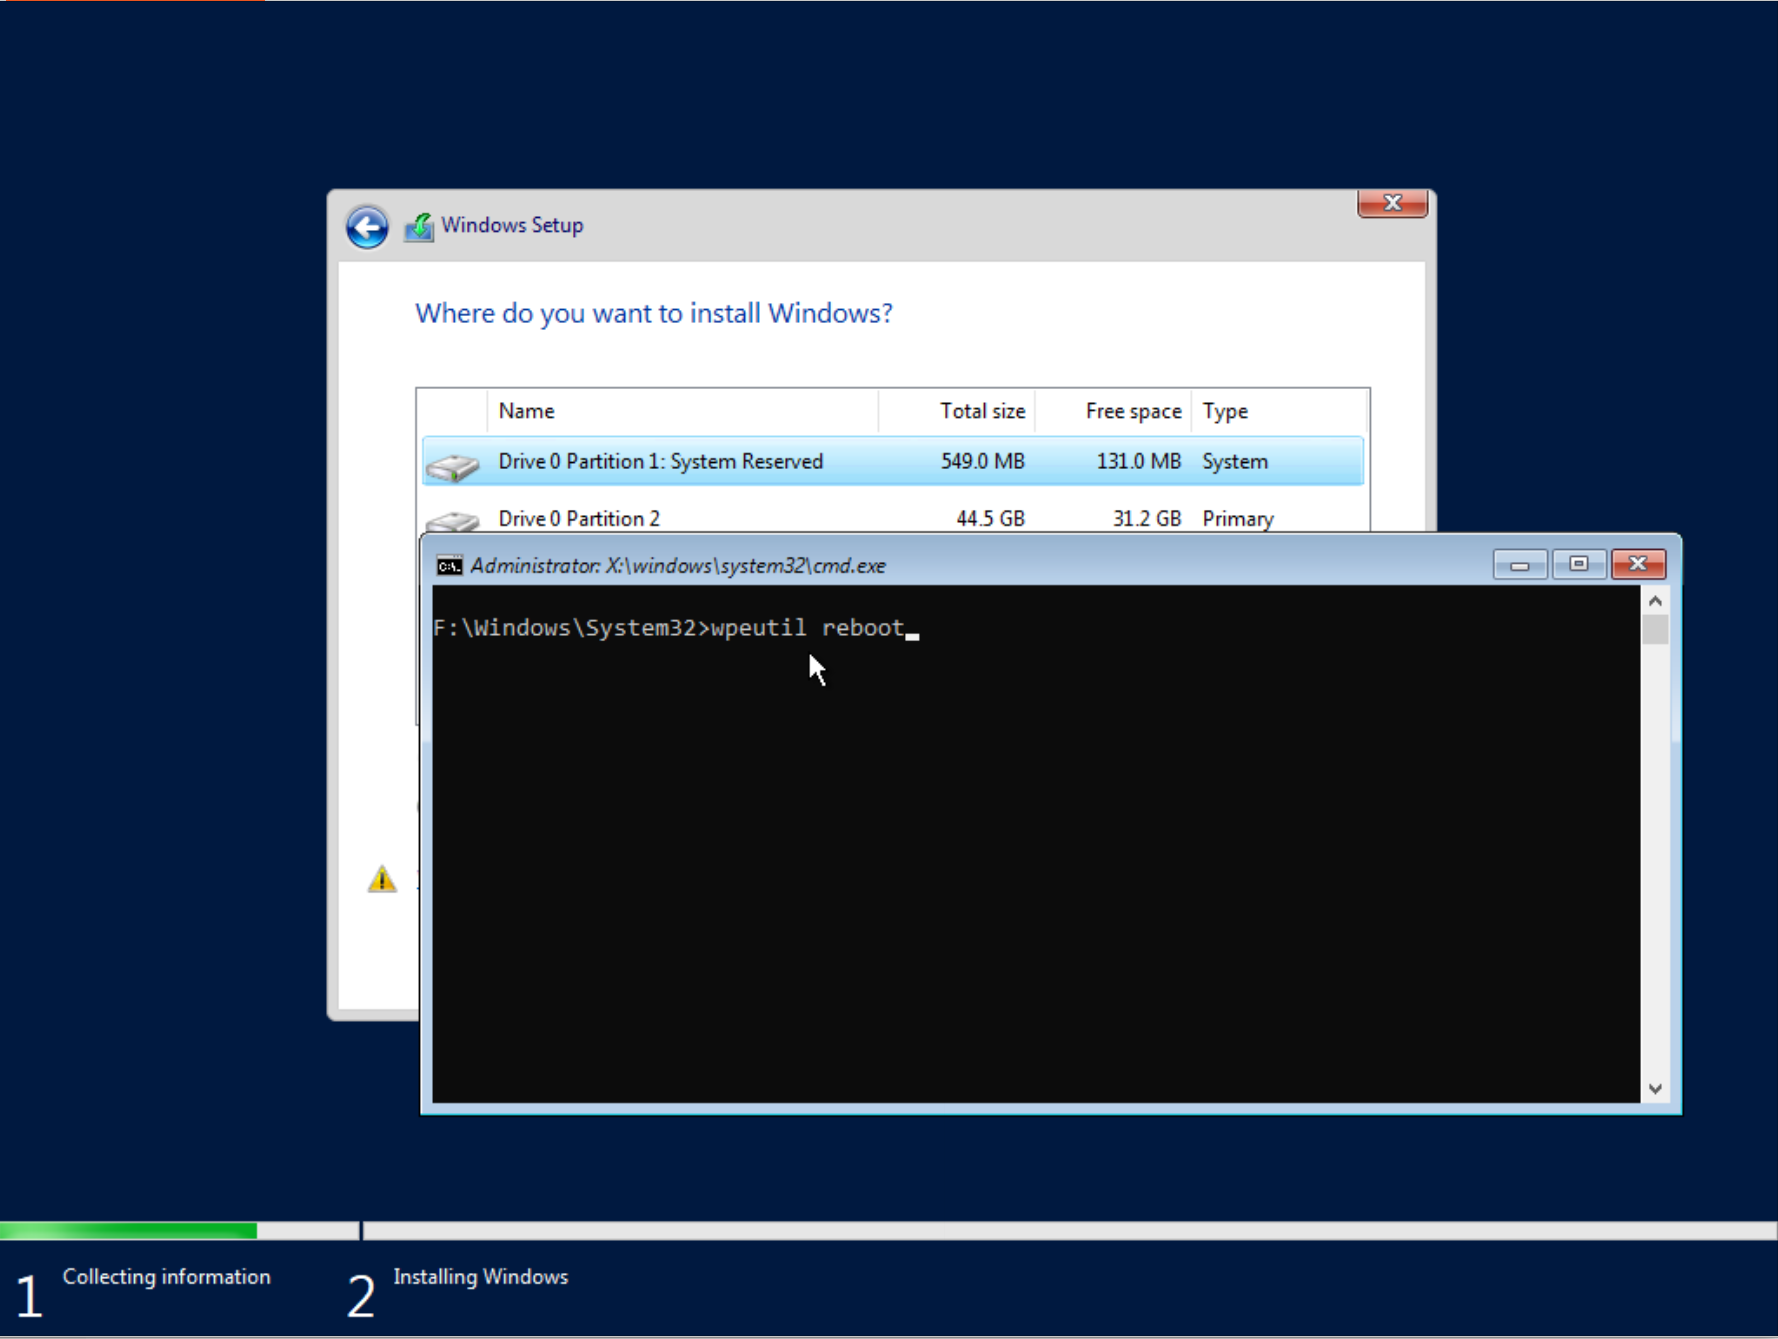
-
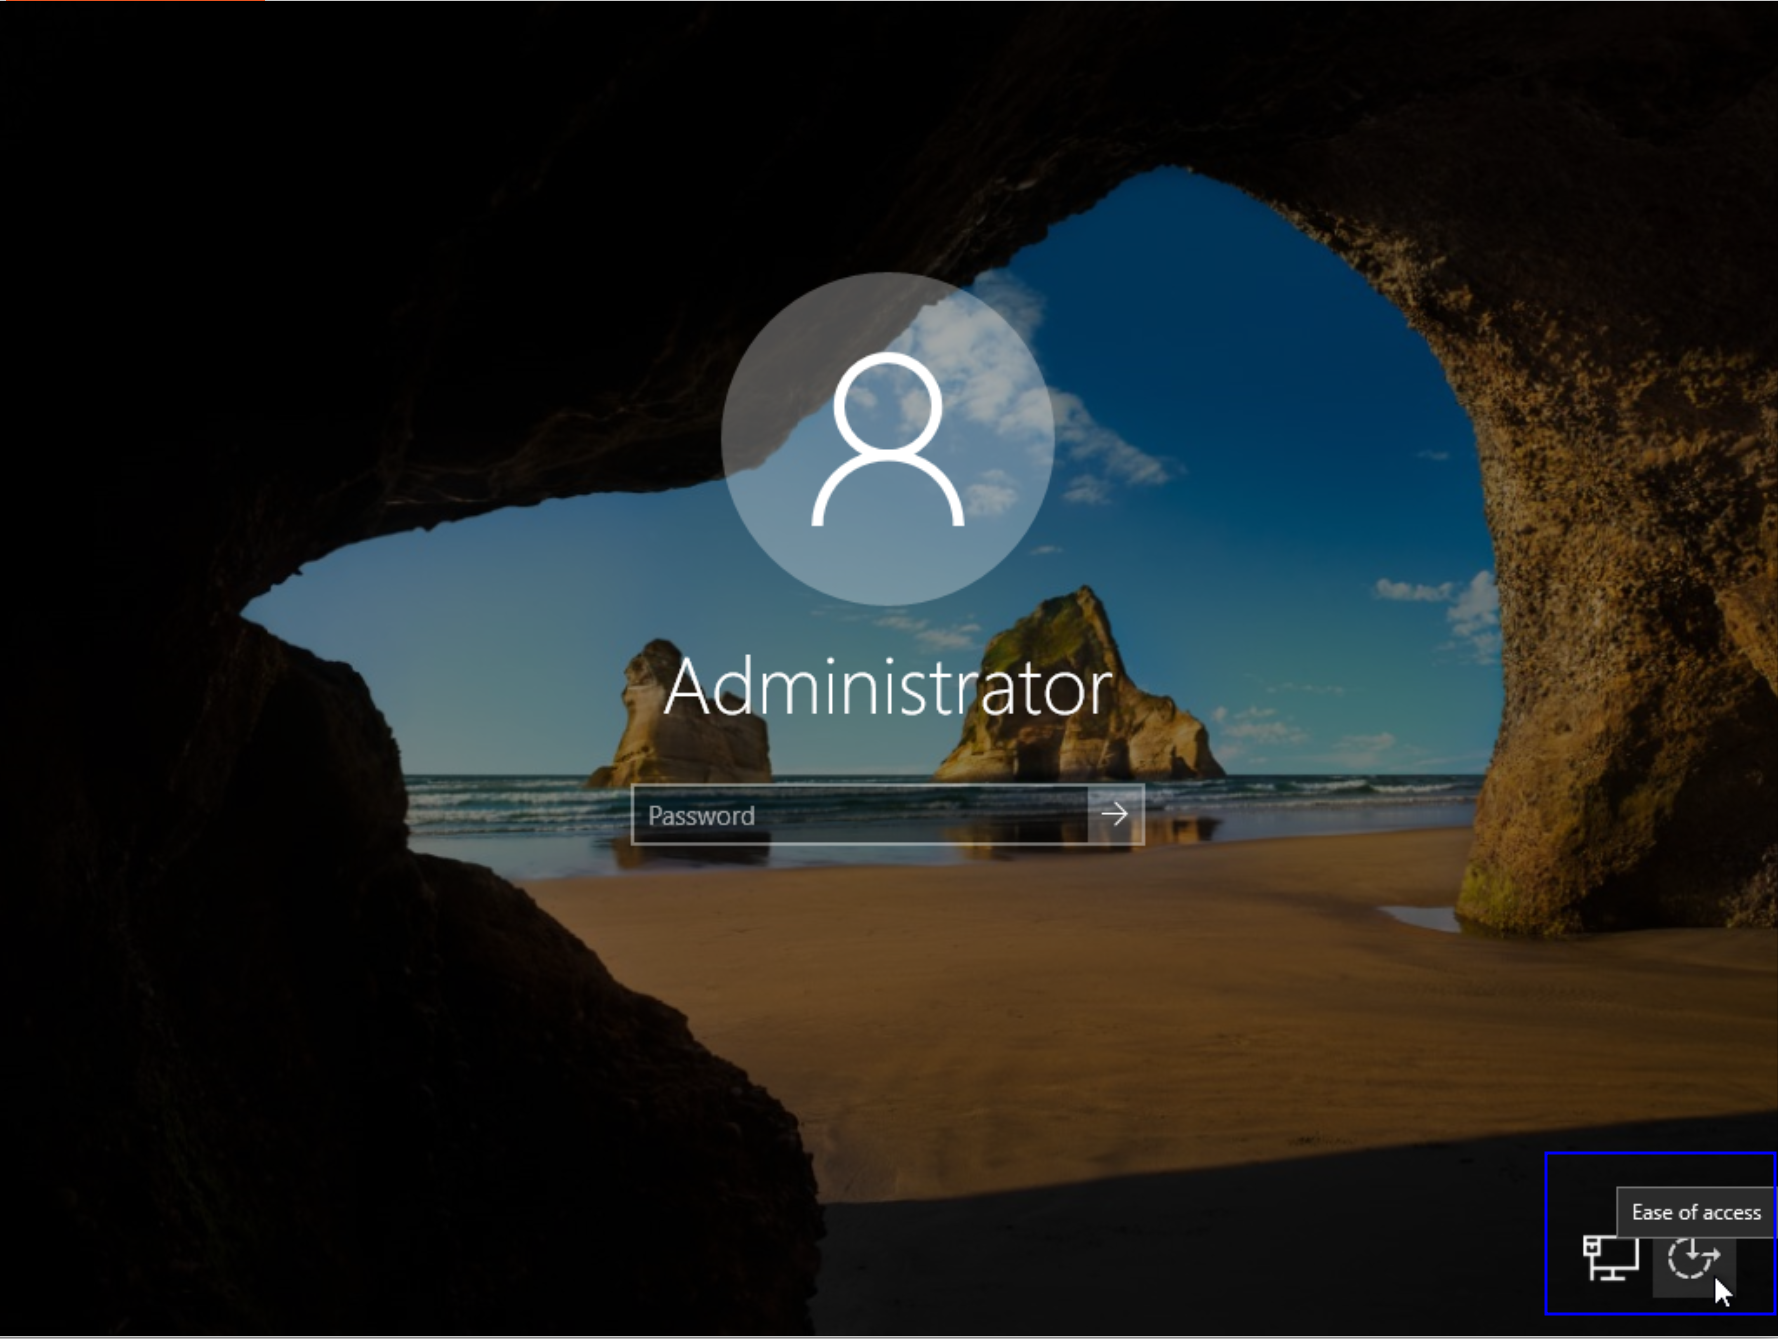
Once Windows loads, press CTRL+ALT+DELETE to access the login screen. Click the Ease of Access icon at the bottom right, which should open a new terminal window.
-
In the terminal window that opens, run the command
net user Administrator newstrongpasswordWhere: -Administratoris the Administrator account in Windows that has full system control. -newstrongpasswordis a new password.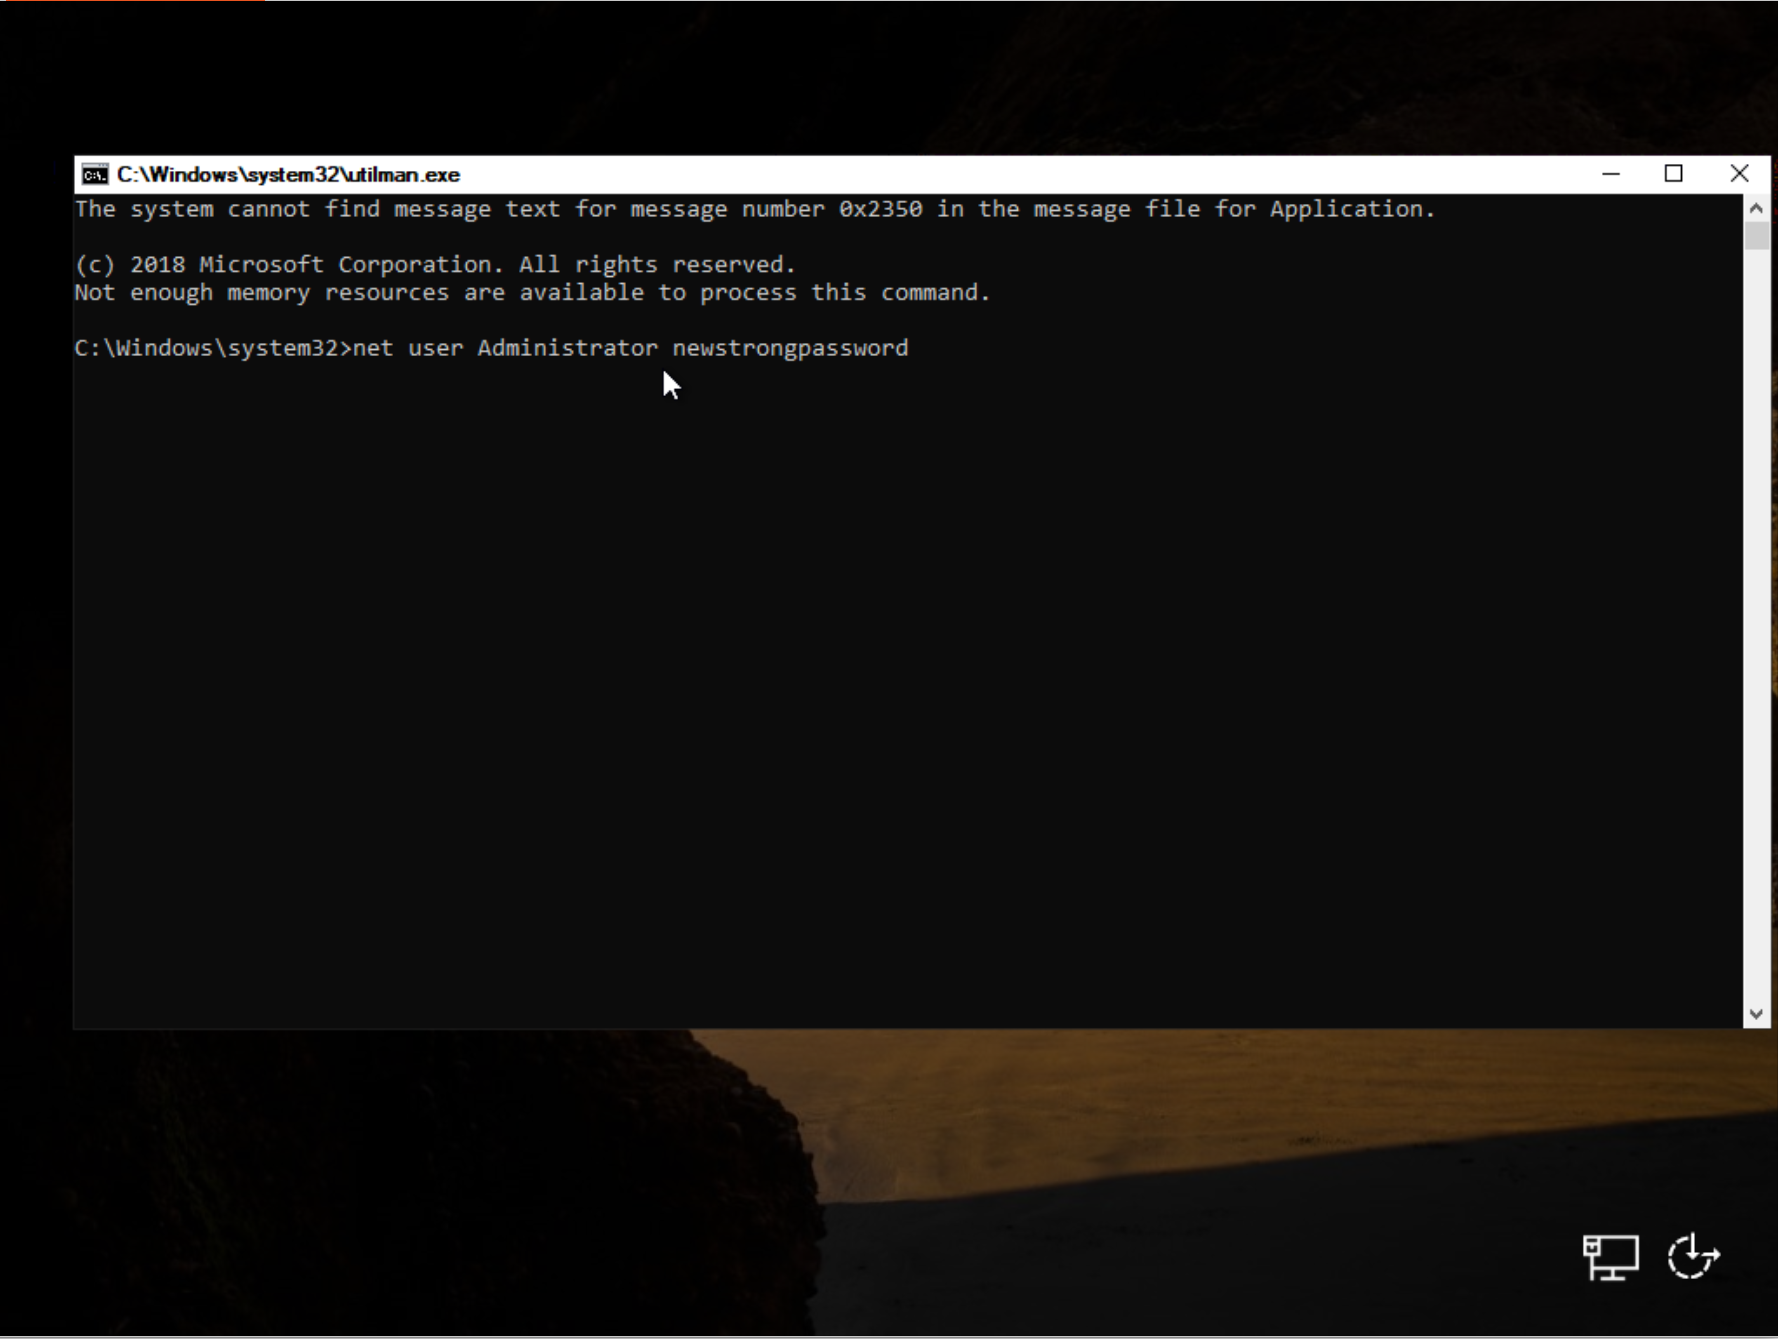
Revert the changes to Ease of Access
- Close the console window and connect to the server using the new password. Once connected, reopen Command Prompt and follow the steps below to revert your changes, restoring the original functionality of the Ease of Access utility.
- Click the Start button or press the Windows key on your keyboard.
- Type cmd or Command Prompt in the search bar.
- Right-click Command Prompt from the search results and select Run as administrator.
- Run as administrator
-
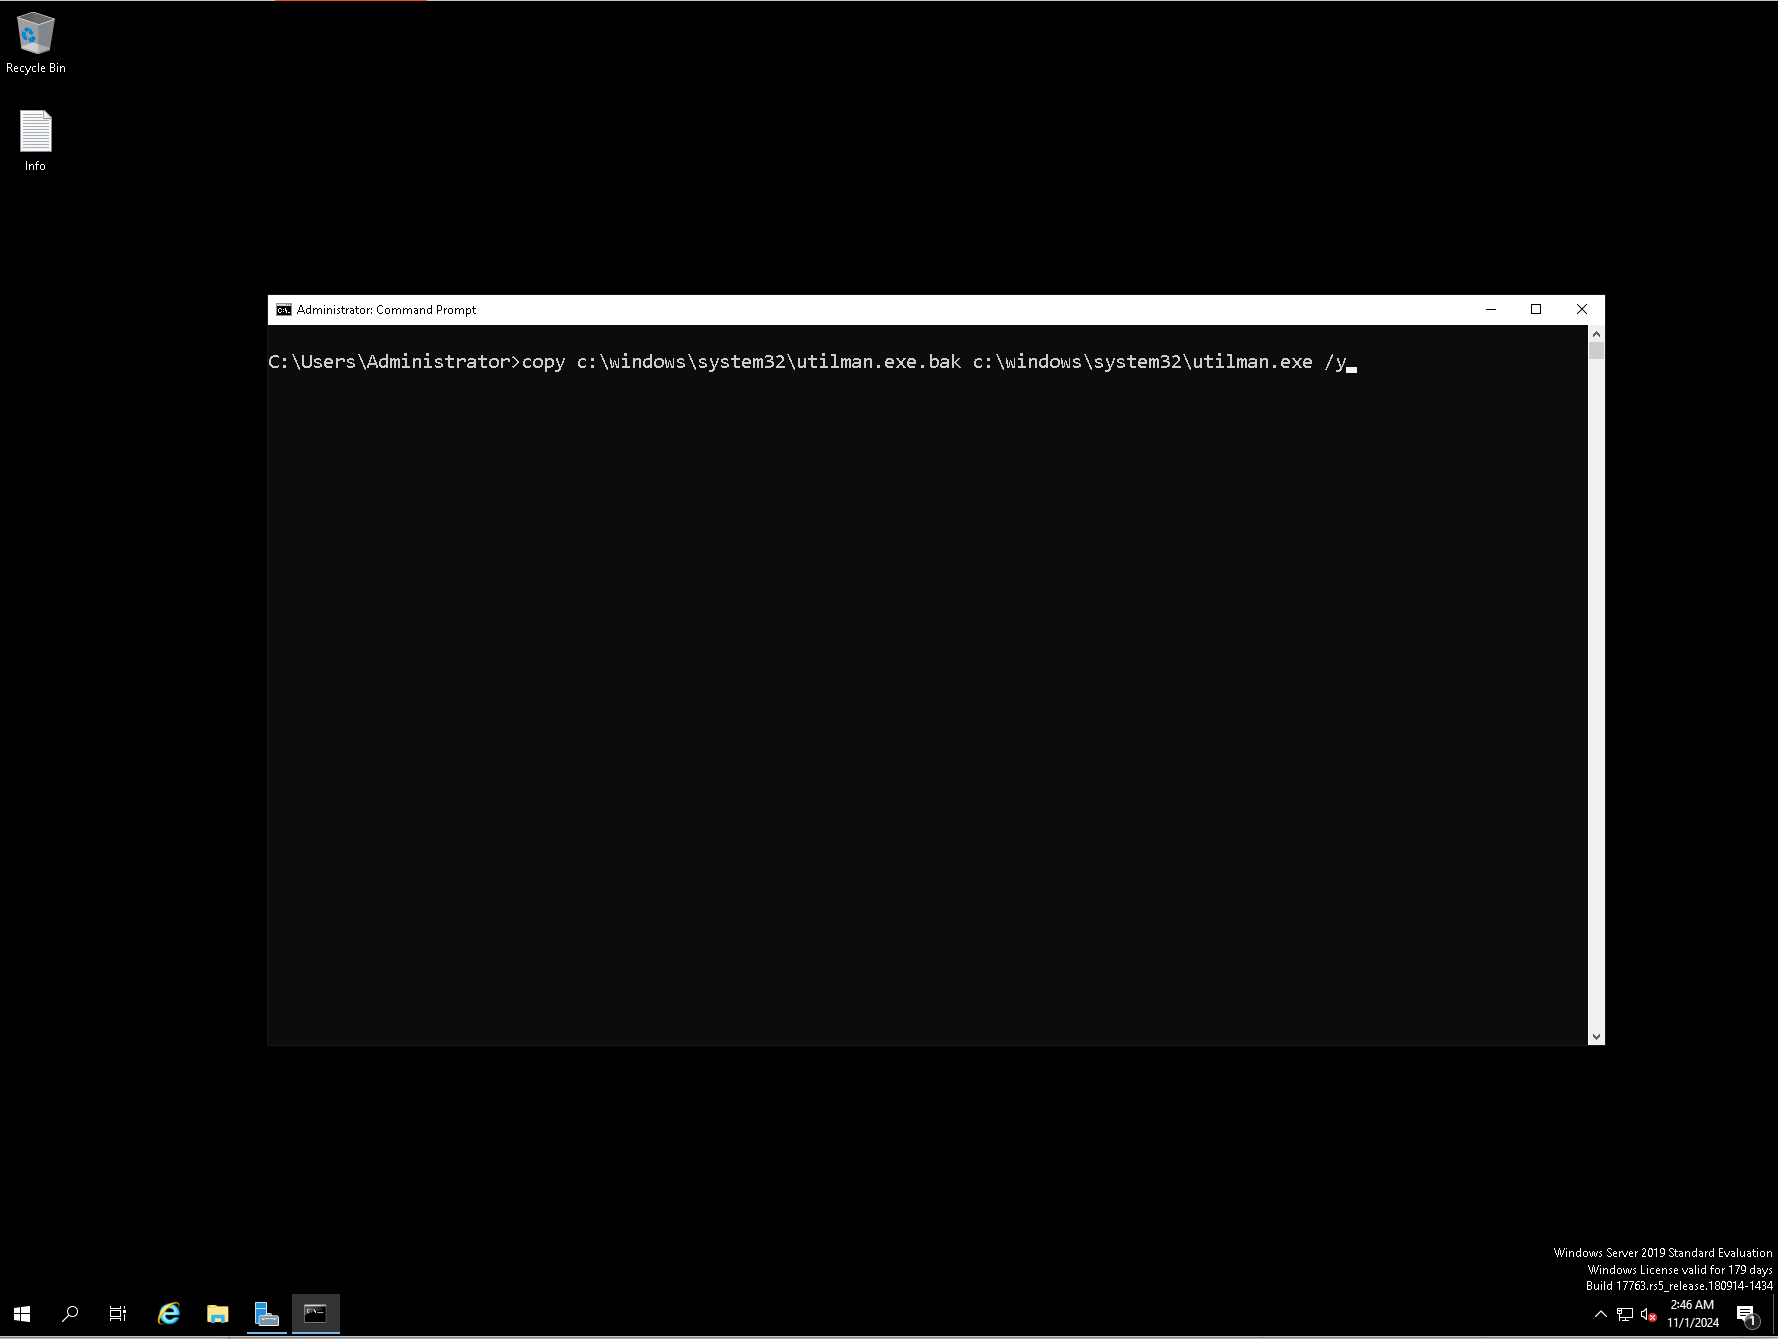
Run command
copy c:\windows\system32\utilman.exe.bak c:\windows\system32\utilman.exe /y