How to Change Your IP Address
Free IP Change (Within 24 Hours)
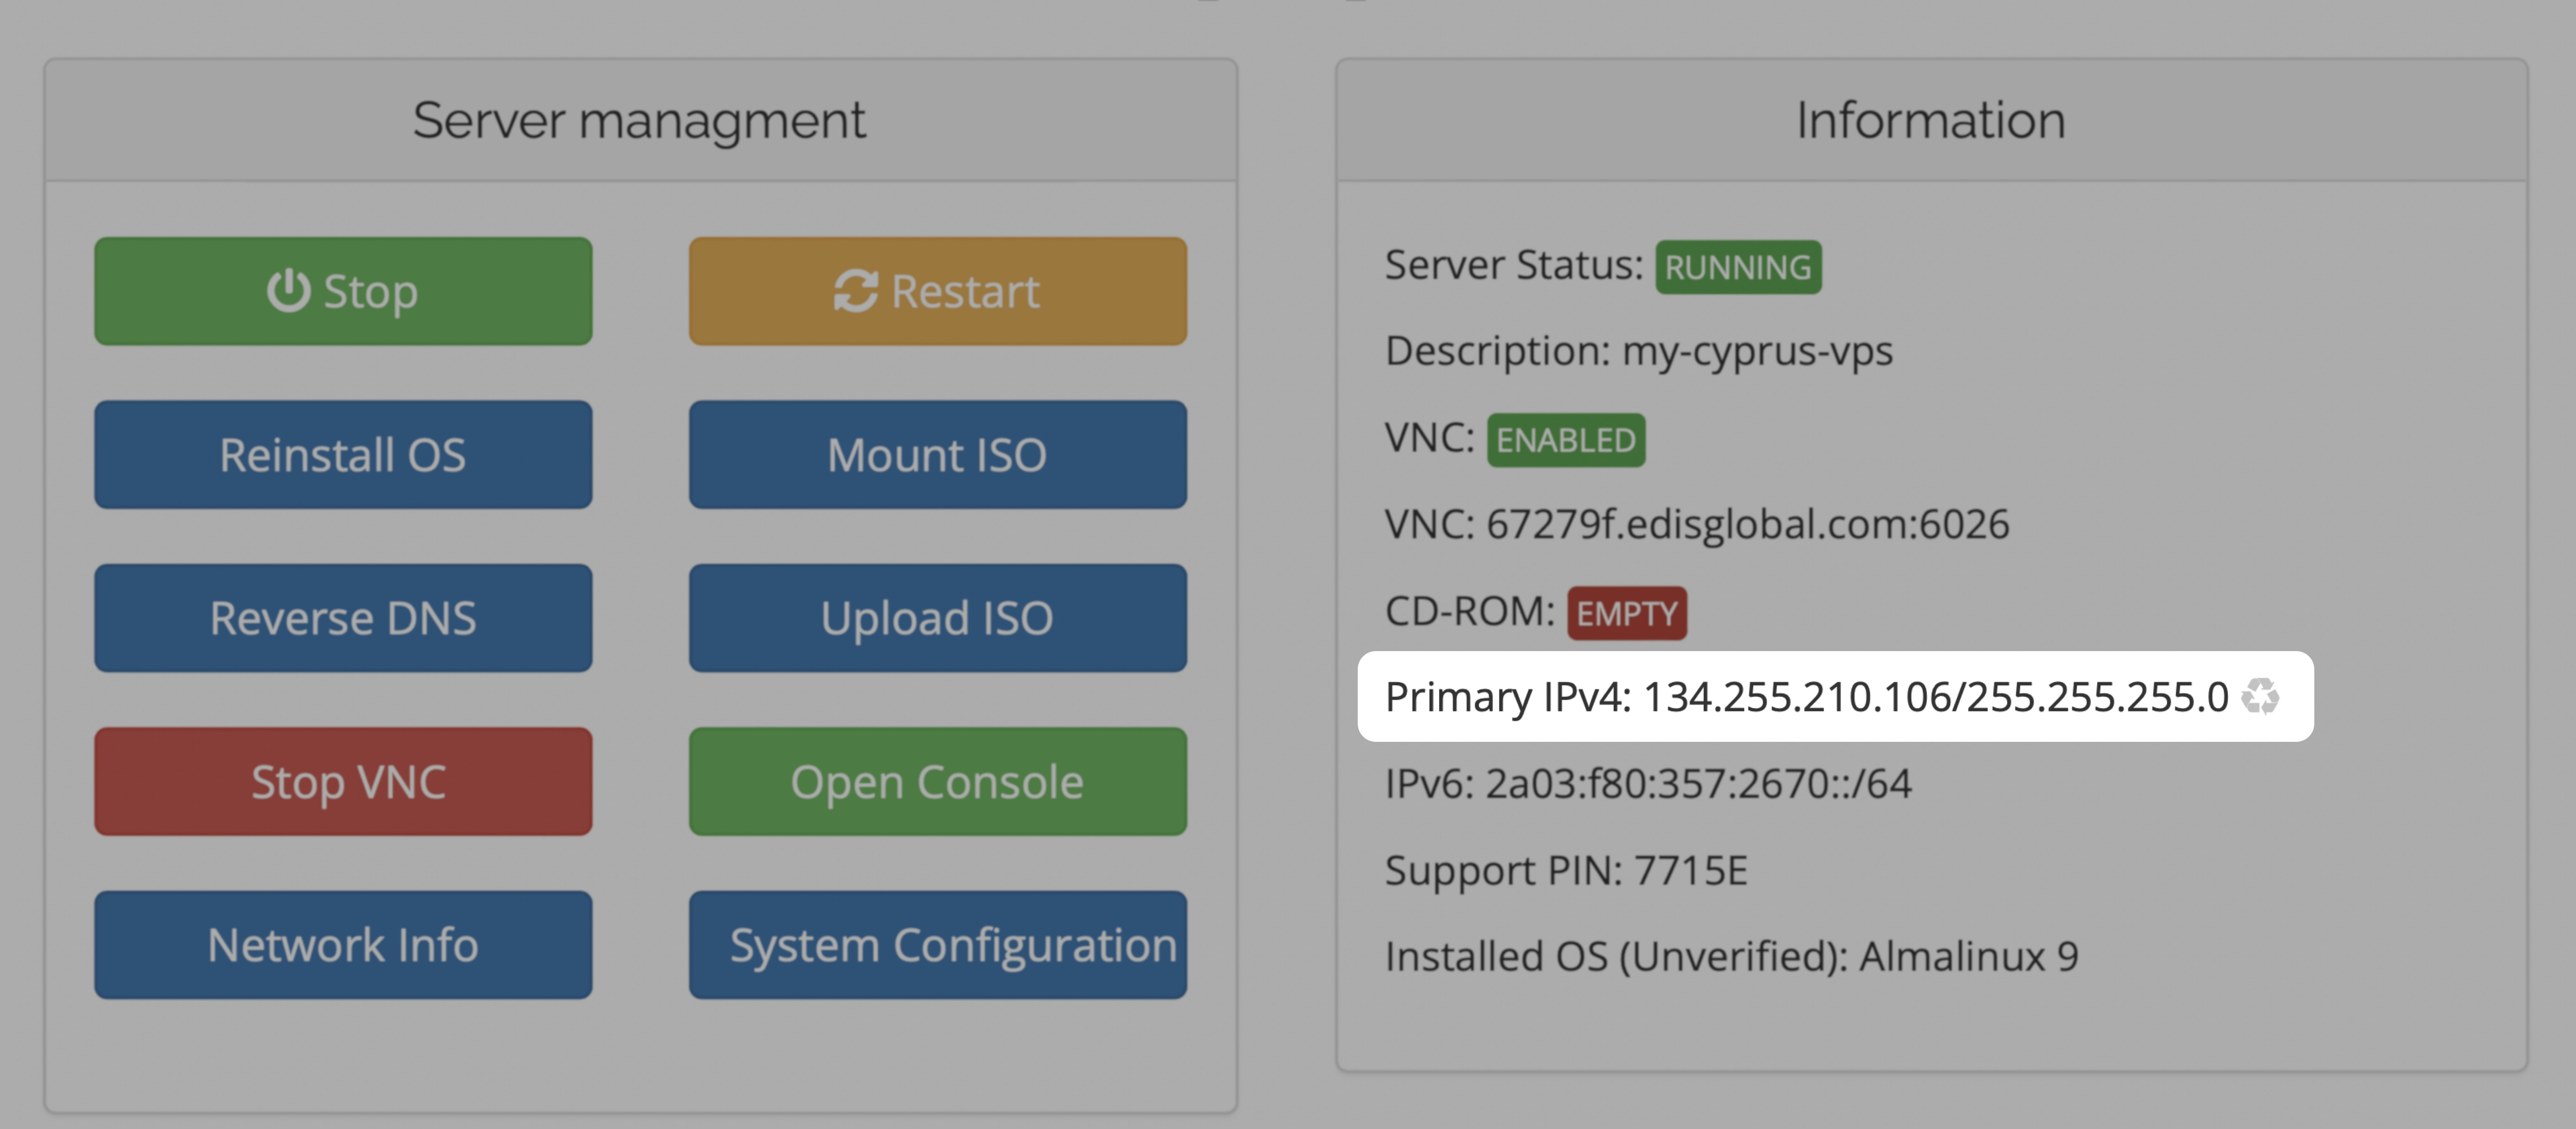
You’re eligible for one free IP change if requested within the first 24 hours of your VPS purchase. Steps:- Log in to your EDIS Global dashboard.
- Navigate to Services and locate your VPS.
- Click the ♻️ recycle icon next to your current IP to request the change.
Note: After the IP change, you will need to reinstall your system or manually configure the new IP using VNC. Once the new IP is activated, your old IP stops working immediately.

IP Change After 24 Hours (Paid Options)
If more than 24 hours have passed, IP changes incur a fee. You have two options:| Option | Price | Description |
|---|---|---|
| Standard IP Change | €5 | A new IP is automatically assigned (random subnet; no selection). |
| Bespoke IP Change | €10 | You choose an IP from a provided list of available addresses. |
Standard IP Change
After payment, the system assigns a random IP from a /24 subnet. You cannot influence the subnet selection.Note: “Random” means you cannot pick the subnet or guarantee its prefix.
Bespoke IP Change
You will receive a list of available IPs (from varying prefixes) and can choose one.Note: If you previously had an IP and it’s still unassigned, you may see it in this list.
Configure New IP After Change (for ALL cases)
Important: Once the new IP is assigned, the old IP immediately stops working. You must activate the new IP by either: • Reinstalling your VPS, or • Manually configuring it using VNC
Summary & Recommendations
- If within 24 hours → use the free IP change.
- After 24 hours → choose Standard or Bespoke.
- Always follow up by reinstalling or configuring your new IP (see above).