VNC, remote console with graphical interface
Understanding VNC
Imagine if you could sit in front of a remote computer from anywhere in the world and use it as if you’re right there. That’s VNC. It lets you see and interact with your VPS even if the normal ways of connecting (like SSH or RDP) are broken.Understanding noVNC (Console)
noVNC provides a convenient way to access VNC servers from any device through almost any modern web browser, eliminating the need for dedicated client software (has limitations vs desktop VNC client though).How to activate VNC in the control panel
Through the VPS Management Portal, you can enable VNC for each VPS individually. Once VNC is turned on, noVNC or a desktop VNC client can be used to connect.1
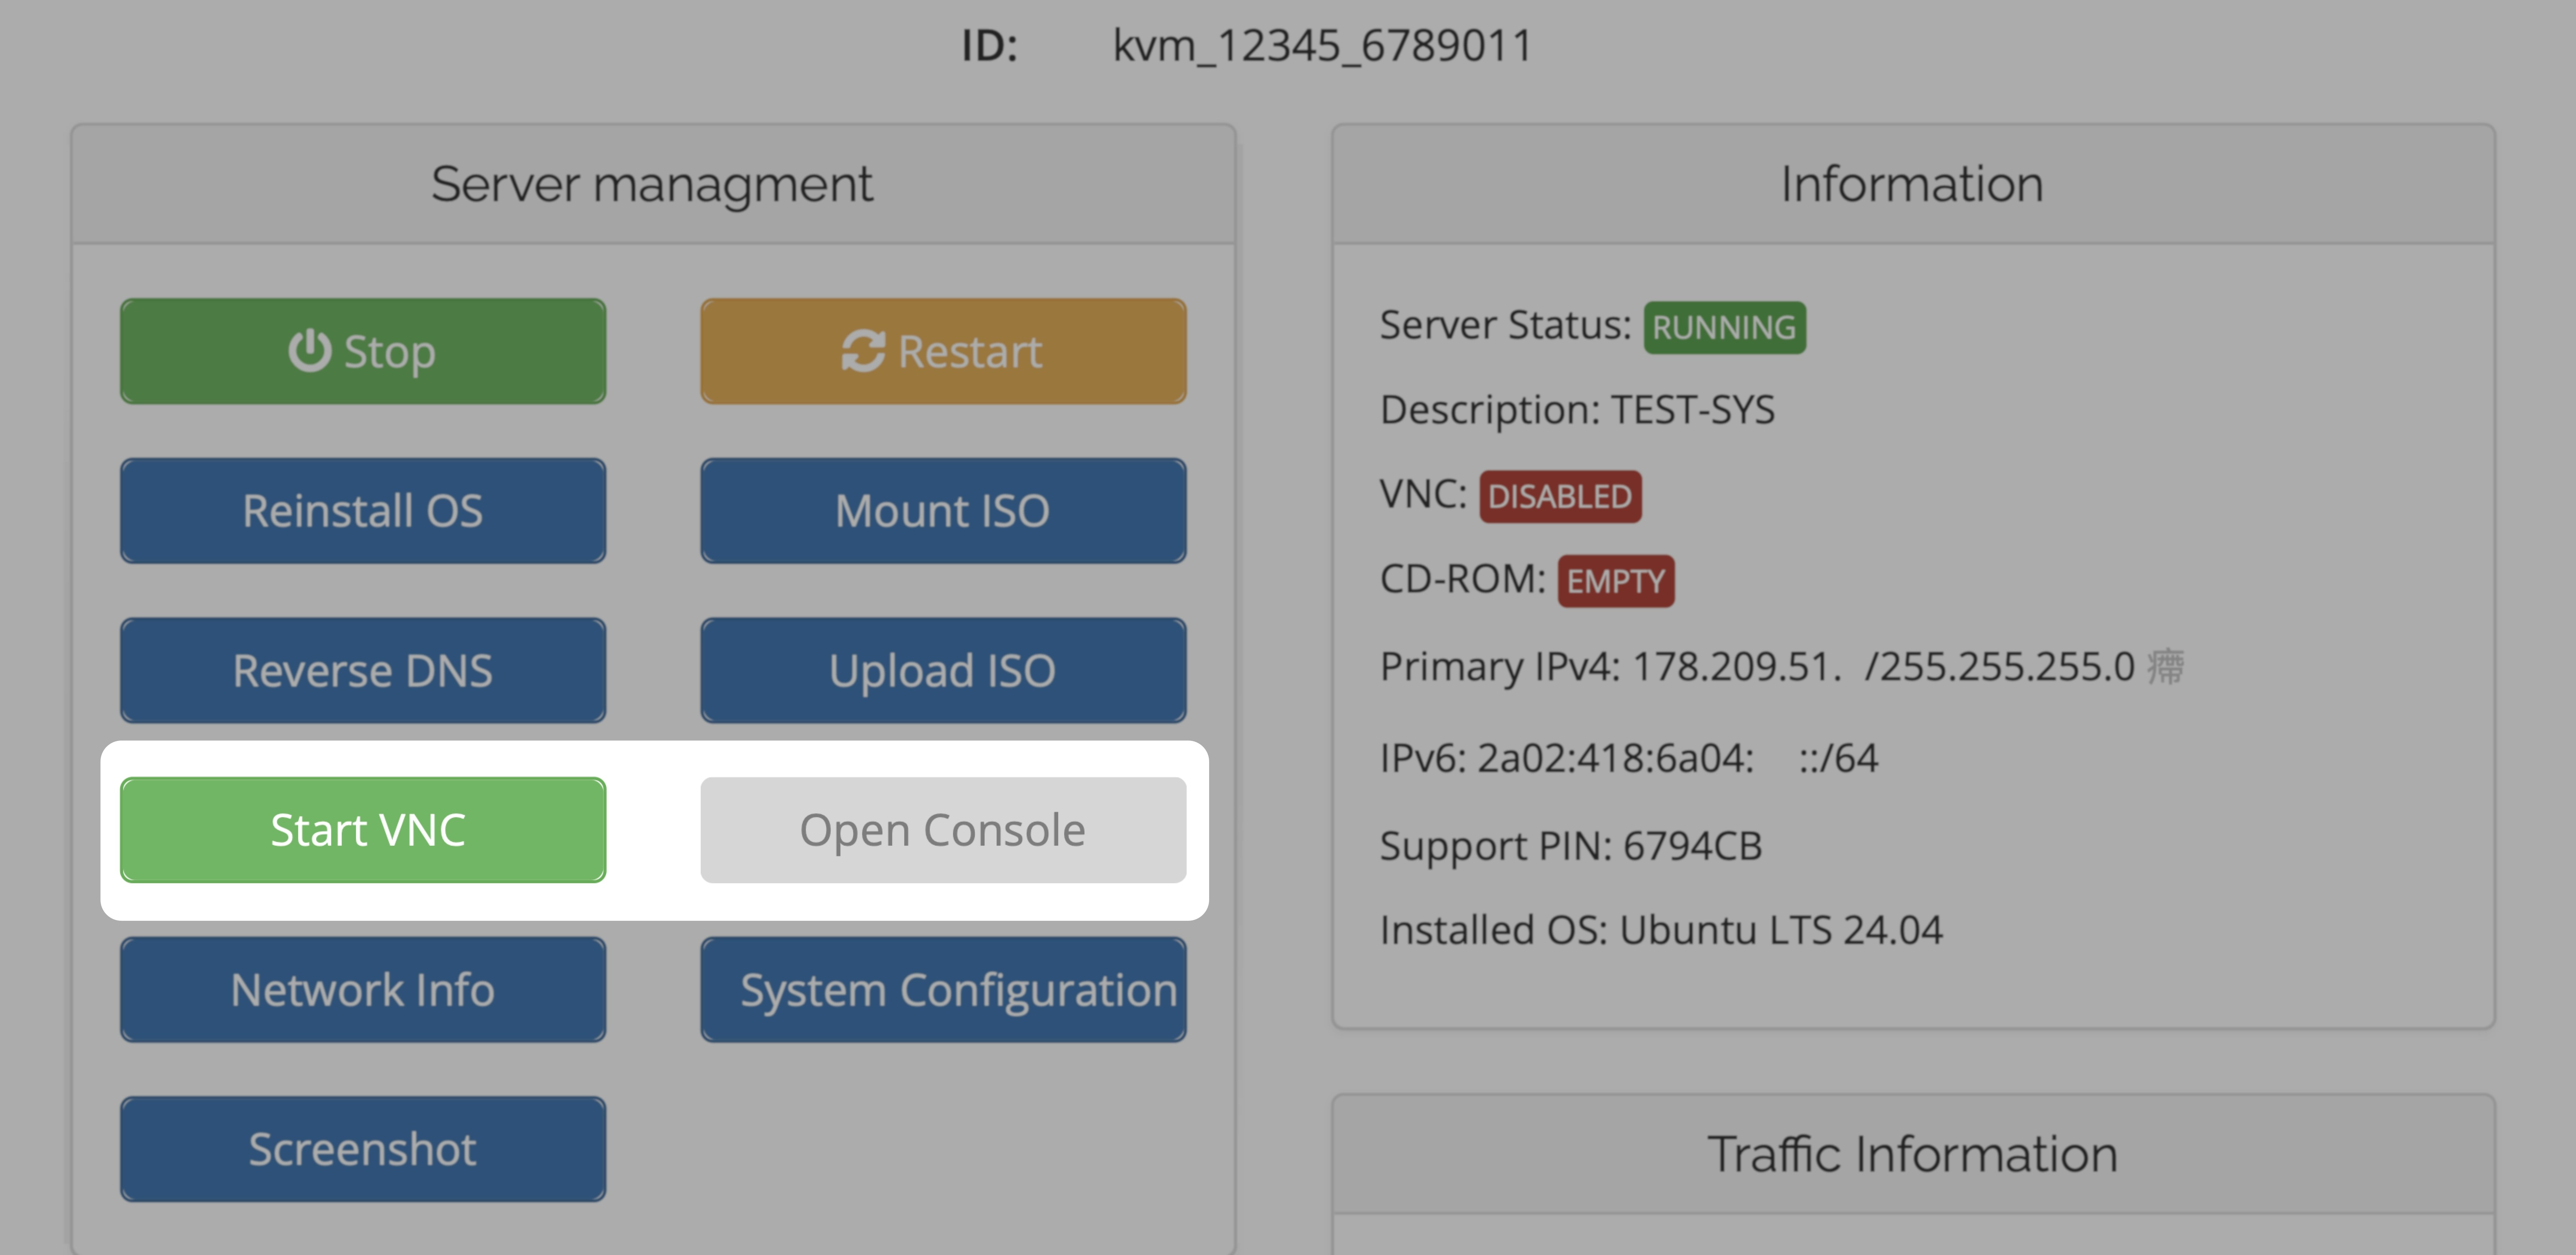
Step 1
Start VNC
2
Step 2
Open Console once button turns green (and click into the window to set focus!)
noVNC Console Instructions
This opens a virtual console for your server. The VNC password is for Desktop VNC Client connections only. The VNC password is not required for noVNC Console access. Click into the noVNC window to set focus. Use your OS username & password to log in to your OS once you are presented with the login-screen.Desktop VNC client instructions
Open a connection with your preferred Desktop VNC Client: RealVNC Viewer, TightVNC Viewer, UltraVNC, …Use the password indicated in Step 1 (Start VNC)
Use VNC Server hostname and port from the Information window on the right side.
Establish your connection.
