Documentation Index
Fetch the complete documentation index at: https://docs.edisglobal.com/llms.txt
Use this file to discover all available pages before exploring further.
Understanding CPU Cores vs. CPU Sockets in VPS Environments
Virtualization technology has transformed the landscape of modern computing, especially in server environments. Within a Virtual Private Server (VPS) environment, understanding the difference between CPU cores and CPU sockets can be critical to optimizing performance. This article will detail these distinctions, describe how virtualization technology can render vCPU cores, and guide you through adjusting these settings in the VPS management dashboard.1. CPU Cores vs. CPU Sockets: What’s the Difference?
- CPU Core: A CPU core is an independent processing unit within a CPU. Modern CPUs can have multiple cores, allowing them to perform multiple tasks simultaneously. In a VPS environment, assigning multiple cores can increase the multitasking capability of a virtual machine.
- CPU Socket: A CPU socket, often just referred to as a socket, is the physical slot on the computer’s motherboard that holds the CPU. Each socket can hold one CPU chip, and that chip can contain one or more cores. When a VPS environment refers to ‘sockets,’ it often means virtual representations of these physical slots.
2. Virtualization Capabilities
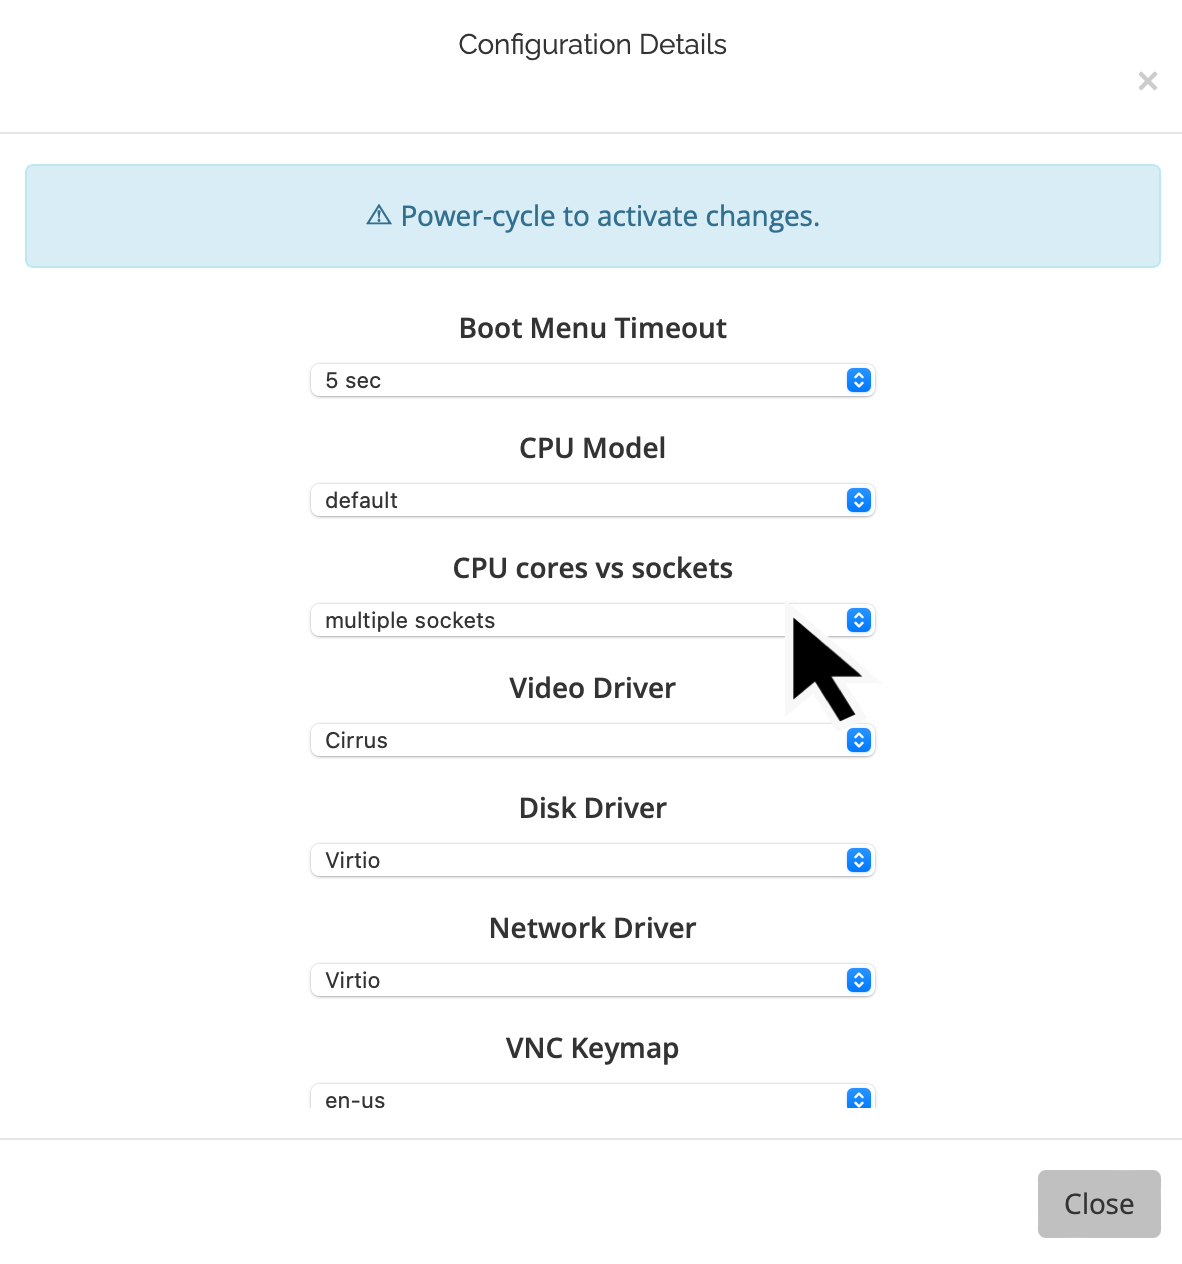
In the world of virtualization, technology can mimic hardware behavior. This means that a vCPU core can be rendered either as a representation of a CPU socket or as a direct CPU core. While the underlying physical hardware might have a fixed number of sockets and cores, virtualization can manipulate these representations to suit software requirements, like operating system limitations or specific software constraints.3. Adjusting CPU Settings in KVM Management Dashboard
If you’re using the KVM management dashboard, here’s how to access and modify the vCPU presentation: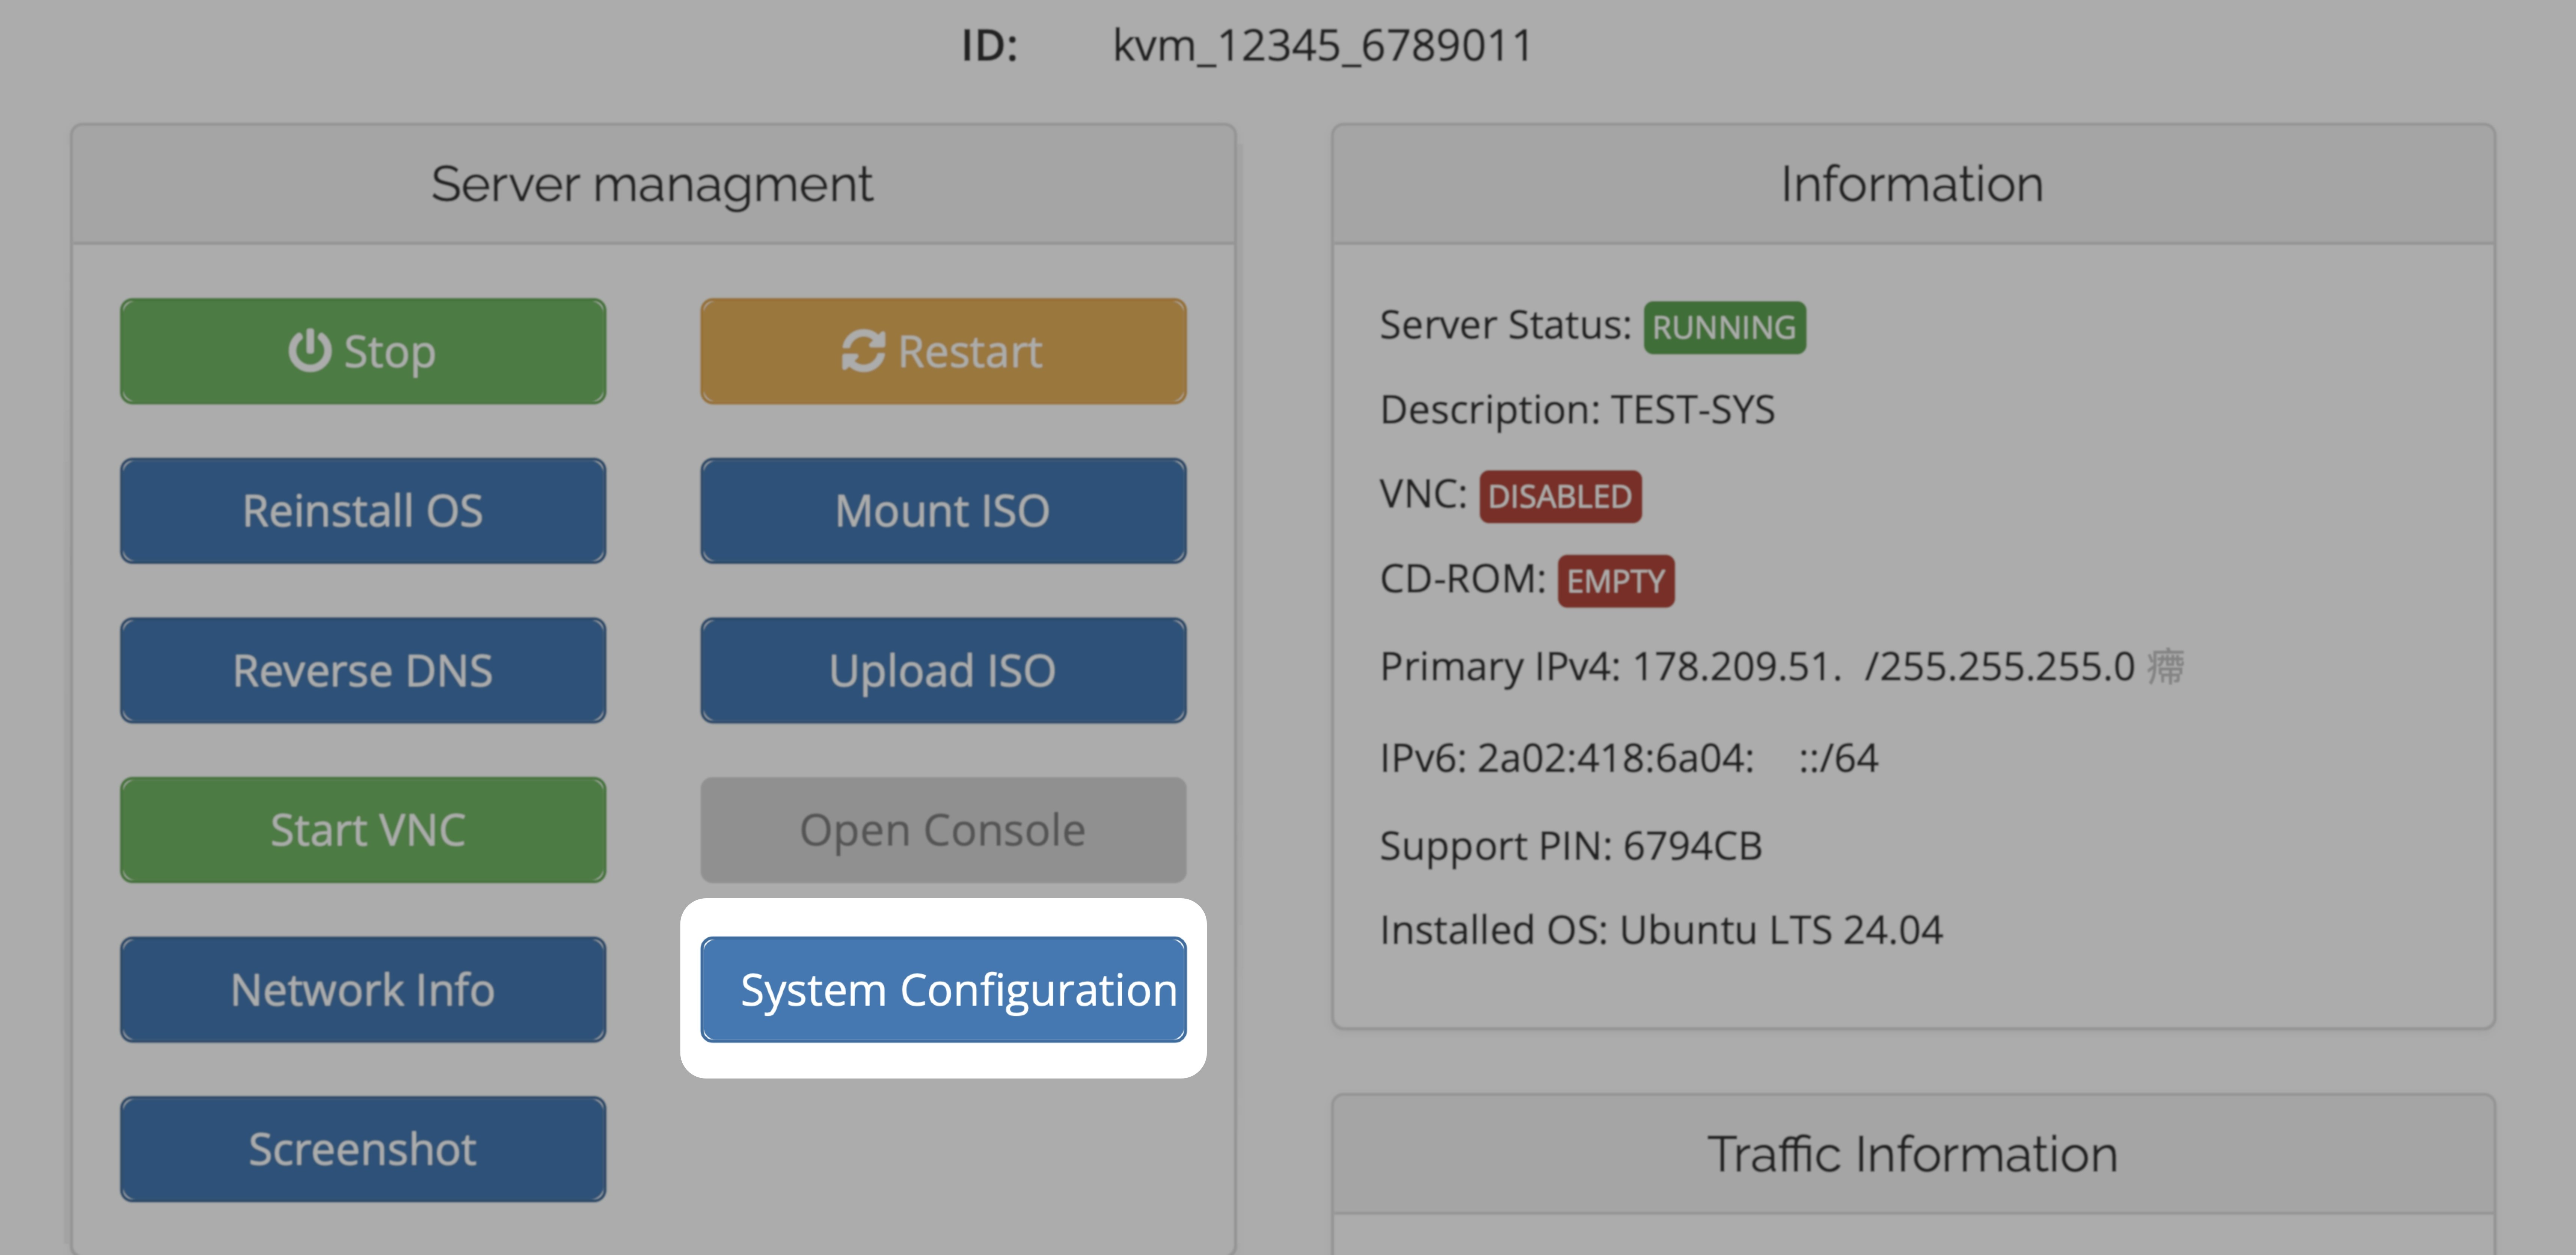
- Navigate to your VPS Management Portal
- Locate your VPS in the Services tab
- Click on KVM Settings
- Within the settings, you’ll find options to switch between “multiple sockets” and “multiple cores”.
- Choose the desired configuration based on your requirements.
- Power-Cyle your VPS (shutdown in the OS, power off, power-on)