Running a Speed Test on Linux and Windows (10Gbps-Aware)
A quick guide to running reliable speed tests on Linux and Windows, especially for 10Gbps setups.🐧 Speed test on Linux
We recommend using the Speedtest CLI by Ookla for reliable results.🔧 Installation
Run the following commands to install:🚀 Running a basic speed test
Once installed, run a simple speed test:
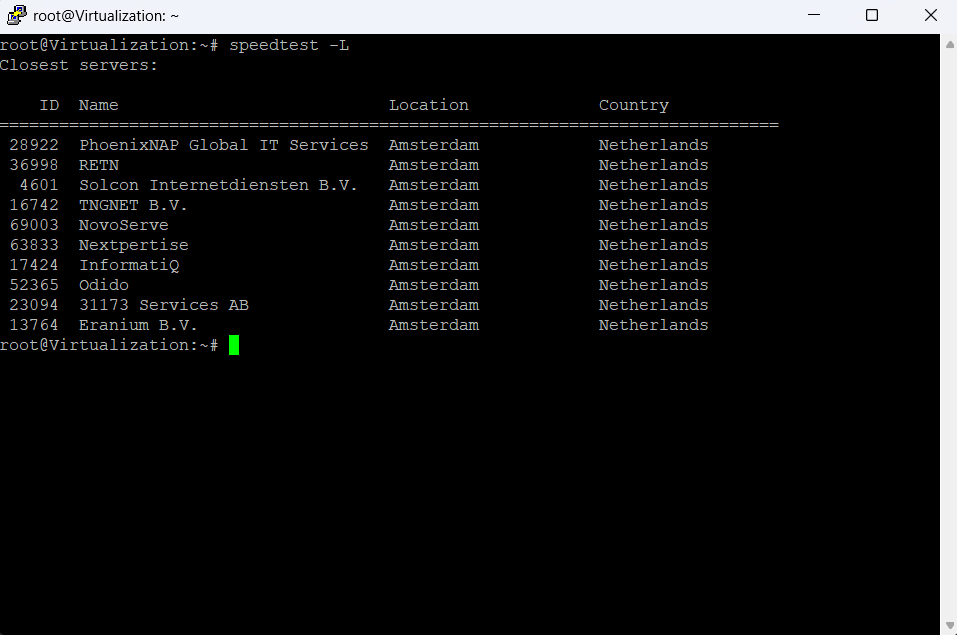
📋 List available servers
🎯 Run Test on a Specific Server
Pick a server that supports high throughput (based on location and provider) and use its ID: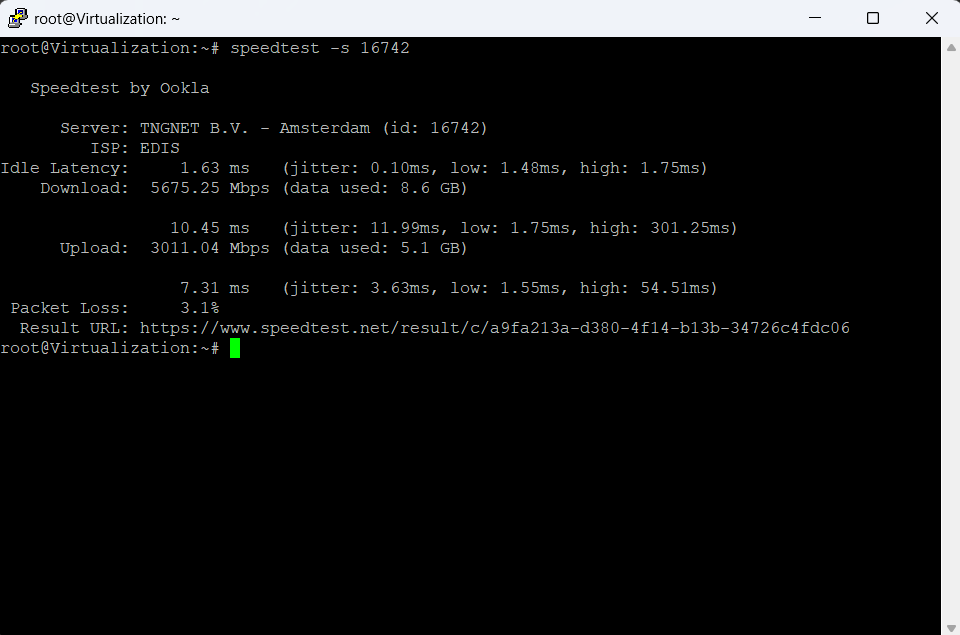
🪟 Speed test on Windows
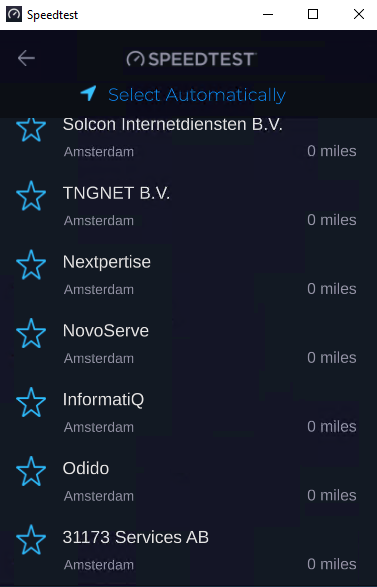
While the command line option is also available, for most users we recommend using the Speedtest app by Ookla.⬇️ Download the App
Download the official Speedtest app from Ookla’s website: This GUI-based tool provides more stable and optimized results, especially on systems with higher bandwidth.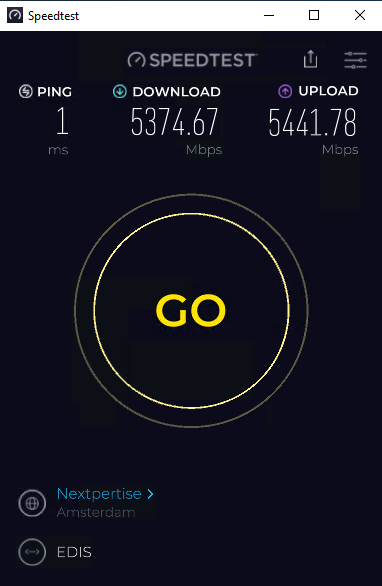
⚠️ Notes on 10Gbps Testing
Just like on Linux, not all servers support 10Gbps. If you’re seeing low results:- Click on the current server name displayed under the speed dial.
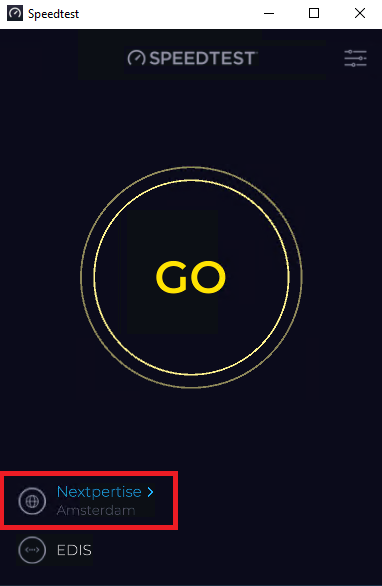
- From the list that appears, select another server — preferably one known to support higher bandwidth.
- Try multiple nearby servers to find the best performance.