Access the VPS Management Portal
After the Upgrade was confirmed …- Login to your VPS Management Portal
- Locate your VPS from the Services tab
- After confirming the upgrade, Initiate shutdown (power-off) and turn on the VPS again. It is important to fully power off.
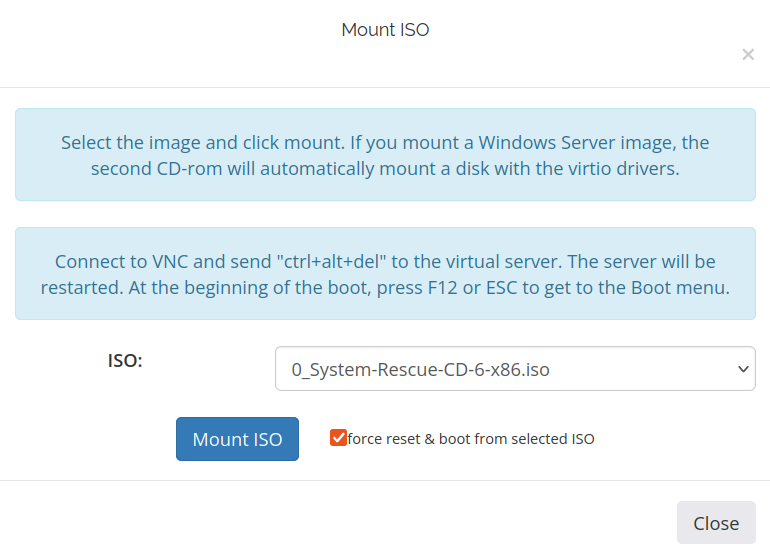
Mount System Rescue CD and Boot
- Click Mount ISO
- Select System-Rescue-CD-6-x86.iso image
- Set button force reset & boot
- Finish mount by clicking “Mount ISO”
- Enable VNC Server
Launch noVNC
- Click “Launch noVNC” to see console output
- Click into the noVNC browser window to set focus
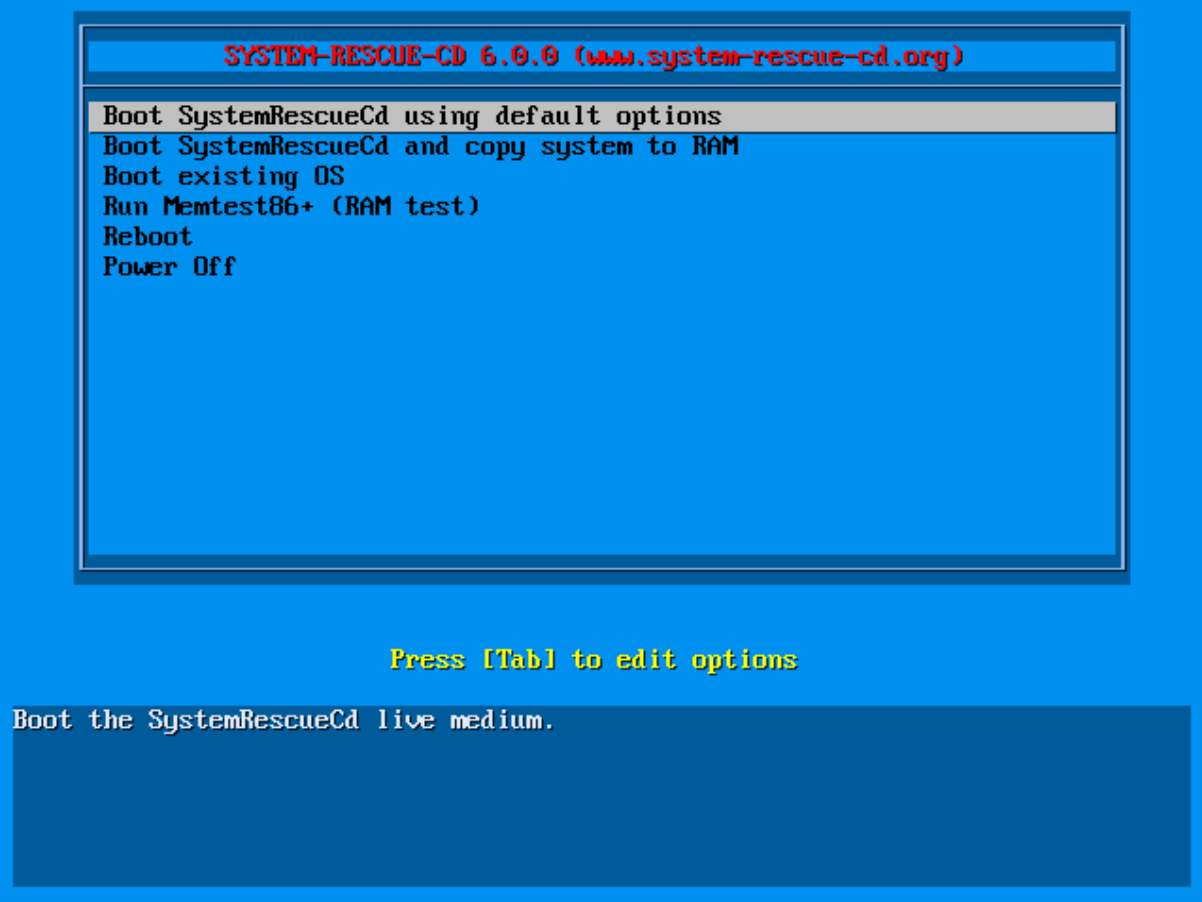
- Select “Boot SystemRescueCd using default options”
- Press Enter to confirm
Resize partition
-
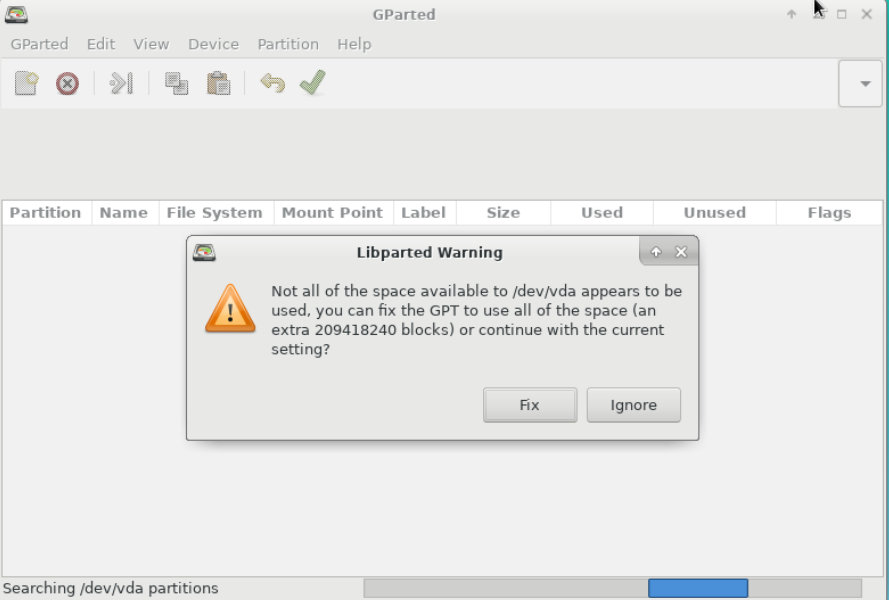
Start the Graphical Interface: If SystemRescueCD boots into a command line, you can start the graphical interface by typing:
startx. - Open GParted: Once in the graphical interface, open GParted. GParted is a free partition editor for graphically managing your disk partitions. Press “Fix” button on “Libparted Warning” pop-up window.
- Remove the swap partition. The vda 2 (swap) partition will be located next to vda1 and the unallocated space. Right-click on this partition and set Delete.
- Resize Partitions: To extend the root partition(vda1), right-click on it in GParted to root partition(vda1), and select “Resize/Move”. Then, drag the handles to include the unallocated space and click “Resize/Move”. In the field “Free space following” install the size of your future swap partition.
- Apply Changes: After arranging the partitions as desired, click the “Apply” button in GParted to apply the changes. Be aware that this process can take some time and may result in data loss if not done correctly.
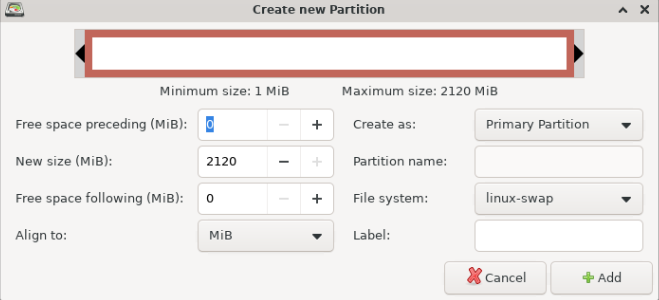
- Сreate a swap partition. Right-click on unallocated space and select New. In the Field File system switch to Linux-swap and click Add button.
- Check and Repair File Systems: Once the partitioning is complete, it’s a good idea to check the file systems for errors. You can do this from GParted by right-clicking on each partition and selecting “Check”.
- Exit and Reboot: After completing the partitioning and checks, exit GParted and the graphical interface, then reboot your system.
Identify the New Swap Partition
- Log into Your VPS: Login to with root of the system.
-
List Current Partitions: Use the command blkid to list all partitions and identify the swap partition and its UUID. Copy the UUID of a swap partition.
blkid -
Edit FSTAB config: Before editing /etc/fstab, it’s a good idea to back it up. Use:
cp /etc/fstab /etc/fstab.backup -
Edit fstab: Open the /etc/fstab file in a text editor:
nano /etc/fstab - Locate Swap Entry: Find the line in fstab that corresponds to the swap partition. It will have ‘swap’ in the type field.
- Update UUID: Replace the old UUID with the new one you noted earlier. Be careful to only change the UUID in the swap line.
- Save and Close: Save the changes using CTRL+O combination and close the editor.
- Restart the VPS: Finally, reboot the server to boot into your primary operating system. You can continue to monitor this process via the VNC connection until you have confirmed that the server boots correctly and the new disk settings are functioning as expected.
- Verify Swap Status: Ensure that the swap is active and using the new UUID by running “swapon -s” or “cat /proc/swaps”