> ## Documentation Index
> Fetch the complete documentation index at: https://docs.edisglobal.com/llms.txt
> Use this file to discover all available pages before exploring further.
# Manual Windows Server installation on EDIS KVM
> Rough guide for manually installing Windows Server on EDIS KVM via VNC. The process is illustrative — for production, use the EDIS Global Auto-Installers.
export const CtaButton = ({label, link, openInNewTab}) => ;
## **For illustration purposes only!**
**Manual** Installation of Windows Server on EDIS KVM using VNC.
This guide was created to document the process. You *can* do it this way if you are interested to experiment. If you want to quickly install Windows or Linux, please use provided auto-installers.
EDIS offers 1-click installation of Windows 2016, 2019, and 2022 Server as well as for Windows 10 - There is no need to manually install Windows!
This manual was created to guide you through a \***manual\* installation** of Windows Server editions 2016, 2012 / R2, 2012, 2008, 2008 / R2. This guide **does not work** if you have a **Windows Desktop .iso** file.
**Minimal system requirements:**
A KVM VPS with 20GB disk space (KVM Starter and up)
A Windows license (2016, 2012 R2, 2012, 2008, 2008 R2) for activation
A VNC client or a noVNC session from the KVM panel
This manual guides you through a manual installation of host-provided Windows .iso images that come with your EDIS KVM VPS.
## Installation
[VPS Management Portal](https://manage.edisglobal.com/clientarea.php)
Continue with the installation till you reach the empty **"Where do you want to install Windows?"** screen
Everything is good. ;-)
Now you need to load disk- and network- drivers EDIS provides on drive E:
Load the "client Virtio drivers".
This is important to be able to access the disk and network.
Click "**Load driver**" and "**Browse"**
Navigate to the driver CD (usually mounted on drive E:\\)
Now select the correct driver directory, according to your Windows version and architecture (x64 = AMD64, x86 = X86)
* For **Windows 2016** select the **2k16** folder
* For **Windows 2012 / R2** select the **2k12** or **2k12R2** folder
* For **Windows 2008 / R2** select the **2k8** or **2k8R2** folder
**For Windows 2012 and newer, only 64-bit drivers are available.**
Pick the AMD64 sub-folder.
Confirm your selection and click "**Next**"
Repeat the process in the "**viostor**" folder.
Click "**Next**"
You can now see your disk partition and you are able to resume the installation.
Once the installation is finished you will need to set your IP address manually.
IP addresses, subnet mask, gateway address, and nameservers are displayed in your VPS Management Portal.
No further driver installations should be required.
Your Windows Server is now ready to use.
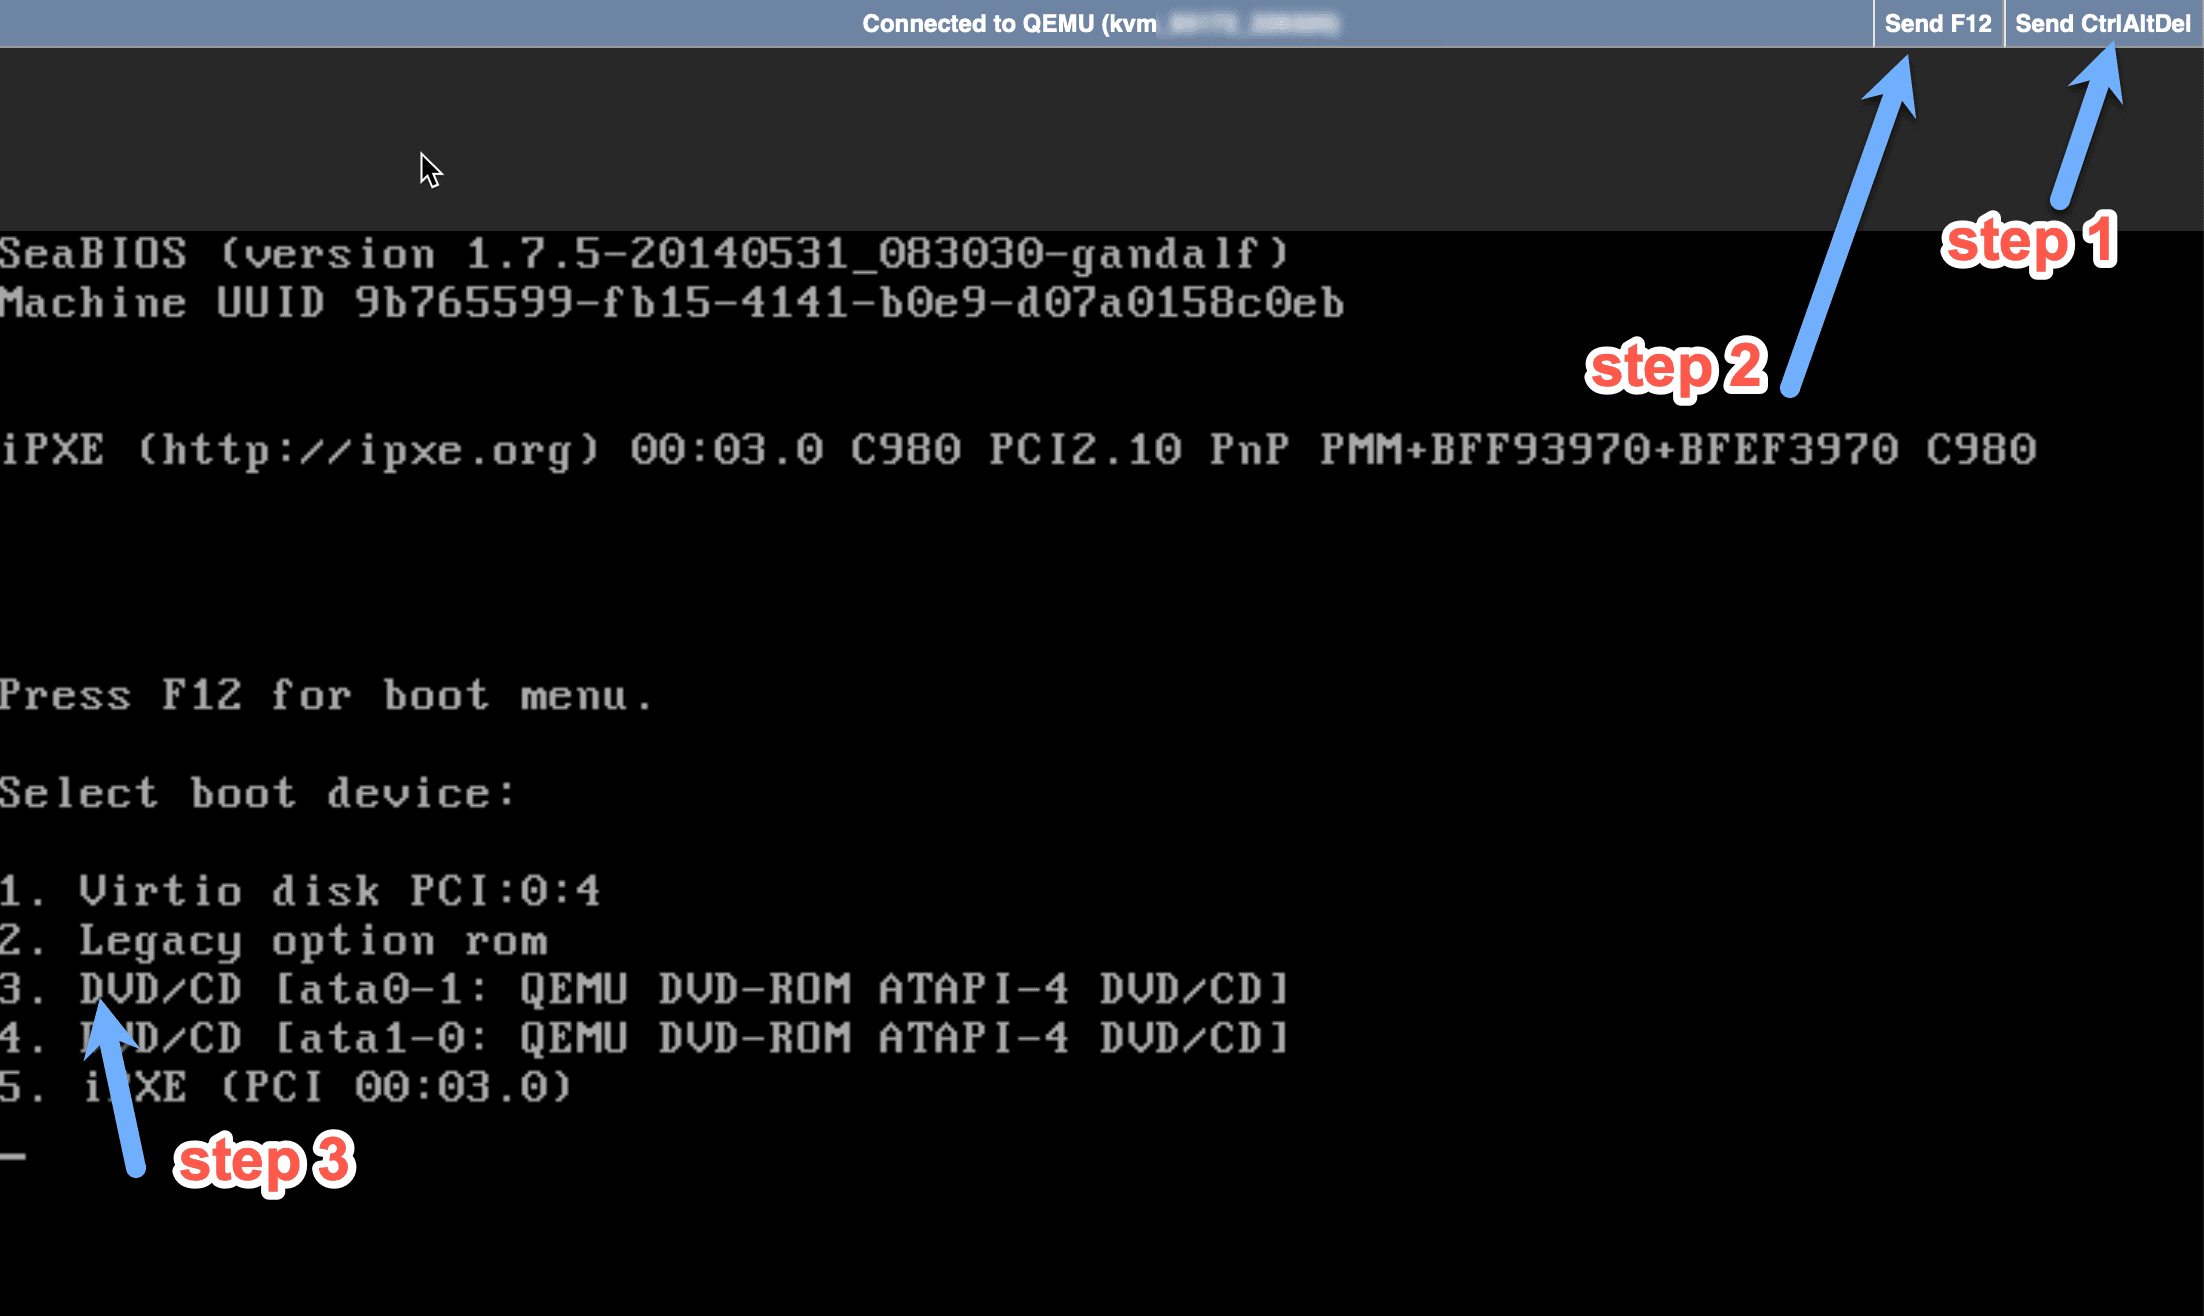
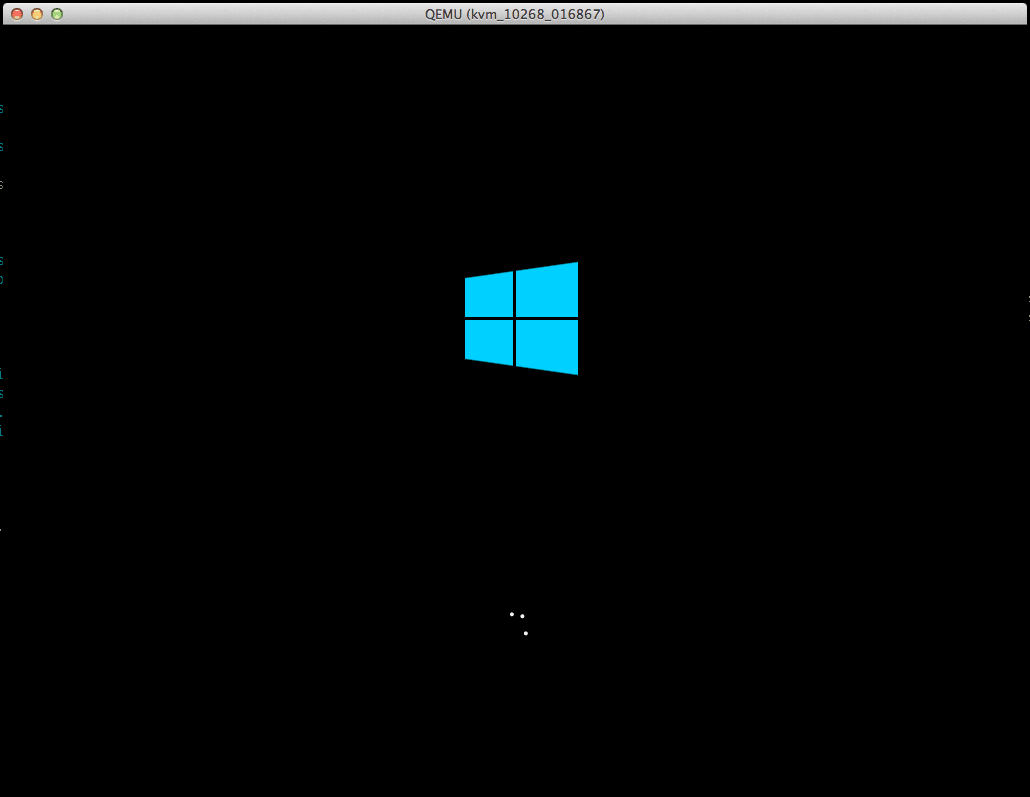 Continue with the installation till you reach the empty **"Where do you want to install Windows?"** screen
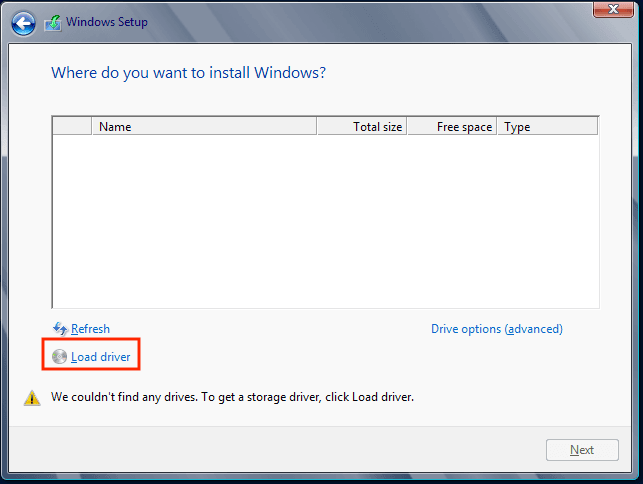 Load the "client Virtio drivers".
This is important to be able to access the disk and network.
Click "**Load driver**" and "**Browse"**
Navigate to the driver CD (usually mounted on drive E:\\)
Load the "client Virtio drivers".
This is important to be able to access the disk and network.
Click "**Load driver**" and "**Browse"**
Navigate to the driver CD (usually mounted on drive E:\\)
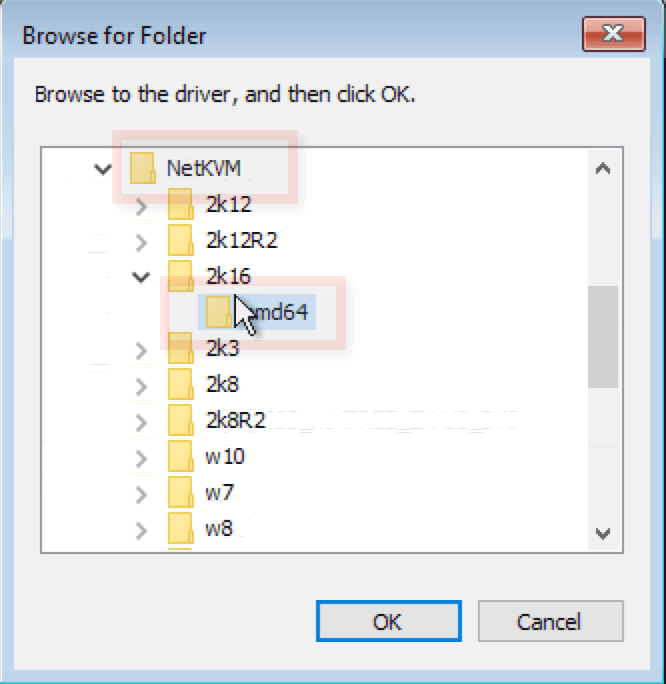 Now select the correct driver directory, according to your Windows version and architecture (x64 = AMD64, x86 = X86)
* For **Windows 2016** select the **2k16** folder
* For **Windows 2012 / R2** select the **2k12** or **2k12R2** folder
* For **Windows 2008 / R2** select the **2k8** or **2k8R2** folder
**For Windows 2012 and newer, only 64-bit drivers are available.**
Pick the AMD64 sub-folder.
Confirm your selection and click "**Next**"
Now select the correct driver directory, according to your Windows version and architecture (x64 = AMD64, x86 = X86)
* For **Windows 2016** select the **2k16** folder
* For **Windows 2012 / R2** select the **2k12** or **2k12R2** folder
* For **Windows 2008 / R2** select the **2k8** or **2k8R2** folder
**For Windows 2012 and newer, only 64-bit drivers are available.**
Pick the AMD64 sub-folder.
Confirm your selection and click "**Next**"
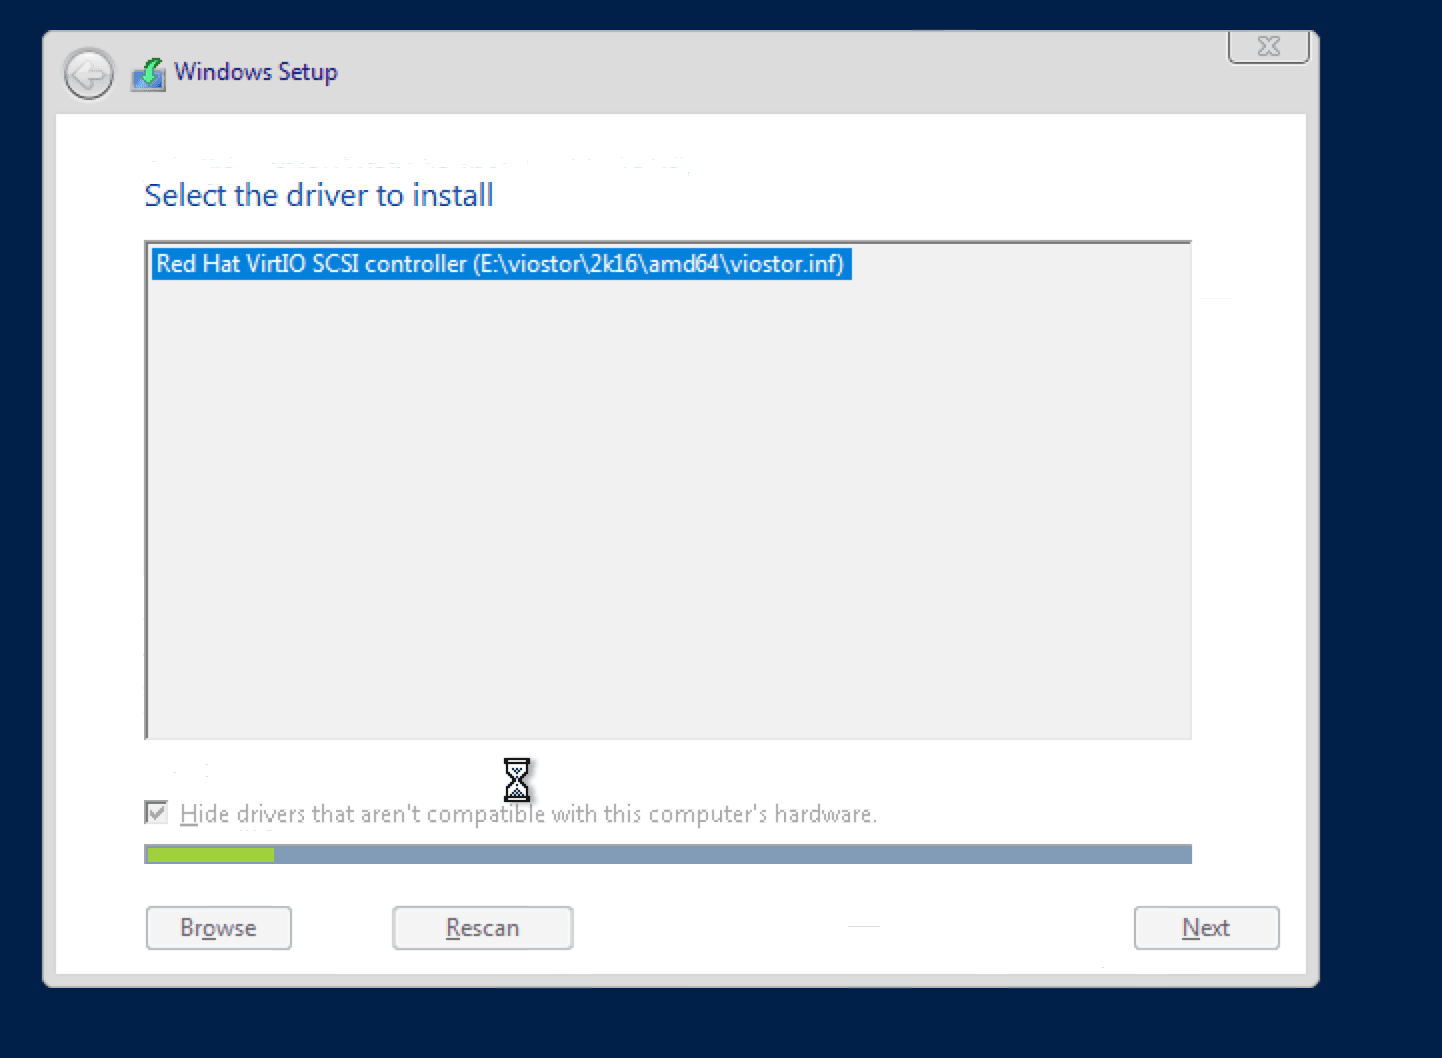 Repeat the process in the "**viostor**" folder.
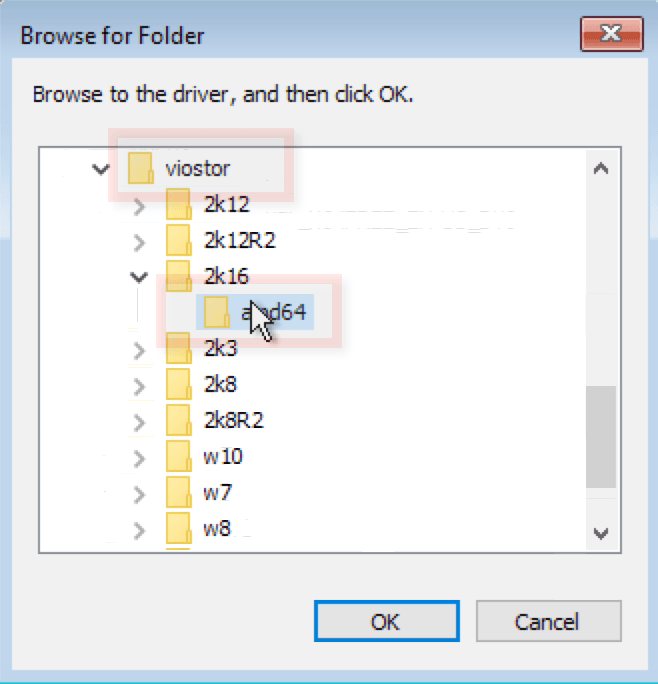 Click "**Next**"
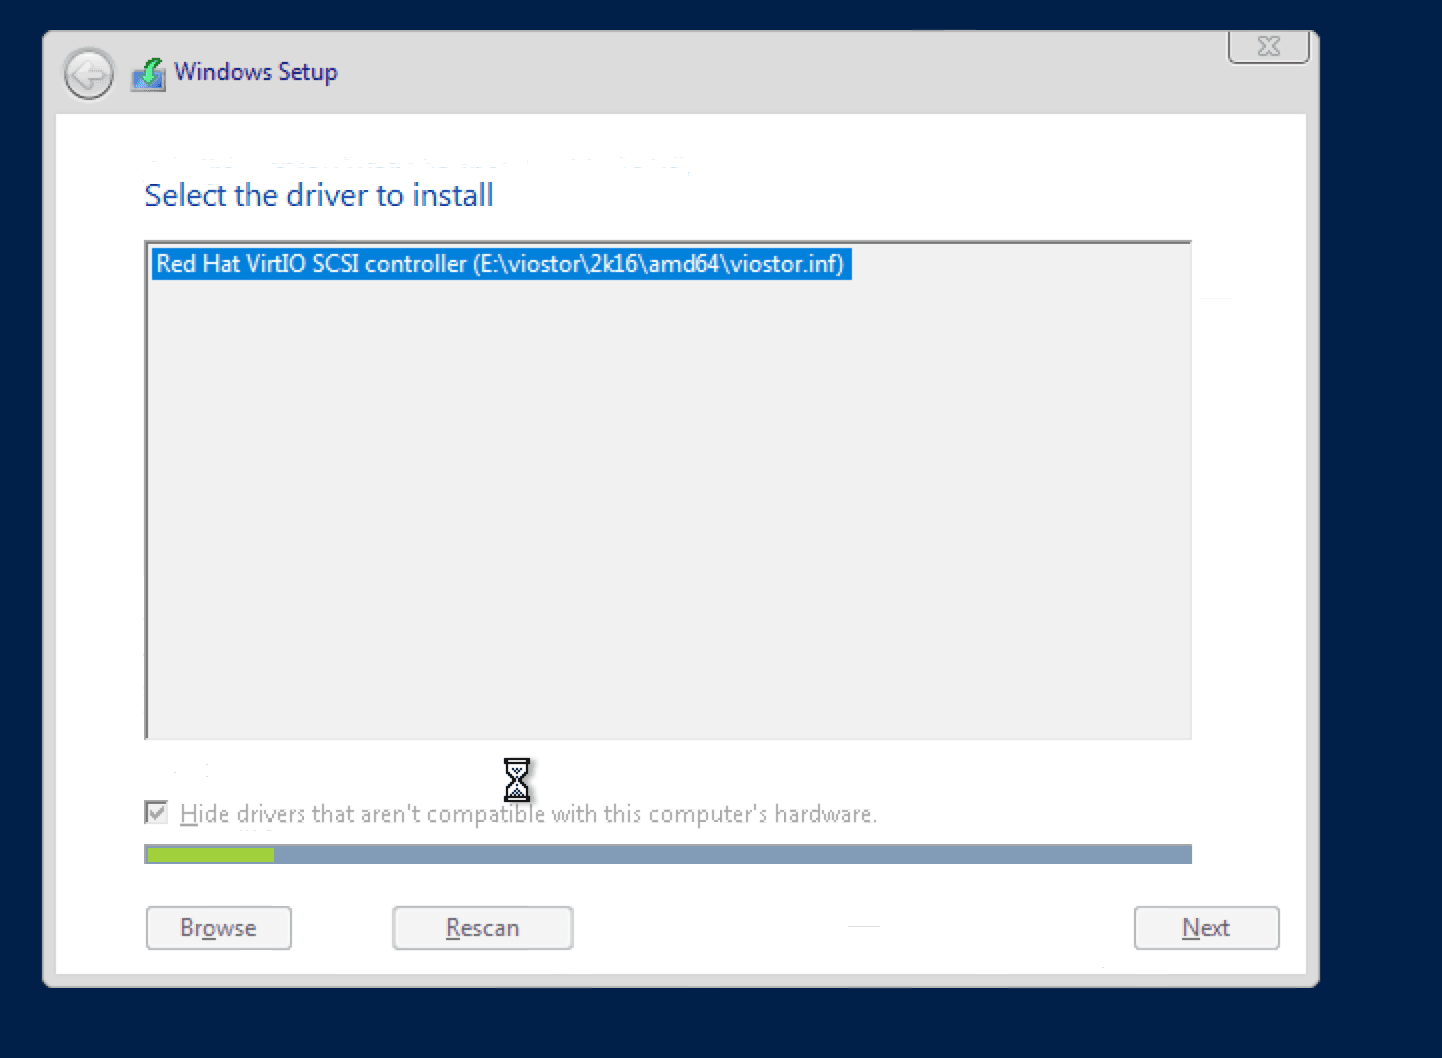 You can now see your disk partition and you are able to resume the installation.
Once the installation is finished you will need to set your IP address manually.
IP addresses, subnet mask, gateway address, and nameservers are displayed in your VPS Management Portal.
No further driver installations should be required.
Your Windows Server is now ready to use.
You can now see your disk partition and you are able to resume the installation.
Once the installation is finished you will need to set your IP address manually.
IP addresses, subnet mask, gateway address, and nameservers are displayed in your VPS Management Portal.
No further driver installations should be required.
Your Windows Server is now ready to use.