> ## Documentation Index
> Fetch the complete documentation index at: https://docs.edisglobal.com/llms.txt
> Use this file to discover all available pages before exploring further.
# Install 3x-ui on VPS
> Install 3x-ui on Ubuntu 22.04 VPS to run a VLESS proxy panel for privacy, DPI bypass, and access to restricted content with a managed web interface.
## What is VLESS?
VLESS is a modern, lightweight protocol used to create fast, flexible VPN-like connections over the internet. It’s an improved version of VMess with a simpler design and no built-in encryption, because it relies on TLS instead. This makes it efficient, good for use with CDNs, and useful for bypassing censorship or network limits when combined with Xray on a VPS.
## What is 3x-ui?
3x-ui is a web panel (a control dashboard in your browser) for managing Xray-core. It lets you create and manage VLESS VPN accounts without touching complex config files. You can add users, generate VLESS links or QR codes, and see traffic usage in a few clicks. 3x-ui also supports other popular protocols like Trojan, Shadowsocks, and more, so you can choose what works best for your needs. Overall, it turns many “terminal-only” tasks into simple buttons and forms, which is much easier for beginners.
## Installation 3x-ui on VPS
[Purchase a VPS](https://www.edisglobal.com/) in your preferred location through our website.
```bash theme={"system"}
ssh root@VPS_IP_address
Enter root password:
```
```bash theme={"system"}
apt update && apt upgrade -y
```
```bash theme={"system"}
apt install curl -y
```
```bash theme={"system"}
#Create file 99-disable-ipv6.conf
sudo nano /etc/sysctl.d/99-disable-ipv6.conf
#Put this inside the file:
net.ipv6.conf.all.disable_ipv6 = 1
net.ipv6.conf.default.disable_ipv6 = 1
net.ipv6.conf.lo.disable_ipv6 = 1
#Save file and exit, then apply:
sudo sysctl --system
#Check network settings:
ip a
ip a | grep inet6
```
```bash theme={"system"}
bash <(curl -Ls https://raw.githubusercontent.com/mhsanaei/3x-ui/master/install.sh)
```
```bash theme={"system"}
Would you like to customize the Panel Port settings? (If not, a random port will be applied) [y/n]:
```
Type **y** to set your own port. The port should use between 41000-65000 range. For example: 46522
At the end, you will see something like:
\###############################################\
Username: ajYbrazcyO \
Password: HPty32FVU7 \
Port: 46522 \
WebBasePath: ZtvraBUmNK9NQj43ks \
Access URL: http\://YOUR\_SERVER\_IP:46522/ZtvraBUmNK9NQj43ks ###############################################
Save these credentials to notes.
## Connect to the 3x-ui panel
Never connect to 3x-ui over plain http – it’s not secure. Always access the panel via https or through an SSH tunnel. To secure your connection to 3x-ui, make sure at least one of the following is set up:
* Generate and assign a self-signed certificate for the panel
* Use SSH port forwarding (access 3x-ui through an SSH tunnel)
* Use a Let’s Encrypt SSL certificate if you have a registered domain
A self-signed certificate lets the 3x-ui panel use HTTPS, so all data between your browser and the panel is encrypted instead of sent in plain text. Your browser may show a warning because the cert isn’t from a public CA, but the connection is still secure—this helps prevent man-in-the-middle (MITM) attacks and is much safer than using HTTP, especially when entering your password or changing VPN settings.
Generate a self-signed certificate and apply it to 3x-ui:
1. Create a directory for the certificate:
```bash theme={"system"}
# Create cert directory
sudo mkdir -p /root/cert/
```
2. Generate a self-signed certificate:
```bash theme={"system"}
sudo openssl req -x509 -nodes -newkey rsa:2048 -days 365 \
-keyout /root/cert/private.key \
-out /root/cert/cert.crt \
-subj "/C=EE/ST=Harjumaa/L=Tallinn/O=Org/OU=site/CN=localhost"
```
3. Assign the certificate to the 3x-ui web panel:
```bash theme={"system"}
sudo /usr/local/x-ui/x-ui cert \
-webCert "/root/cert/cert.crt" \
-webCertKey "/root/cert/private.key"
```
4. Restart the 3x-ui panel to apply changes:
```bash theme={"system"}
sudo x-ui
```
Select option **13** to restart the panel. After that, the 3x-ui web interface will be served over HTTPS using your self-signed certificate.
SSH port forwarding (SSH tunneling) lets you securely access a service on your VPS, like the 3x-ui web panel, without opening its port to the public internet. You create an encrypted SSH connection where your PC listens on a local port (for example `2222`) and forwards all traffic to the 3x-ui port on the server (for example `46522`), so when you open `http://127.0.0.1:2222/` in your browser, you’re safely talking to the panel through SSH.
Setup SSH port Forwarding on VPS:
```bash theme={"system"}
#Execute 3x-ui cli
x-ui
#Select an item 22. SSH Port Forwarding Management
Please enter your selection [0-25]: 22
#Choose setting Set listen IP
Choose an option: 1
#Use default IP (127.0.0.1)
Select an option (1 or 2): 1
```
When you select option 1, 3x-ui will show you sample commands for creating an SSH tunnel from your local machine.
Create an SSH tunnel from your PC:
```bash theme={"system"}
SSH Port Forwarding Configuration:
Standard SSH command:
ssh -L 2222:127.0.0.1:46522 root@134.255.210.100
If using SSH key:
ssh -i -L 2222:127.0.0.1:46522 root@YOUR_SERVER_IP
After connecting, access the panel at:
http://localhost:2222/ZtvraBUmNK9NQj43ks/
```
You can also use these second example on how to connect to the server from your local machine, where port of 3x-ui is 46522:
```bash theme={"system"}
ssh -L 127.0.0.1:2222:127.0.0.1:46522 root@YOUR_SERVER_IP
```
Open URL in the browser on your local PC:
```text theme={"system"}
http://127.0.0.1:2222/ZtvraBUmNK9NQj43ks
```
To get a trusted HTTPS certificate from Let’s Encrypt for the 3x-ui panel, you need:
* Domain name, e.g. vpn.example.com
* That domain’s A record pointing to your VPS IP(set in the hosting provider)
* Port 80 on the VPS open to the internet (for HTTP validation)
Connect to the server via SSH and run these commands:
```bash theme={"system"}
#Execute 3x-ui cli
x-ui
#Select SSL Certificate Management
Please enter your selection [0-25]: 18
#Choose “Get SSL”
Choose an option: 1
Select Get SSL, then enter:
Your domain name (e.g. vpn.example.com)
Your email address (used by Let’s Encrypt)
#Set the certificate for the 3x-ui panel
In the same SSL Certificate Management menu, choose Set Certificate Paths for the Panel, then pick the certificate for your domain so the panel uses it for HTTPS.
#Restart the 3x-ui panel to apply changes:
sudo x-ui
Select option **13** to restart the panel.
#After that, you can use URLs with valid Let’s Encrypt certificate:
https://vpn.example.com:PORT/
```
Great, you’re now securely connected and logged in to the 3x-ui panel. Next, you’ll create a new inbound and connect to your server from your client apps.
## 3X-UI panel
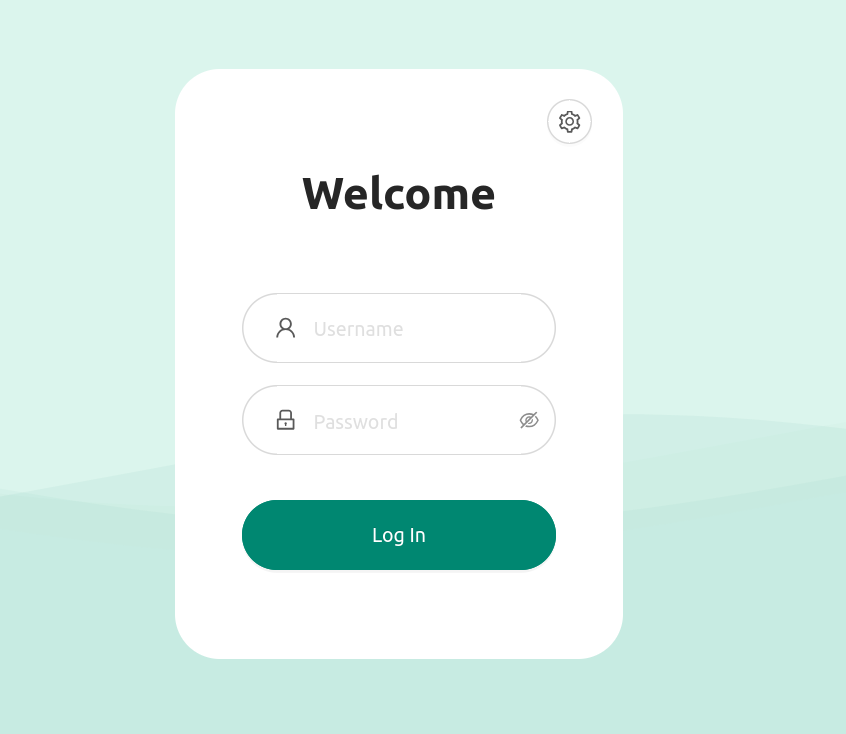
Login to the panel:
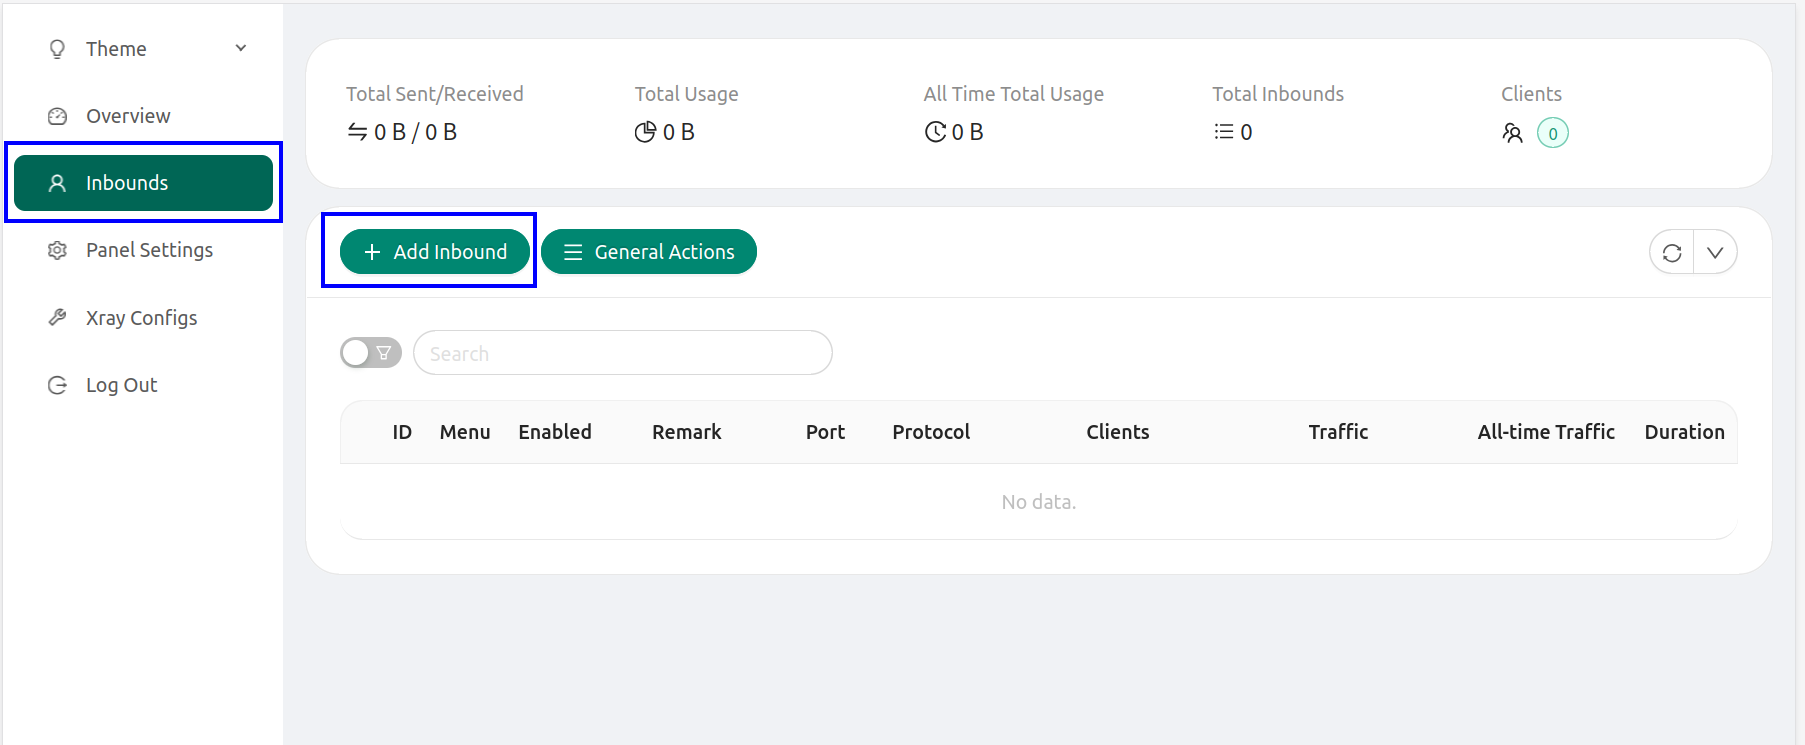
 After logging into the 3X-UI panel, go to the Inbounds tab and click on the Add Inbound button:
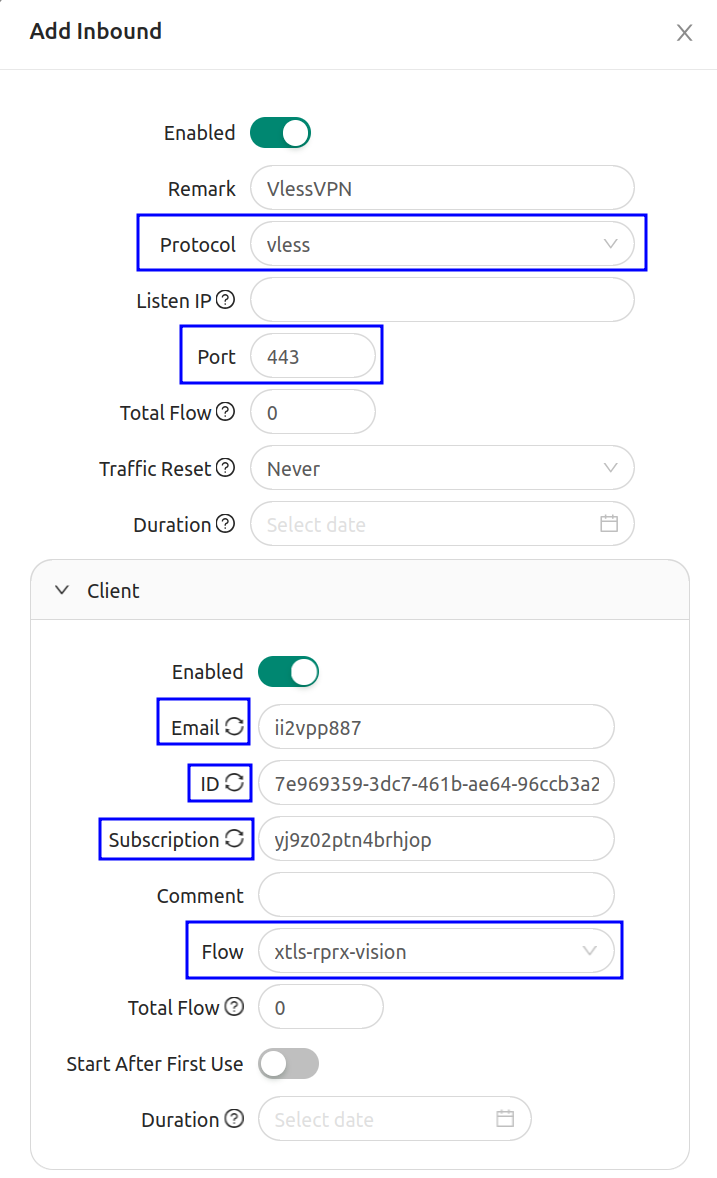
 Fill in the following fields in the opened menu:
* Remark - name the connection
* Protocol - select vless
* Listen IP - leave the field blank;
* Port - specify port 443
.
* Click on the Client drop-down list and click one by one to the Email, ID, Subscription to update.
* For Flow settings choose xtls-rprx-vision
. The Flow will be visible after activation Reality for Security setting.
Fill in the following fields in the opened menu:
* Remark - name the connection
* Protocol - select vless
* Listen IP - leave the field blank;
* Port - specify port 443
.
* Click on the Client drop-down list and click one by one to the Email, ID, Subscription to update.
* For Flow settings choose xtls-rprx-vision
. The Flow will be visible after activation Reality for Security setting.
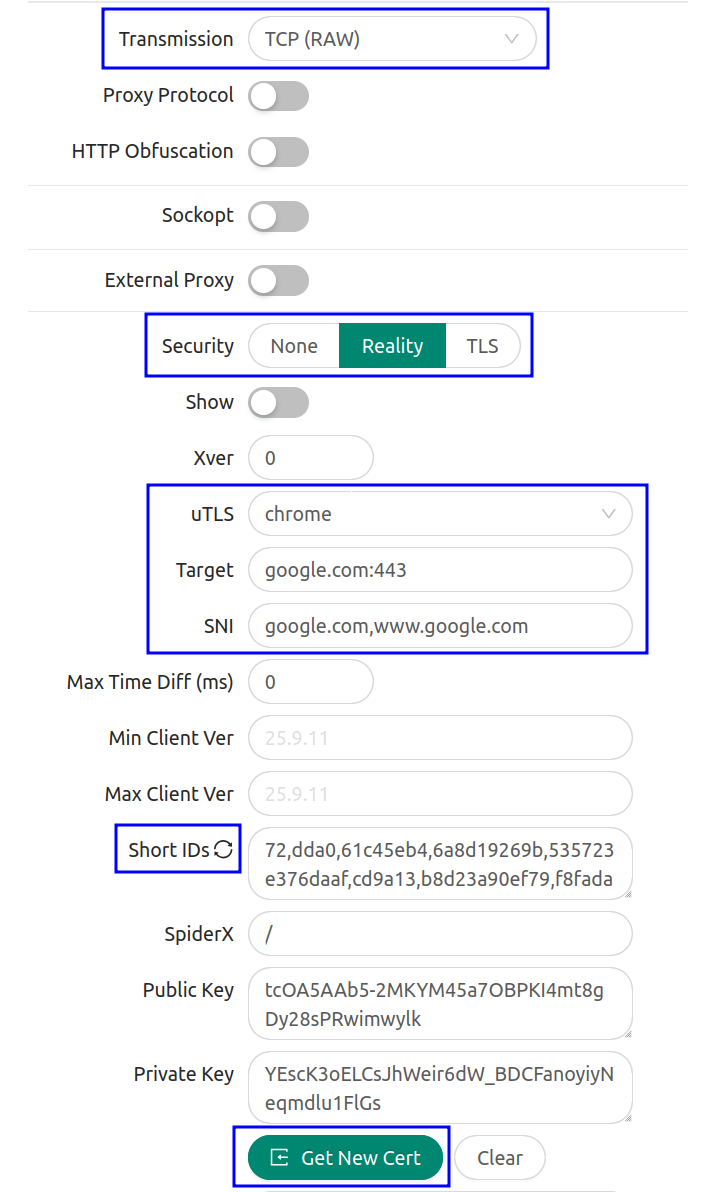
 * Transmission - TCP(RAW)
* Security - Reality
* uTLS - chrome or firefox
* Target - google.com:443
* SNI - google.com,[www.google.com](http://www.google.com)
* Short IDs click to update
* Click to Generate New Cert
* Transmission - TCP(RAW)
* Security - Reality
* uTLS - chrome or firefox
* Target - google.com:443
* SNI - google.com,[www.google.com](http://www.google.com)
* Short IDs click to update
* Click to Generate New Cert
 Activate Sniffing, switch to enable:
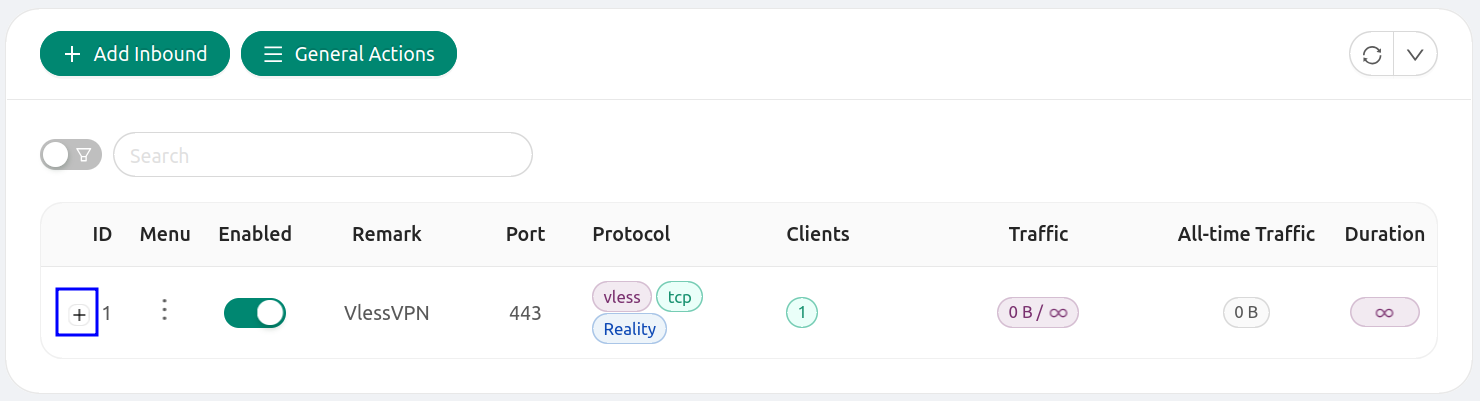
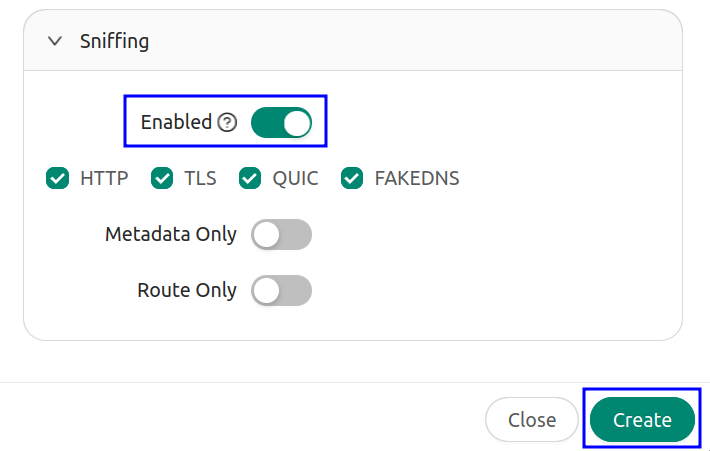 After entering the data, click the Create button.
If configured correctly, you will have an entry with the protocol. Try to click on the +
plus to show client settings for export:
After entering the data, click the Create button.
If configured correctly, you will have an entry with the protocol. Try to click on the +
plus to show client settings for export:
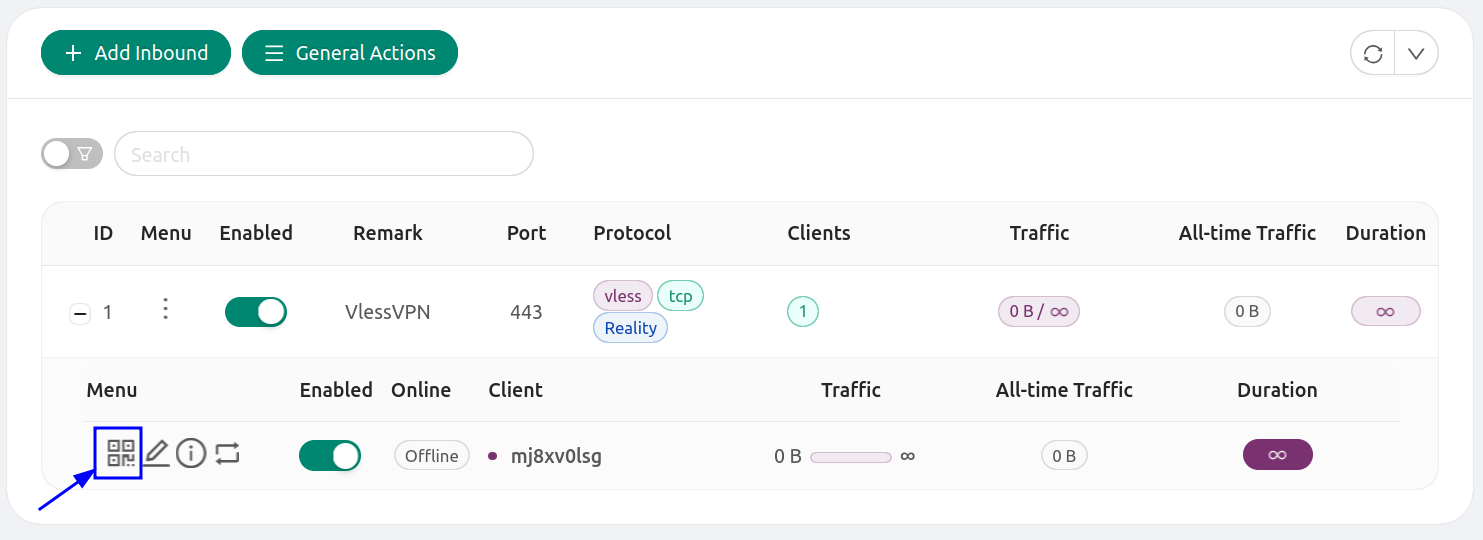
 In the drop down menu click to the QR code image:
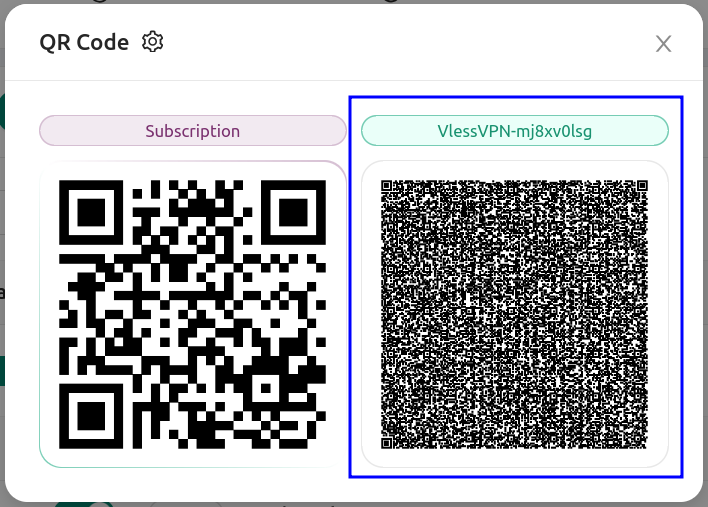
 In the pop-up window you’ll see two QR codes. Click the QR code on the right (the VLESS one) and its client configuration will be copied to your clipboard. Then paste this config into your VPN client on your PC or Mobile device.
 ## How to Connect to 3x-ui (PC, Android, iOS)
Description of 3X-UI clients for PC: **Hiddify**, **v2rayN**, **v2RayTun**, **v2RayNG**, **Nekoray** and others.
| Client | Mobile (Android / iOS) | PC (Windows / Linux / macOS) | Notes |
| ------------- | -------------------------------------------------------------------------------------------- | -------------------------------------------------------------------------------------------------------------------------------------------------------- | ---------------------------------------------------------------------- |
| **v2rayNG** | Android | – | Popular Android V2Ray/Xray client; supports import via link/QR. |
| **v2RayTun** | Android, iOS | Windows | Xray-based client that works well with VLESS/Trojan configs. |
| **Streisand** | Android, iOS | Windows
## How to Connect to 3x-ui (PC, Android, iOS)
Description of 3X-UI clients for PC: **Hiddify**, **v2rayN**, **v2RayTun**, **v2RayNG**, **Nekoray** and others.
| Client | Mobile (Android / iOS) | PC (Windows / Linux / macOS) | Notes |
| ------------- | -------------------------------------------------------------------------------------------- | -------------------------------------------------------------------------------------------------------------------------------------------------------- | ---------------------------------------------------------------------- |
| **v2rayNG** | Android | – | Popular Android V2Ray/Xray client; supports import via link/QR. |
| **v2RayTun** | Android, iOS | Windows | Xray-based client that works well with VLESS/Trojan configs. |
| **Streisand** | Android, iOS | Windows
macOS | Multi-protocol client supporting VLESS, VMess, Trojan, Shadowsocks. |
| **Hiddify** | Android, iOS | Windows
macOS
Linux | Multi-platform client; easy to use with 3x-ui links and subscriptions. |
| **v2rayN** | – | Windows
Linux
macOS | Classic GUI client for VLESS/VMess/Trojan/Xray. |
| **Nekoray** | – | Windows
Linux | Cross-platform GUI proxy client for desktops and laptops. |
Links:
* [https://github.com/MHSanaei/3x-ui](https://github.com/MHSanaei/3x-ui)
* [https://github.com/MHSanaei/3x-ui/wiki](https://github.com/MHSanaei/3x-ui/wiki)
* [https://github.com/MHSanaei/3x-ui/wiki/Installation#docker-recommended](https://github.com/MHSanaei/3x-ui/wiki/Installation#docker-recommended)
* [https://github.com/XTLS/Xray-core](https://github.com/XTLS/Xray-core)
* [https://xtls.github.io/en/config/inbounds/vless.html](https://xtls.github.io/en/config/inbounds/vless.html)